WiPro „all in one“ Installation manual Page 7
GB
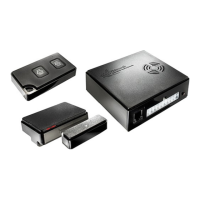
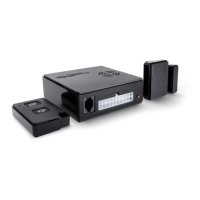
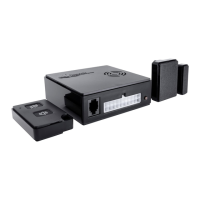
1.9.2 Installing the wireless contacts
Choose the places where you want to install the contacts. The distance between
thetransmitter(Diagram3,PartA)andmagnet(Diagram3,PartB)canbe
around22mm.Alargerdistanceactivatesthetransmissionprocess(LEDbriey
lights up Diagram 4, C) and triggers the alarm when the system is activated.
Beforeinstallingthemagneticcontacts,carryoutarangetestusingthe
adhesive pads on the back.
Inordertodoso,xthetransmitterwhichisalreadyassignedandthemagnets
to the places you have chosen using adhesive tape and follow the instructions
under 1.9.3.
Only use motif adhesive pad (Spare part item no: THZ-1-00002) for smooth
surfaces (glass / acrylic etc.). For all other surfaces, only use the white
adhesive pad (Spare part Item no: THZ-1-00003).
The contact surface must be clean, dry and free of grease. Treat beforehand
with suitable cleaning agent.
Donotuseonsurfacesattemperaturebelow15°C.
Theadhesivepadsreachtheirnalstrengthafterapprox.24hours.
1.9.3 Range test/ Diagnostics mode
Brieypressthebutton“A”onthecentralunit(Diagram2Page6).TheredLED
startstoash(Diagram2,PartC).WiProisnowinDiagnosticmode.
The central unit cancels every transmission process received
from an assigned transmitter, with an acoustic signal.
If there is no acoustic cancel tone, the transmitter is not assigned (repeat 1.8)
or shielded by metal parts. In this case, choose another place to mount the
transmitter or use mounting angles (Item no.: THZ-1-00004)
ToterminateDiagnosticsmode,brieypressthebutton“A”again.
The LED goes out.
1.9.4 Installing the wireless gas alarm (accessory)
Choose a suitable place to mount the wireless gas alarm.
The place where it is mounted should not be in the direct vicinity of the heater
outlets or where there are lead-acid batteries. Mounting it in the direct vicinity
of strong cleaning agents, petrol and other fuels should also be avoided.
The ideal height of installation is at the lowest point of the vehicle
justabovetheoor(approx.10-20cm).
Now carry out a range test with the wireless gas alarm, as described under
1.9.3. Mount the wireless gas alarm using the template in the wireless gas
alarm manual and connect the power supply. (brown = +12V / white = earth)
If installed on the rear storage locker, use the mounting adapter (art.
no. THZ-1-00004) to optimize the transmission and bridge larger gaps.
 Loading...