3-2
3. Mounting Procedure
3.
Mounting Procedure
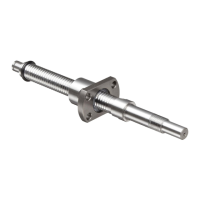
Ball Screw
3-3
Installing onto Table and Base
(1) If using a bracket when mounting the Ball Screw nut to the table, insert the nut into the
bracket and temporarily fasten it.
(2)
adjust the table so that it can travel freely.
z
Ball Screw nut and the table or inside the bracket when making the adjustment.
z
If using the table as the reference point, make the adjustment either by using a shim (for a
rectangular type Support Unit), or by securing the clearance between the outer surface of
the nut and the inner surface of the mounting section (for a round type Support Unit).
(3) Press the table toward the table supported side Support Unit to align the axial center. Make
the adjustment by reciprocating the table several times so that the nut travels smoothly
throughout the whole stroke, and temporarily fasten the Support Unit to the base.
Base
Fixed Side Support Unit
Bracket
Table
Supported Side
Support Unit
3-4
Connection with the Motor
(1) Mount the motor bracket to the base.
(2) Connect the motor and the Ball Screw using a coupling.
Note: Make sure the mounting precision is maintained.
(3) Thoroughly run in the system.
Motor
Coupling