page 14
Top of playing _ _ || "_ X }
surface must flush
at seams!
I Top of playing
, surface must flush
at seams!
Card
1
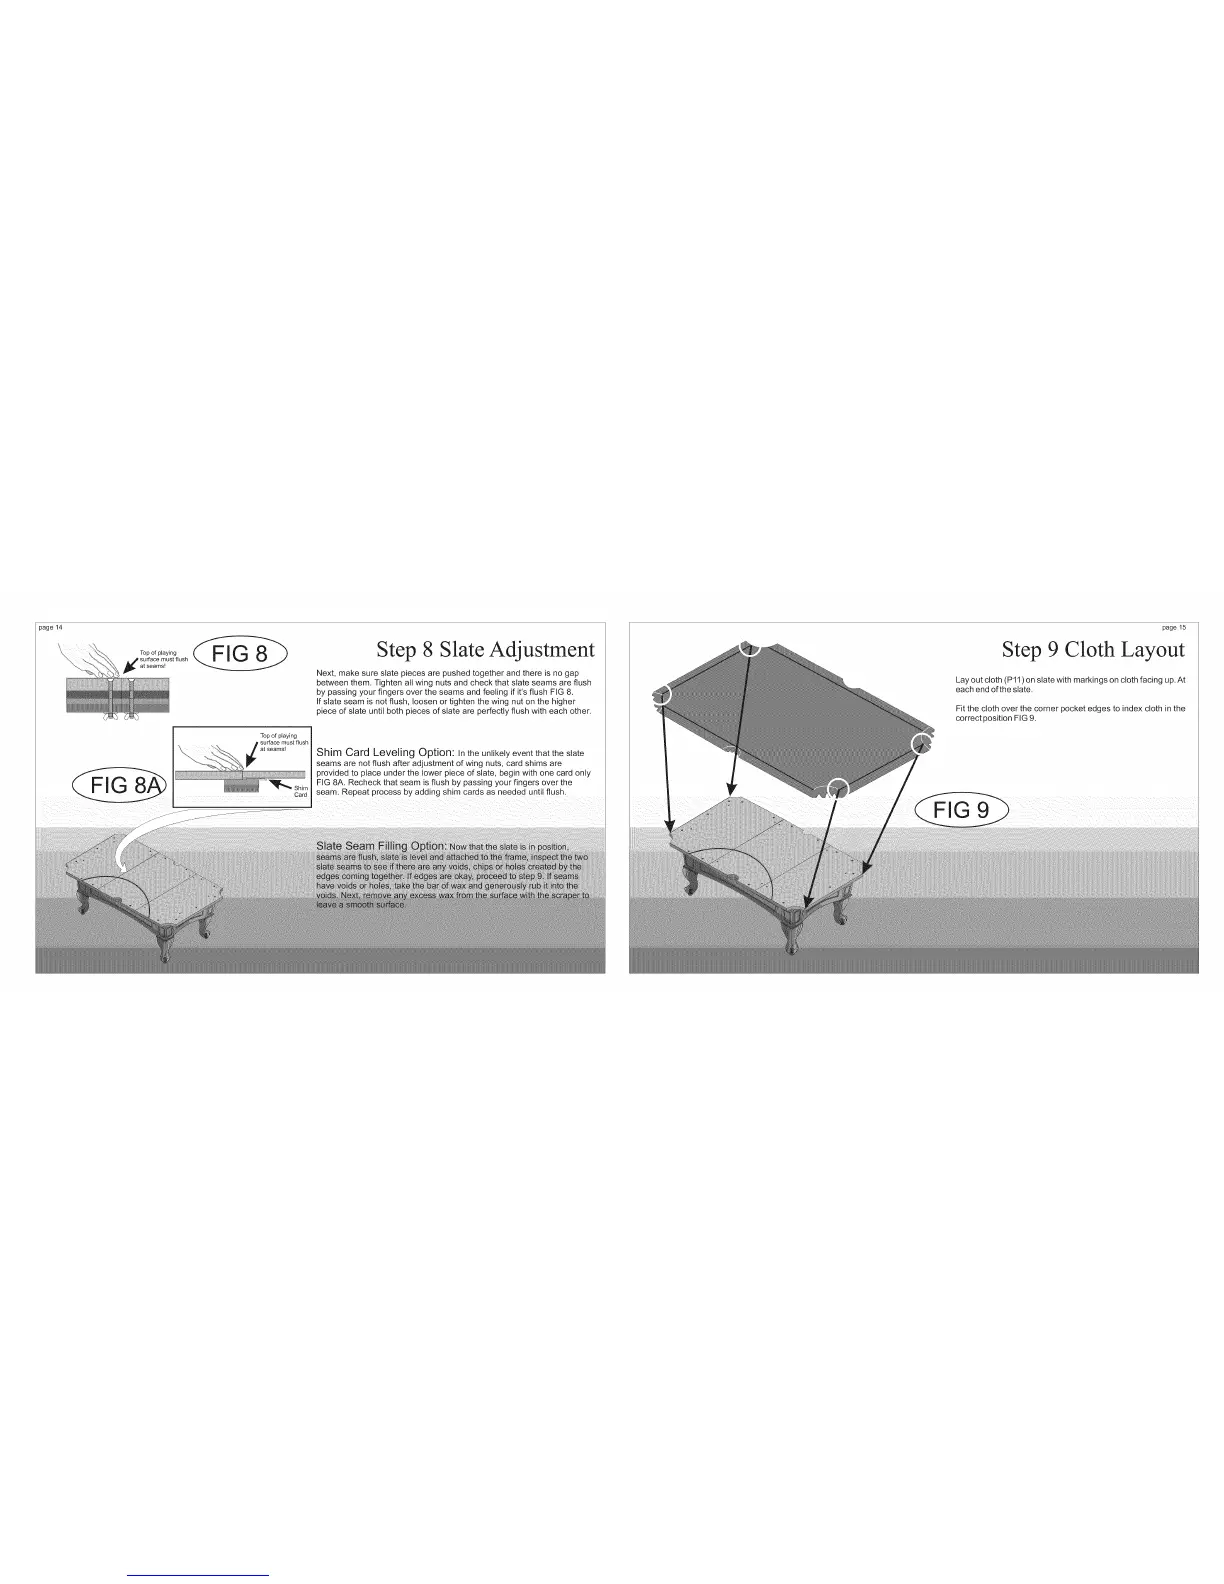
Step 8 Slate Adjustment
Next, make sure slate pieces are pushed together and there is no gap
between them. Tighten all wing nuts and check that slate seams are flush
by passing your fingers over the seams and feeling if it's flush FIG 8.
If slate seam is not flush, loosen or tighten the wing nut on the higher
piece of slate until both pieces of slate are perfectly flush with each other.
Shim Card Leveling Option: In the unlikely event that the slate
seams are not flush after adjustment of wing nuts, card shims are
provided to place under the lower piece of slate, begin with one card only
FIG 8A. Recheck that seam is flush by passing your fingers over the
seam. Repeat process by adding shim cards as needed until flush.
Fi
page 15
Step 9 Cloth Layout
Lay out cloth (Pll) on slate with markings on cloth facing up. At
each end of the slate.
Fit the cloth over the corner pocket edges to index cloth in the
correct position FIG 9.