EasyManua.ls Logo

THOMSON RR95 User Manual

THOMSON RR95
7 pages
To Next Page IconTo Next Page
Page #1 background imageLoading...
Page #1 background image
Main Connections (For UK only)
CAUTION:
For UK Only
CONNECT THE MAIN LEAD INTO AC MAINS
POWER SOCKET
POWER SUPPLY 230V. It must not be connected
to D.C. mains.
Note: The mains lead of the set is fitted with a
moulded plug. If the mains socket are not
compatible or if for any reason the plug is
removed please follow the directions below. The
moulded plug cannot be rewired and if removed
must be disposed of safely.
DO NOT under any circumstances plug the severed
plug into any mains socket as this could result in
electric shock.
Important: If the plug is removed, rewire the
new plug as follow:
The wires in the mains plug are coloured in
accordance to the following code:
BLUE = NEUTRAL & BROWN = LIVE
BLUE
BROWN
If the colours of the wires in the mains lead of
this apparatus may not correspond with the
coloured markings identifying the terminals in
your plug, proceed as follows:
BLUE wire to the terminal coded N (Neutral) or
coloured black.
BROWN wire to the terminal coded L (Live) or
coloured red.
DO NOT make any connection to
the terminal in the plug which is
marked by the letter E or by the
earth symbol or coloured green
or green and yellow.
A fused plug must be fitted
with a 3A fuse approved by
ASTA or BS1362 and fuse
covers must be always be
securely replaced. If your set
does not work, the fuse may
be blown.
MAINS CONNECTIONS:
(For UK, see inside front cover)
MAINS OUTLET POWER SUPPLY: 230V ~50Hz
Note:
Power is fed to the unit even when it is not functioning. To cut the
power supply off, the power cable must be unplugged.
RR95 EN 3/20/03, 2:17 PM1
Question and Answer IconNeed help?

Do you have a question about the THOMSON RR95 and is the answer not in the manual?

THOMSON RR95 Specifications

General IconGeneral
BrandTHOMSON
ModelRR95
CategoryClock Radio
LanguageEnglish

Summary

Main Connections (For UK only)

CAUTION: For UK Only

Important safety and wiring instructions for connecting the mains lead to AC mains power.

MAINS CONNECTIONS

Details on mains outlet power supply and notes on continuous power feed.

Technical Specifications

Safety and Environmental Precautions

Warnings regarding placement near water, humidity, and electrical hazards.

Battery Back-Up Operation

Installing the Battery

Step-by-step guide on how to install a 9V battery for memory backup.

Power Failure Indicator

Explains how the display indicates a power interruption when battery backup is active.

Clock Time and Alarm Setting

Setting Clock Time

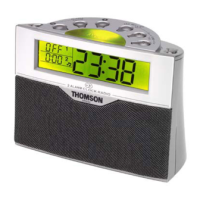
Instructions for setting the digital clock to the correct 24-hour time.

Setting the Wake Time

Guide on how to set ALARM 1 and ALARM 2 wake-up times.

Clock Operation: Sleep and Nap Features

Waking by Selected Source Programme

How to select music or alarm for waking up and adjust volume.

Sleep Mode

Instructions for setting the radio to turn off automatically after a set period.

Nap Mode

How to set a shorter wake-up timer for a brief rest.

Radio Operation

Tuning the Stations

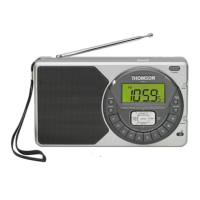
Steps for manually selecting AM or FM radio stations and memorizing them.

Automatic Station Search

How to use the automatic search function to find available radio stations.

Clock Operation: Alarm Management and Display

Alarm Control

Manages silencing, stopping, and disabling alarms.

Snooze Alarm Operation

Details how to use the snooze function for extra sleep.

Display Settings

Covers seconds display and backlight brightness adjustments.

Related product manuals