13
INSTALLATION
Installing the cooker
The kitchen should be dry and airy and
have effective ventilation according to the
existing technical provisions.
The room should be equipped with a ven-
tilation system that pipes away exhaust
fumes created during combustion. This
system should consist of a ventilation
grid or hood. Hoods should be installed
according to the manufacturer’s instruc-
tions. The cooker should be placed so
as to ensure free access to all control
elements.
Coating or veneer used on tted furniture
must be applied with a heat resistant
adhesive (100°C). This prevents surface
deformation or detachment of the coat-
ing. If you are unsure of your furniture’s
heat resistance, you should leave ap-
proximately 2 cm of free space around
the cooker. The wall behind the cooker
should be resistant to high temperatures.
During operation, its back side can warm
up to around 50°C above the ambient
temperature.
The cooker should stand on a hard, even
oor (do not put it on a base).
Before you start using the cooker it should
be leveled, which is particularly important
for fat distribution in a frying pan. To this
purpose, adjustable feet are accessible
after removal of the drawer. The adjust-
ment range is +/- 5 mm.
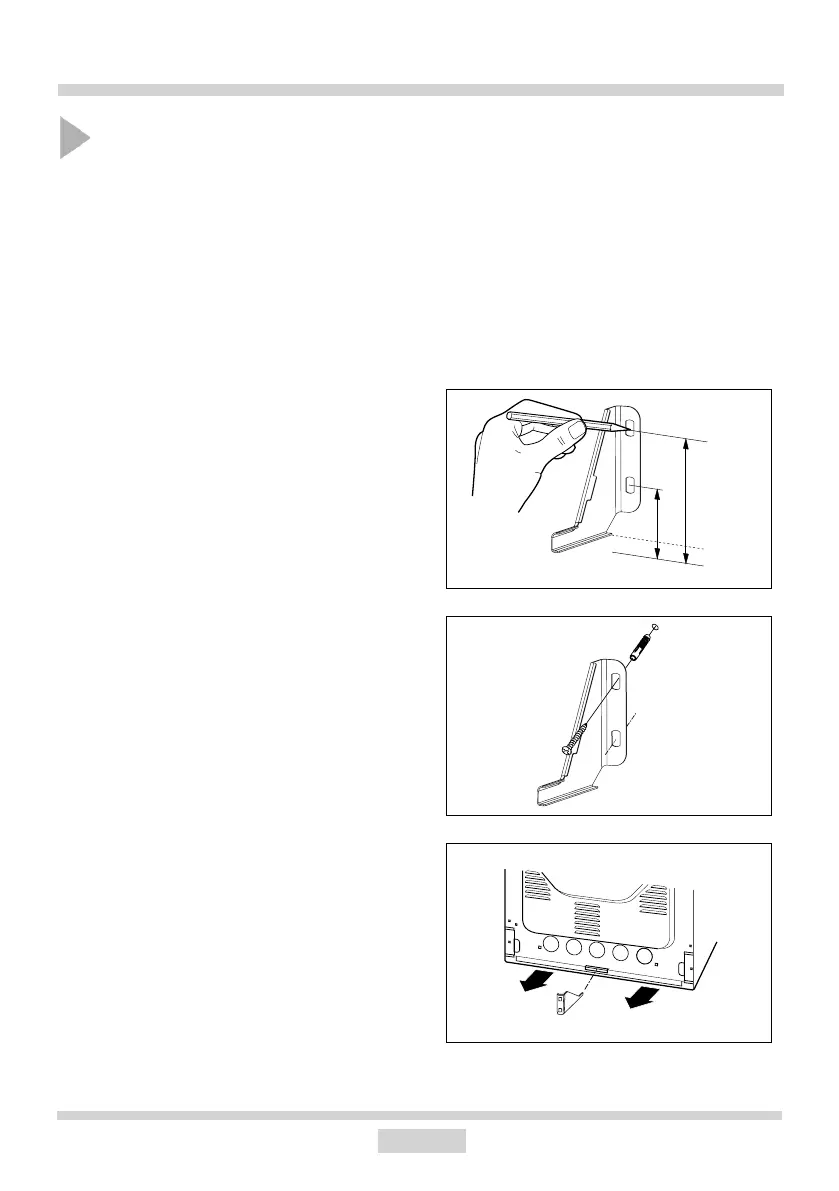
Install the anti-tip bracket.
To prevent the appliance tipping over, install
the anti-tip bracket provided with the applian-
ce by following the instructions below.
Drill a hole at a height of 6 cm from the oor
(A) on the wall, where the appliance will be
installed. Then drill the second hole at the
height of 10.3 cm from the oor (B). Using the
2 wall anchors and screws provided, attach
the anti-tip bracket to the wall by aligning it
with the drilled holes.
Downloaded from www.vandenborre.be