EasyManua.ls Logo

Thule 9029XT User Manual

Thule 9029XT
10 pages
To Next Page IconTo Next Page
Page #1 background imageLoading...
Page #1 background image
QUICK S
T
ART
GUIDE f
or:
VERTEX
(2 BIKE CARRIER)
9028XT
(4 BIKE CARRIER)
9029XT
- Fold do
wn stinger and install
flathead bolts (S
TEP 1).
- Install in r
eceiver and bolt with
washer and lock w
asher (STEP
2).
- Load hea
viest bike first - front to
the right (STEP 6).
- Alterna
te bike direction.
- Secure bic
ycle to rack with
rubber str
aps and black safety
strap through the frames and
around the mast of the rack
(STEP 8).
- Check tightness of all bolts and
knobs periodically (e
very 6
months).
- Check rubber str
aps for wear
and replac
e if worn.
- Install on a tr
ailer or other towed
vehicle
.
- Put more than 200 lbs. on a clas
s
1 hitch.
- Do not “o
verstretch” the straps.
- Use the rack while tr
aveling on
dirt roads.
- Use the rack t
o carry tandems or
recumbents.
- Put more than the int
ended
number of bikes on the r
ack.
DO
DO NO
T
506-7077
Question and Answer IconNeed help?

Do you have a question about the Thule 9029XT and is the answer not in the manual?

Thule 9029XT Specifications

General IconGeneral
Model9029XT
CategoryAutomobile Accessories
TypeHitch Bike Rack
Mounting LocationHitch
Maximum Bike Weight37.5 lbs per bike
FoldableYes
TiltableYes
Integrated LockYes
MaterialSteel
Locking MechanismIntegrated Cable Lock
Aerodynamic DesignNo
Hitch Receiver Size1.25" or 2"

Summary

Important Usage Guidelines

DO

Essential instructions for proper usage and installation procedures.

DO NOT

Critical warnings and prohibited actions to ensure safe operation.

Component Identification

Parts Included

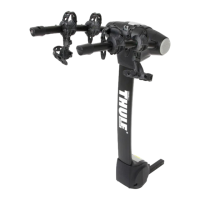
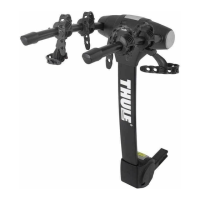
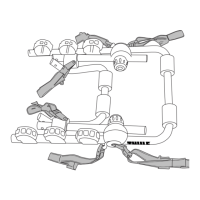
Visual identification and listing of all carrier components.

Product Setup and Installation

Step 1: Initial Setup

Prepare the carrier by adjusting the stinger and securing base components.

Step 2: Stinger Installation

Securely attach the stinger to the receiver using the provided hardware.

Step 3: Carrier Arm Adjustment

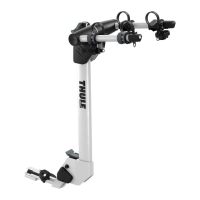
Adjust the carrier arm assembly for proper positioning and locking.

Step 4: Cradle Strap Attachment

Attach the cradle strap to the bike support cradle.

Step 5: Anti-Sway Extension

Attach the anti-sway angled extension to the underside of specific cradles.

Step 6: Loading Bicycles

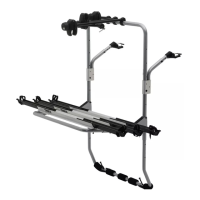
Load the heaviest bike first, followed by securing cradle straps.

Step 7: Anti-Sway Cage

Attach and position the anti-sway cages against the bicycle.

Step 8: Securing Bicycles

Secure the mounted bicycles to the carrier mast with the provided black strap.

Step 9: Lowering Carrier

Procedure for lowering the carrier mast, typically for vehicle access.

Step 10: Security Features

Install lock cylinders and use locking cables for bike and carrier security.

Related product manuals