Do you have a question about the Thule CROSSCAMP Omnistor 4900 and is the answer not in the manual?
Preparation and application of zinc spray for surface treatment as per supplier instructions.
Thule recommends SIKA 252 or Terostat MS937 for gluing and sealing.
Maximum recommended speed for the vehicle with the product installed is 130 km/h (80 miles/h).
Illustrations showing vehicle types (Compact, Standard, Long) and general mounting points.
Marking the adapter position on the vehicle at both rear and front locations based on measurements.
Marking and drilling pilot (3.5mm) and main (9mm) holes at the rear mounting points.
Applying degreaser, zinc spray, and activator to the drilled holes at the rear.
Installing rivets and applying SIKA 252 sealant to the rear mounting points.
Attaching brackets with bolts/screws and sealing fixpoint joints at the rear.
Attaching and tightening front brackets using M8 and M6 bolts to a torque of 6 Nm.
Attaching and tightening rear brackets using M8 and M6 bolts to a torque of 6 Nm.
Checking and filling any gaps with rubber plates if necessary.
Aligning adapter positions and securing them with bolts tightened to 6 Nm.
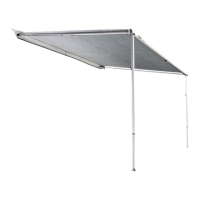
Positioning the awning and tightening nuts to 6 Nm at front and rear.
Pre-drilling holes and securing the awning position with screws.
Attaching mounting parts and support bar using bolts at front and rear.
| Brand | Thule |
|---|---|
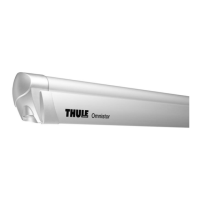
| Model | CROSSCAMP Omnistor 4900 |
| Category | Automobile Accessories |
| Language | English |