speakers. This is normal and is NOT an indication that your
Transmit Audio is noisy. The actual Transmit Audio signal
going to the radio is FULLY ISOLATED from the computer.
- CONNECTING THE COMPUTER -
IMPORTANT: You should connect the SignaLink USB to
your computer only AFTER you have installed the jumper
module or jumper wires, and connected the radio cable.
The SignaLink USB can be connected to a standard USB 2.0
or USB 3.0 port using the supplied USB cable (USB 2.0
ports are preferred if available). On desktop computers we
recommend attaching the SignaLink to a rear panel USB
port. This is because some front panel USB ports may be
unable to provide sufficient power (this does not apply to
laptops). The use of external USB hubs, docking stations,
and USB extension cables should be avoided. If you must
use a USB hub, then it must be externally powered and
designed for “high power” USB devices.
Before attaching the USB cable, Windows should be fully
updated. The SignaLink should be turned OFF, and your
computer should be turned ON with Windows running and
sitting idle. All other software should be closed. Your virus
scanner can be running but not actively scanning.
The computer-end of the USB cable should be plugged in
first, as this will help drain any static electricity off you and
minimize the chance of static damage to the SignaLink. The
computer end of the USB cable has a flat rectangular shaped
plug and will fit into the USB jack only one way. If it
doesn’t plug in, then you have either turned it the wrong
way, or you are trying to plug it into a non-USB jack. The
SignaLink end of the cable can be plugged in after the
connection to the computer has been made. This end of the
cable has a more square shaped connector and plugs into the
SignaLink’s rear panel “USB” jack. This connector is also
keyed and will only fit one way.
When the USB connection between the SignaLink and the
computer is made, Windows will automatically detect this
and install the required drivers (the SignaLink drivers are
provided directly by Windows - The SignaLink CD doesn't
contain any drivers and it is not required for installation).
During this process you may see several “New Hardware
Found” messages as the drivers are installed. Once the
driver installation is completed (usually after a minute or
two) your computer may display a message indicating that
your “Hardware is ready for use”. Note that some
computers will not display any messages. This does not
indicate a problem, so please do not be alarmed.
Once the SignaLink USB drivers have been installed, you
are now ready to configure Windows and the communication
program. This is described in detail in the “Configuring
Windows” section below.
IMPORTANT: If you move the SignaLink to a different
USB port after you complete the Windows setup instructions
below, then Windows will detect this and re-install the
SignaLink drivers. Once the drivers have been reinstalled
for the new port, you must go through the Windows setup
instructions again or the SignaLink will not work properly.
- CONFIGURING WINDOWS -
NOTE: These instructions are written for the most current
sound card chipset used in the SignaLink USB but they will
also work fine for the earlier chipset. Note that the earlier
chipset will be displayed as “Microphone – USB Audio
Codec” instead of “Line – USB Audio Codec”, and the
Recording Level slider will have a different range.
These configuration instructions are for Windows 7, 8.x and
Windows 10 only. If you are using an older version of
Windows then please see the SignaLink Support page of our
website for those instructions. If you are using a different
operating system, such as Linux or the Mac OS, then please
note that our support for non-Windows OS' is limited.
Support information for these OS' is posted on the
SignaLink Support page of our website.
Default Sound Card Selection
Because the SignaLink USB has its own built-in sound card,
you will want to configure Windows to play “System”
sounds through your computer’s sound card, not the
SignaLink USB. Your communication program will be
configured to use only the SignaLink USB. This will
prevent any system sounds from being transmitted
accidentally and allow your computer’s sound card to
function as it normally would.
To configure Windows, carefully follow the steps below.
Please double-check your settings as you go and do not skip
any steps. If something doesn't look right, then please take a
minute to go over it again as you have most likely made a
simple mistake.
WINDOWS 8.x Users: You may need to first select the
"Desktop" charm or tile before proceeding.
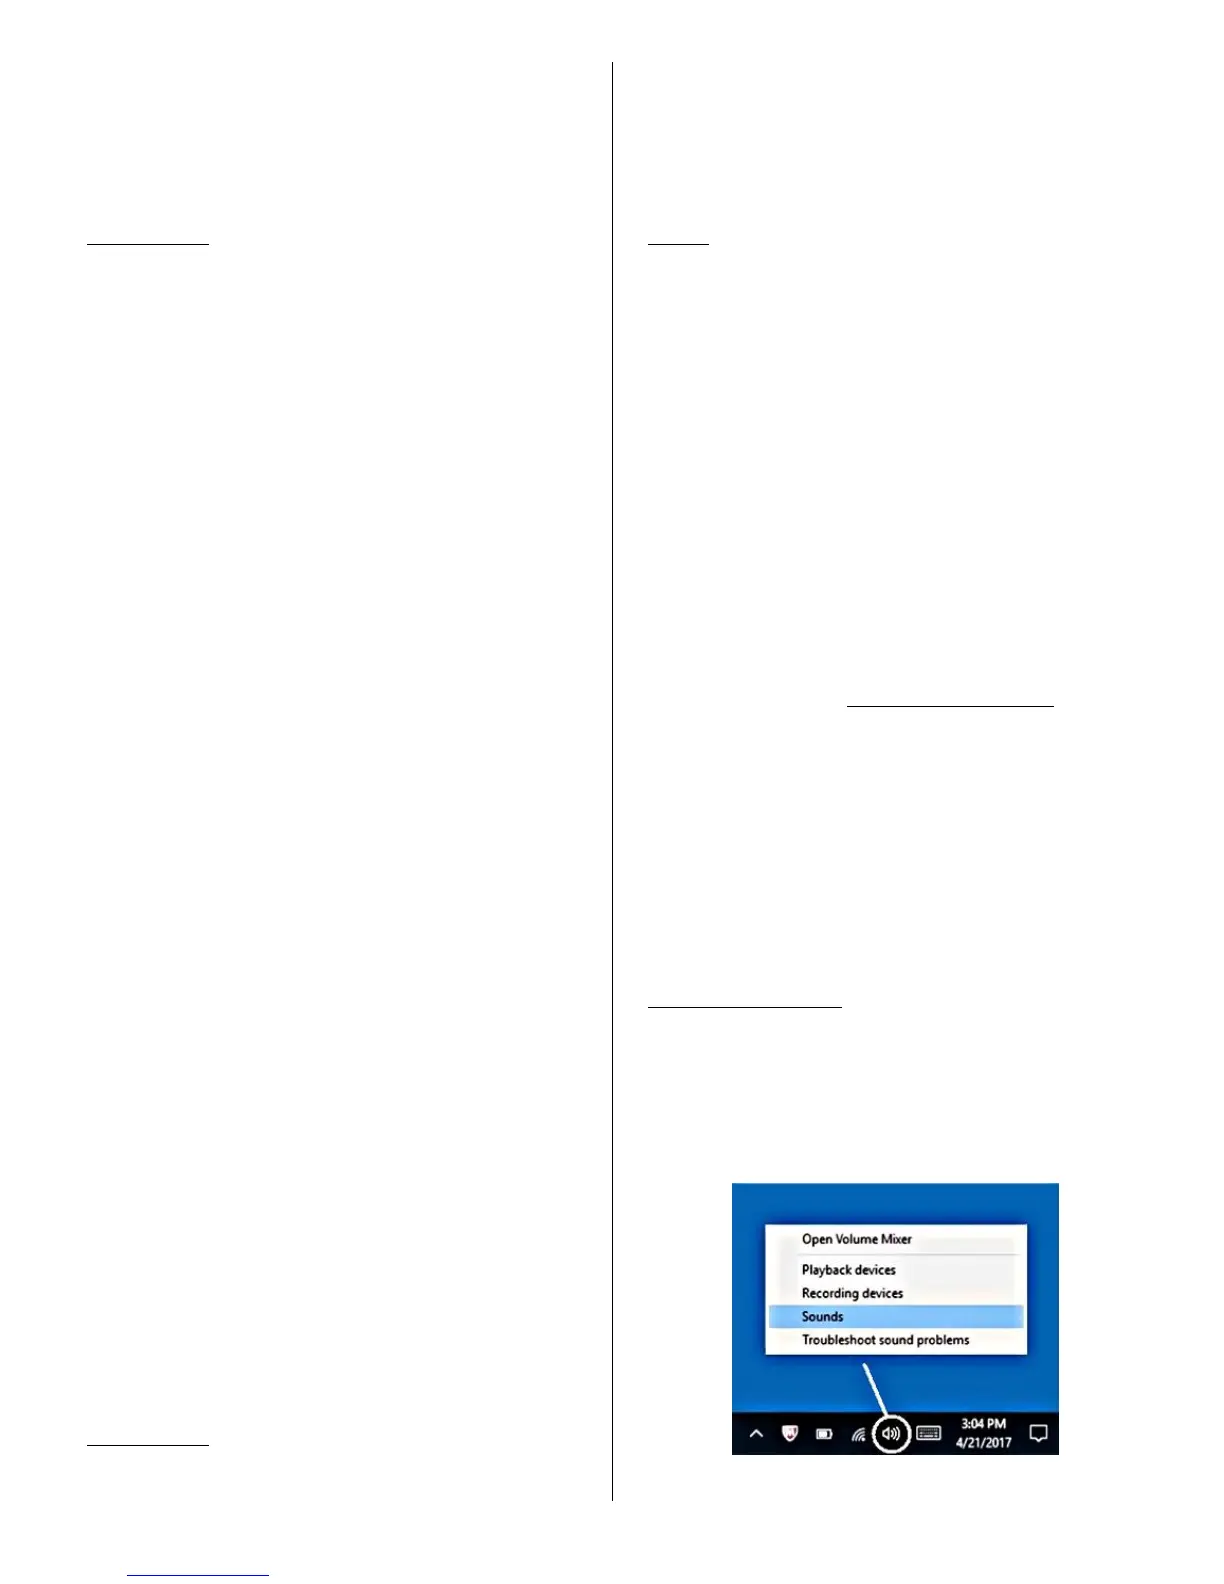
• As shown below in Figure 1, locate the white
speaker icon on the Windows task bar (lower right-
hand corner of the Windows desktop). Right-click it
and select "Sounds".
Figure 1 - White speaker icon
 Loading...