85
Wiring Instructions
Connections between the main 16/2AWG cable and the lighting fixtures are made using
the space between the post and the Post Cap or Post Light Module as a junction box.
When routing the main wire around the deck, leave a loop of extra wire at the top of
each post to allow for splicing connections.
Use silicone filled wire nuts with corrosion protection and intended for outdoor use to
make all connections. They shall be copper, copper alloy,
or the equivalent.
Be sure to MAINTAIN POLARITY by aligning ridges when splicing the main
16/2AWG wires or shorting will occur. Polarity for the 18AWG fixture wires is not
critical.
When making splices, do not pre-twist wires. Pre-twisting wires can lead to a poor seal
inside the wire nut causing corrosion and/or voltage drop.
Wire Connections
Cross section of
16
AWG wire
Ridges
Wire Polarity
NO
YES
Wire Nut Instructions
IMPORTANT: Turn off power before installing or removing connector. Product to be used in accordance with
local and national codes.
1. Strip wires 5/8”
2. Align frayed strands of conductors.
3. Do not pre-twist. Place stripped wires together with ends even, but lead smaller
stranded wires slightly ahead of larger solid or stranded wire.
4. Twist connector onto wires pushing firmly until hand-tight. DO NOT over torque.
5. Wipe excess sealant in and around conductors. DO NOT REUSE.
Use the following guidelines for correct usage of wire nuts.
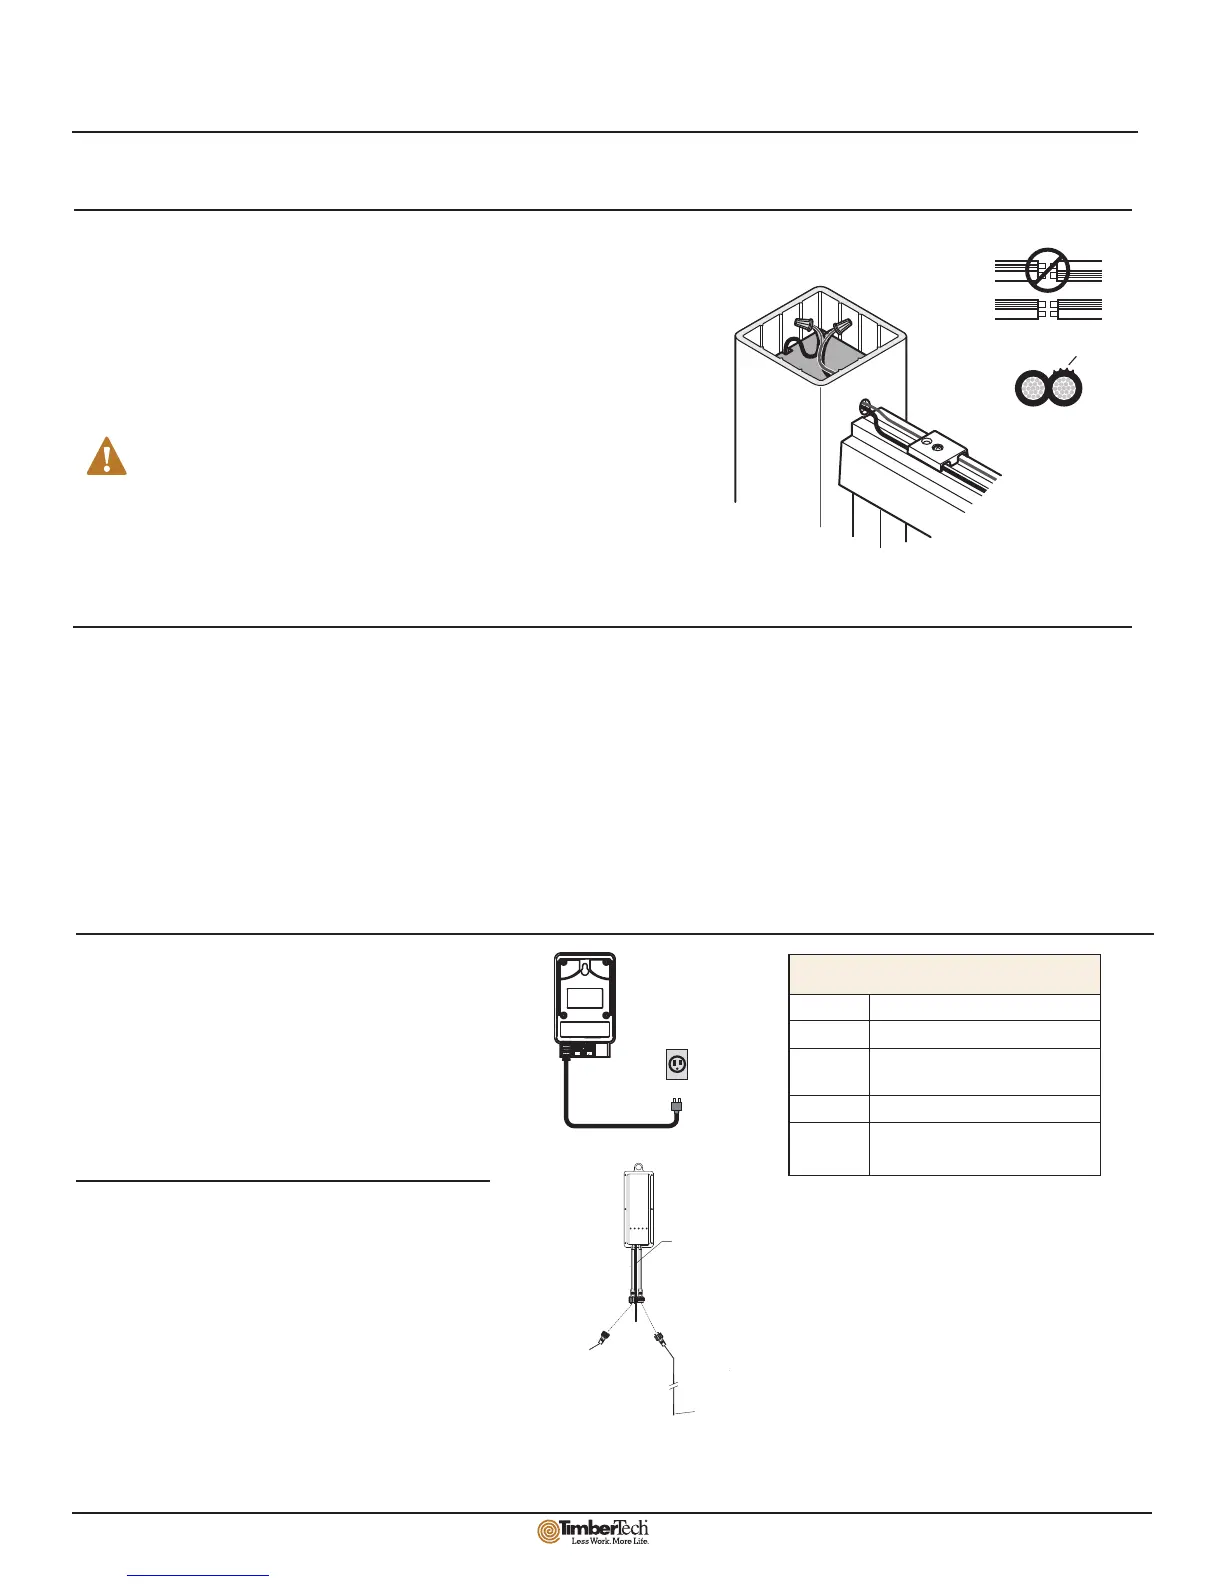
Transformer Settings
Power is supplied to the lighting fixtures via 16/2AWG wires connected to the provided
transformer. One side of the 16/2AWG wire is connected to the Common terminal (C),
the other side is connected to an Output terminal. One side of the 16/2AWG wire
contains raised ridges to allow for easy identification (see Wire Connections section).
The maximum recommended load for the transformers is 90 watts.
Transformer Connections
Consult the instructions provided with the transformer for
additional information.
Outside
GFCI Circuit
Dimmer Instructions
On
Turns unit on
100 Watt Transformer
Off
Turns unit off
Auto
Photocell Control “Auto” – Lights come
on at dusk and go off at dawn
4H
6H
8H
Stays on 4 hours after dusk
Stays on 6 hours after dusk
Stays on 8 hours after dusk
PDF !"# "pdfFactory Pro" $#%&'( www.fineprint.cn
Female
Male
Male
Dimmer
Line Length 10’
Stripped
Antenna
Female
Power from
Transformer
Install the Dimmer next to the DeckLites LED Transformer. Use the provided 10” wire and
water-tight connector to connect the Dimmer to the DeckLites LED Transformer. Next, use the
provided 10’ wire and water-tight connector to connect the Dimmer to main run of wire.
To use the Dimmer, turn the DeckLites LED Transformer to a setting that turns the DeckLites
on when desired. To dim the lights, press the button on the remote or on the dimmer until
the desired brightness is achieved.
The recommended load for the dimmer is between 20-90 watts.
Fixture Wattage
Post Cap Module 3.0W
Accent 1.6W
Under Rail 1.5W
Stair Riser 1.3W
In-Deck .5W
 Loading...