Date: Jun 10, 2013
Timex Audio Products, a division of SDI Technologies Inc. (hereafter referred to as SDI), warrants
this product to be free from defects in workmanship and materials, under normal use and
conditions, for a period of ninety (90) days from the date of original purchase.
Should this product fail to function in a satisfactory manner, it is best to first return it to the store
where it was originally purchased. Should this fail to resolve the matter and service still be required
by reason of any defect or malfunction during the warranty period, SDI will repair or, at its
discretion, replace this product without charge. This decision is subject to verification of the defect
or malfunction upon delivery of this product to the Factory Service Center authorized by SDI
Customer Service.
If service is still required, please call Customer Service at 1-800-888-4491 to obtain a Return
Authorization Number and shipping instructions.
Disclaimer of Warranty
NOTE: This warranty is valid only if the product is used for the purpose for which it was designed.
It does not cover (i) products which have been damaged by negligence or willful actions, misuse
or accident, or which have been modified or repaired by unauthorized persons; (ii) cracked or
broken cabinets, or units damaged by excessive heat; (iii) damage to digital media players, CD’s
or tape cassettes (if applicable); (iv) the cost of shipping this product to the Factory Service Center
and its return to the owner.
This warranty is valid only in the United States of America and does not extend to owners of the
product other than to the original purchaser. In no event will SDI or any of its affiliates, contractors,
resellers, their officers, directors, shareholders, members or agents be liable to you or any third
party for any consequential or incidental damages, any lost profits, actual, exemplary or punitive
damages. (Some states do not allow limitations on implied warranties or exclusion of
consequential damages, so these restrictions may not apply to you.) This warranty gives you
specific legal rights, and you may also have other rights which vary from state to state.
Your acknowledgement and agreement to fully and completely abide by the above mentioned
disclaimer of warranty is contractually binding to you upon your transfer of currency (money order,
cashier's check, or credit card) for purchase of your SDI product.
© 2014 SDI Technologies, Inc. All rights reserved
Questions? Visit www.timexaudio.com
or call 1-800-888-4491 Toll Free
Limited 90 Day Warranty Information
CAUTION: TO REDUCE THE RISK OF ELECTRIC SHOCK, DO NOT REMOVE COVER (OR BACK). NO
USER-SERVICEABLE PARTS INSIDE. REFER SERVICING TO QUALIFIED SERVICE PERSONNEL.
WARNING: TO REDUCE THE RISK OF FIRE OR ELECTRIC SHOCK, DO NOT EXPOSE THIS APPLIANCE
TO RAIN OR MOISTURE.
AVERTISSEMENT: POUR RÉDUIRE LE RISQUE D’INCENDIE OU DE CHOC ÉLECTRIQUE, NE PAS
EXPOSER CET APPAREIL SOUS LA PLUIE ET L’HUMIDITÉ
CAUTION
RISK OF ELECTRIC SHOCK.
DO NOT OPEN
The exclamation point within an equilateral triangle is intended to alert the user of the presence of
important operating and maintenance (servicing) instructions in the literature accompanying the
appliance.
The lightning flash with arrowhead symbol, within an equilateral triangle, is intended to alert the
user of the presence of uninsulated “dangerous voltage” within the product’s enclosure that may
be of sufficient magnitude to constitute a risk electric shock to persons.
The symbols above are located at the bottom of the cabinet.
CAUTION: To prevent electric shock, do not use this (Polarized) plug with an extension cord
receptacle, or other outlets unless the blades can be fully inserted to prevent blade exposure.
ATTENTION: Pour prévenir les chocs électriques ne pas utiliser cette fiche polarisée avec un
prolongateur Une prise de courant ou une autre sortie de courant sauf si les lames peuvent étre
This unit has been designed and manufactured to assure your personal safety. Improper use can result in potential
electrical shock or fire hazards.
1. Read these Instructions.
2. Keep these Instructions.
3. Heed all Warnings.
4. Follow all instructions.
5. Water and Moisture - Do not use this apparatus near water. For example: near a bathtub, washbowl,
kitchen sink, laundry tub, swimming pool or in a wet basement.
6. Ventilation - Do not block any of the ventilation openings. Install in accordance with the manufacturers
instructions. For example, it should not be situated on a bed, sofa, rug or similar surface that may block
ventilation openings. Also, it should not be placed in a built-in installation, such as a bookcase or cabinet
that may impede the flow of air through the ventilation openings.
7. Heat - Do not install near any heat sources such as radiators, heat registers, stoves, or other apparatus
(including amplifiers) that produce heat.
8. Power Sources - The unit should be connected to a power supply only of the type described in the
operating instructions or as marked on the appliance.
9. Grounding or Polarization - Do not defeat the safety purpose of the polarized or grounding - type plug.
A polarized plug has two blades with one wider than the other. A grounding type plug has two blades
and a third grounding prong. The wide blade or the third prong are provided for your safety. When the
provided plug does not fit into your outlet, consult an electrician for replacement of the obsolete outlet.
10. Power-Cord Protection - Protect the power cord from being walked on or pinched particularly at plugs,
convenience receptacles, and the point where they exit from the apparatus. It is always best to have a
clear area from where the cord exits the unit to where it is plugged into an AC outlet.
A Consumer Guide to Product Safety
Battery B
Your new
settings a
• Install tw
compart
• Replace
AC Powe
Unwind the AC power cord completely and insert the plug into a 120V/60Hz AC outlet. Use an
outlet that is always ‘live’. Do not use an outlet that is controlled by a wall switch.
When the clock is connected to the AC outlet for the first time the display will turn on and begin
flashing “12:00 (PM)”. If the back-up batteries were not installed, the Low Battery indicator will
also be flashing.
Setting The Time
1. Depress the Time button and the Hour button together to advance the display to the correct hour, and
then release both buttons. Observe the PM indicator to confirm that you have set the hour correctly. If
the PM indicator is ‘On’ the hour on the display is PM. If the PM indicator does not appear the hour on
the display is AM.
2. Depress the Time button and the Minute button together to advance the display to the correct minute,
and then release both buttons. The time is now set and the clock is running.
Setting The Alarm Time
1. Depress the ALM Set/Reset button and the Hour button together to advance the display to the desired
wake up hour, and then release both buttons. Observe the PM indicator to confirm that you have set
the wake-up hour correctly. If the PM indicator is ‘On’ the wake-up hour on the display is PM. If the PM
indicator does not appear the wake-up hour on the display is AM.
2. Depress the ALM Set/Reset button and the Minute button together to advance the display to the
correct wake-up minute, and then release both buttons. The wake-up time is now set.
3. To activate the alarm press the ALM On/Off button. The ALM indicator appears in the lower left corner
of the display to confirm that the alarm is ‘On’.
At the selected wake-up time the buzzer alarm will turn on. It begins softly and gradually increases in
volume to wake you gently. The alarm sound will continue for one hour and then shut off and reset itself for
the following day.
To stop the alarm sooner, press the ALM Set/Reset button again. The alarm will shut off immediately and
reset itself for the following day.
To cancel the alarm so that it does not turn on again on the following day, press the ALM On/Off button
until the ALM indicator no longer appears in the display.
NOTE: You may also adjust the loudness of the alarm with the Alarm Loud/Soft switch on the back panel.
Snooze Alarm
For a few minutes extra sleep after the alarm turns on, press the Snooze Bar on the top panel. The alarm
will stop for 9 minutes and then turn on again. The Snooze operation may be repeated several times within
the first hour but after one hour the alarm will not turn on again. It will reset itself for the following day.
Replacing the Back-Up Batteries
Fresh back-up batteries can last for up to one year, depending on the frequency and length of
the power interruptions that you experience in your home. When the batteries are getting weak
the Low Battery indicator begins flashing in the display. Replace the batteries as soon as you
see this indicator. NOTE: To avoid having to reset the time and alarm settings, leave the clock
connected to the AC outlet when changing the batteries.
Cleaning the Cabinet
If the cabinet becomes dusty wipe it with a soft dusting cloth. Do not use dusting sprays. If the
cabinet becomes smudged or dirty, wipe it with soft cloth slightly dampened with a mild soap
and water solution. Never use harsh or abrasive cleaners and never allow water or any other
liquid to enter the cabinet.
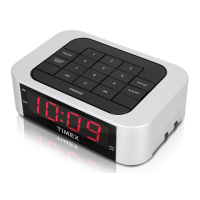
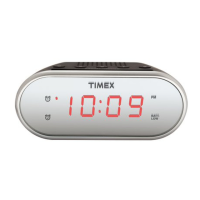
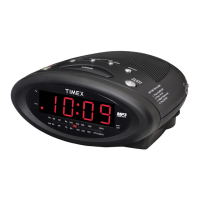
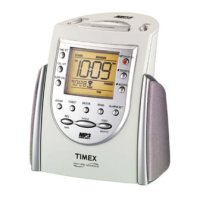
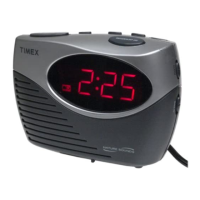
Controls and Indicators
Front Panel
Top Panel
Back Panel
PM Indicator
Alarm ‘On’ Indicator
Alarm On/Off Button
Time Button
Alarm Set/Reset Button
Minute Button
Snooze Bar
Time Display
Low Battery Indicator
Hour Button
Operating Instructions Care and Maintenance
 Loading...