…………………………………………………………………………….
www.tinytag.info
www.tinytag.infowww.tinytag.info
www.tinytag.info
sales@tinytag.info
sales@tinytag.infosales@tinytag.info
sales@tinytag.info
…………………………………………………………………………….
ThermocoupleLogger
Thermocouple Specific Configuration Options
Thermocouple Specific Configuration Options Thermocouple Specific Configuration Options
Thermocouple Specific Configuration Options
in Tinytag Explorer
in Tinytag Explorerin Tinytag Explorer
in Tinytag Explorer
When starting a thermocouple data logger in Tinytag Explorer you will see two
options specific to this type of logger that are not mentioned in the software’s
quick start guide.
Thermocouple Type
Thermocouple TypeThermocouple Type
Thermocouple Type
Select the thermocouple type you are using from the options listed.
If you are unsure what type of thermocouple you have, the plug or cable on it may
be coloured coded and you can match this to the diagram next to each option.
Colours for the different types of thermocouple are as follows:
Type K
Type KType K
Type K
Type J
Type JType J
Type J
Type T
Type TType T
Type T
Type N
Type NType N
Type N
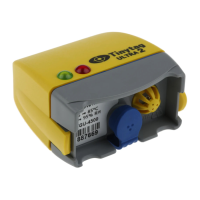
Tinytag Ultra 2
Tinytag Ultra 2 Tinytag Ultra 2
Tinytag Ultra 2
Thermocouple Manual
Thermocouple ManualThermocouple Manual
Thermocouple Manual
TGU
TGUTGU
TGU-
--
-4550
45504550
4550
Warnings
WarningsWarnings
Warnings
• This logger must be used in accordance with the information provided in this
manual.
• This equipment contains a lithium battery. Do not cut open, incinerate,
recharge or expose to temperatures in excess of 100°C (212°F). Danger of
explosion if the battery is incorrectly fitted.
• The battery should only be replaced with the battery type specified in this
document, observing the correct polarity.
• This equipment should only be connected to a computer using a CAB-0007-
USB interface cable.
• This equipment should be used within the temperature range and other
environmental conditions specified in this manual.
Getting Started
Getting StartedGetting Started
Getting Started
To use a Tinytag Ultra 2 thermocouple data logger you will require the following
items:
• A copy of the Tinytag Explorer software
• A CAB-0007-USB download cable
Install Tinytag Explorer and the USB download cable, as described in the
software’s quick start guide and plug the USB cable into the socket on the front of
the logger.
For further information on how to start the data logger recording and how to view
the results from the unit, please see the Tinytag Explorer quick start guide.
Measurement Specification
Measurement SpecificationMeasurement Specification
Measurement Specification
Thermocouple
Thermocouple Thermocouple
Thermocouple
Sensor Type
Sensor Type Sensor Type
Sensor Type Type K, J, T or N Thermocouple
Range
RangeRange
Range
Type K
Type KType K
Type K
-270 to +1370°C (-454 to 2498°F)
Type J
Type JType J
Type J
-210 to +1200°C (-346 to 2192°F)
Type T
Type TType T
Type T
-270 to +400°C (-454 to 752°F)
Type N
Type NType N
Type N
-270 to +1300°C (-454 to 2372°F)
Reading Resolution
Reading Resolution Reading Resolution
Reading Resolution 0.01°C
Cold Junction Compensation
Cold Junction CompensationCold Junction Compensation
Cold Junction Compensation -10 to +70°C
Accuracy
AccuracyAccuracy
Accuracy
Better than ±1.0°C across all thermocouple
ranges when the logger is between
-10 & +70°C.
Note: The above accuracy figures do not include the thermocouple probe.
Logger Temperature
Logger TemperatureLogger Temperature
Logger Temperature
Range
RangeRange
Range -40 to +85°C (-40 to +185°F)
Sensor Type
Sensor Type Sensor Type
Sensor Type 10K NTC Thermistor
Response Time
Response TimeResponse Time
Response Time 20 mins to 90% FSD in moving air
Reading Resolution
Reading Resolution Reading Resolution
Reading Resolution 0.02°C or better
Accuracy
AccuracyAccuracy
Accuracy
Better than ±0.5°C
Burnout Response
Burnout ResponseBurnout Response
Burnout Response
The burnout response option allows you to tell the data logger what to do in the
event of a problem with the thermocouple being used.
If a faulty thermocouple is attached to the data logger it is possible for the logger
to show readings that may appear to be correct. The burnout response can
deliberately drive readings low or high in the event of a problem, to make it clear
to the user that there is a problem.
Choose what you want the data logger to do from the options listed.
Using the Thermocouple Data Logger
Using the Thermocouple Data LoggerUsing the Thermocouple Data Logger
Using the Thermocouple Data Logger
To get the best results, ensure that the data logger and the thermocouple plug
have sufficient time to reach the same temperature before recording begins. If the
thermocouple has been stored at a significantly different temperature from the
logger, allow 30 minutes for stabilisation.
It is advisable to keep the logger at a constant temperature whilst recording, and
to avoid large temperature gradients across the unit (for example, avoid placing
the logger on a very hot or very cold surface).
Large fluctuations in logger temperature can cause temporary errors in the probe
measurement, although these are unlikely to exceed 1°C.