22 3
ASSEMBLY
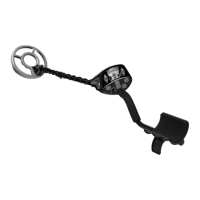
Assembly is easy and requires no tools.
Position the lower stem (the straight tube)
with the silver button toward the back.
Using the bolt and knurled knob,
attach the search coil to the plastic
extension protruding from the
lower stem.
Press the button
on the upper end
of the lower stem,
and slide the lower
stem into the upper
stem.
Adjust the stem to a length
that lets you maintain a
comfortable upright posture,
with your arm relaxed at
your side. Tighten the stem
locking nut.
Wind the cable securely around the stem.
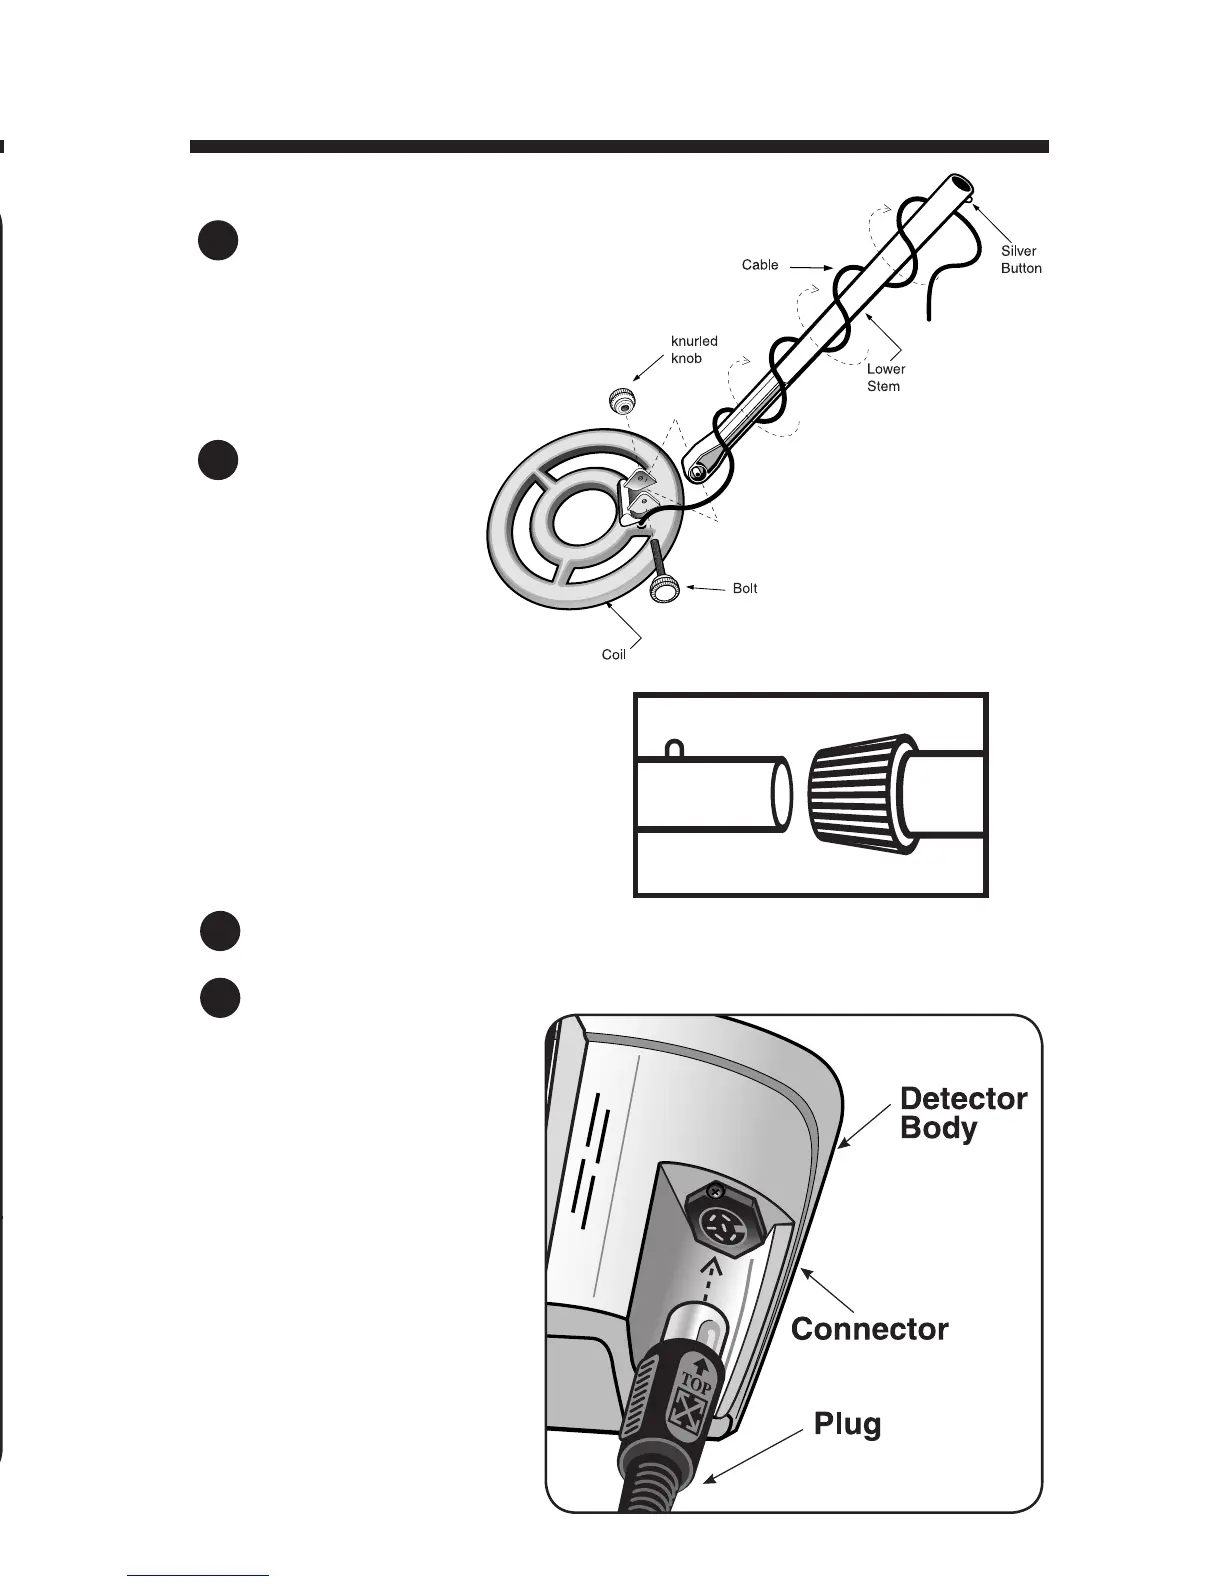
Insert the plug into the matching connector on the right underside of the
detector body. Be sure
that the key-way and pins
line up correctly.
Caution:
Do not force the plug
in. Excess force will cause
damage.
To disconnect the cable,
pull on the plug. Do not
pull on the cable.
1
2
3
4
TROUBLESHOOTINGGUIDE
SYMPTOM CAUSE SOLUTION
Detector chatters • Using detector • Use detector
or beeps erratically indoors outdoors only
• Using detector near • Move away
power lines
from power lines
• Using 2 detectors in • Keep 2 detectors
close proximity at least 20’ apart
• Highly oxidized • Only dig up
buried object repeatable
signals
• Environmental •
Reduce sensitivity
electromagnetic until erratic
interference signals cease
False high-tone •
Over-adjusted
• Move GB knob
signals ground balance
counter clockwise
knob
LCD does not lock • Multiple targets •
Move coil slowly
on to one target ID present at different angles
or detector emits • Highly oxidized
multiple tones target
• Sensitivity set • Reduce sensitivity
too high
No power, no • Dead batteries • Replace batteries
sounds • Poor
battery • Push batteries in
contact
tighter
• Cord not connected •
Insert paper spacers
securely (see page 5)
•
Check connections
TROUBLESHOOTING
 Loading...