27
TTB879GRD by TITAN
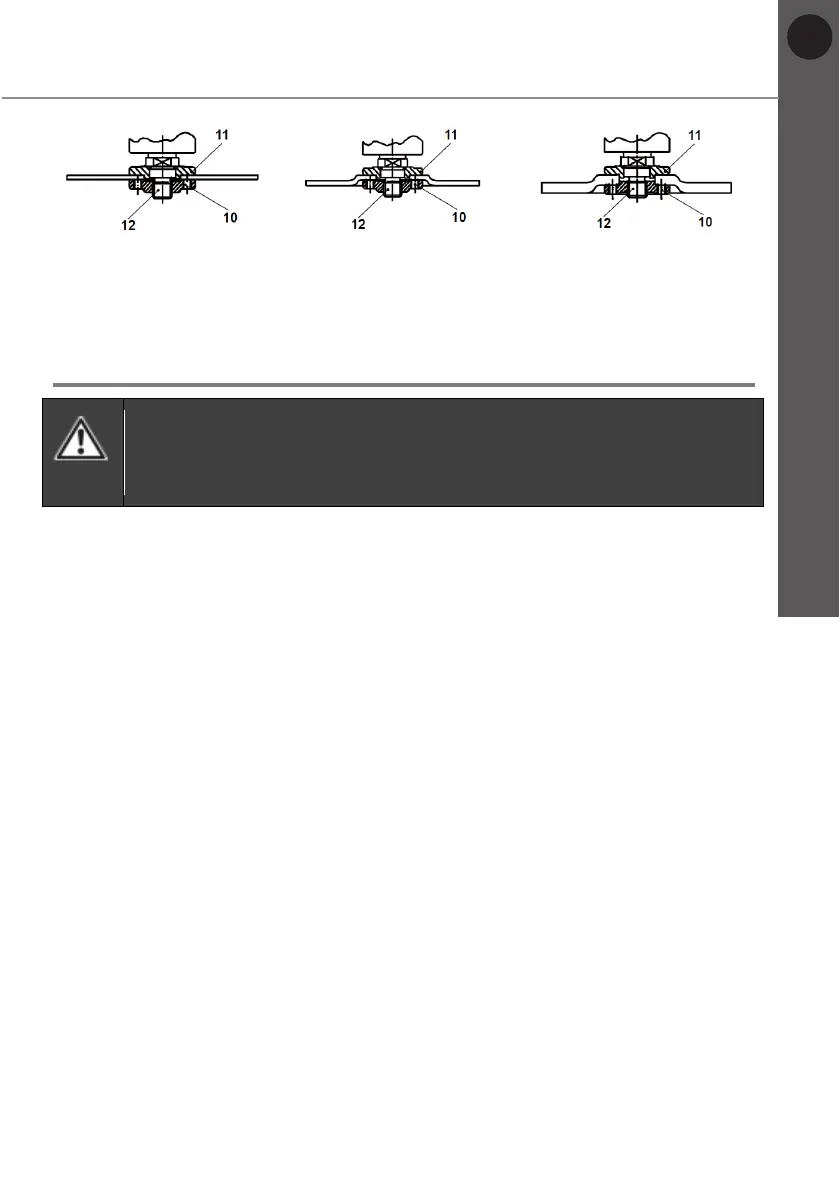
Fig. 14 Fig. 15 Fig. 16
7. Press the spindle lock button (1) and tighten the locking flange (10) clockwise
with the spanner (15).
Grinding / cutting wheels
WARNING! Ensure the wheel is properly fastened but do not use force
to tighten the flange! High pressure will cause damages like cracks to
the wheel!
1. Turn the wheel by hand to test if it is rotating smoothly. The wheel should not
flutter.
2. Switch the product on and let it run idle for at least one minute, to confirm that
the wheel has been installed properly.
Removing / replacing
Replace a worn or damaged grinding / cutting wheel:
1. Ensure the spindle (12) stands still and press the spindle lock button (1). Turn
the spindle (12) until it locks in place.
2. Keep the spindle lock button (1) pressed and loosen the locking flange (10)
anticlockwise with the spanner (15).
3. Remove the locking flange (10), wheel as well as the backing flange (11) from
the spindle (12).
4. Check the flanges (10, 11) for damages and wear. Replace them if necessary.
5. Clean the flanges (10, 11) and spindle (12) from dust.
6. Refit the backing flange (11) to the spindle (12).
7. Refit appropriate wheel onto the spindle (12).
8. Refit the locking flange
(10) to the spindle (12), ensuring that the locking
flange (10) is correctly orientated for the intended use.
9.
Press the spindle lock button (1) and tighten the locking flange (10) clockwise
with the spanner (15).


 To Next Page