26
TTB879GRD by TITAN
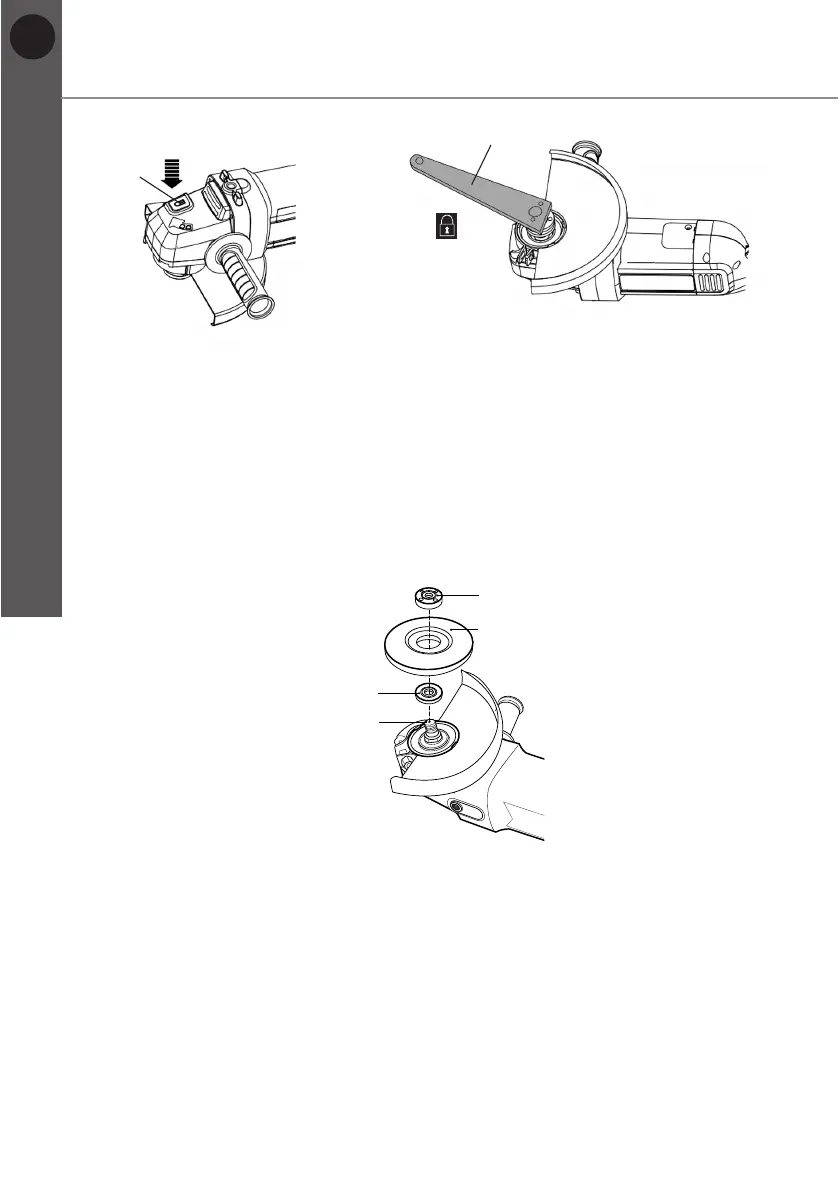
Fig. 11 Fig. 12
3. Remove the locking flange (10) from the spindle (12).
4. Holding the product with spindle facing upwards, fit the backing flange (11)
onto the spindle and ensure it is correctly located. The two machined flat
sections must face the product and locate in the appropriate position on the
spindle (12).
5. Place the wheel onto the spindle (12) with the label facing the product. The
hole in the wheel should locate onto the spindle (12) and fit firmly into the
protruding section of the backing flange (11) (Fig. 13).
Fig. 13
6. Place the locking flange (10) on the spindle (12). Depending on the kind of
wheel, the flange must be placed as follows:
• Thin wheels (< 4 mm) with flat centre: place the locking flange (10) with
protruding side away from the wheel
(Fig. 14).
• Thin wheels (< 4 mm) with curved centre: place the locking flange (10)
with protruding side away from the wheel (Fig. 15).
• Thick wheels (> 4 mm) with curved centre: place the locking flange (10)
with protruding side to the wheel (Fig. 16).
10
grinding /
cutting wheel
11
12
1
15


 To Next Page