S
Stephanie PetersSep 13, 2025
What to do if TKR Group PNP 90 UN 2.0 has an oil leak?
- WWilliam JonesSep 13, 2025
If there's an oil leak from the pump of your TKR Group Nail Gun, it needs to be repaired through the manufacturer.
What to do if TKR Group PNP 90 UN 2.0 has an oil leak?
If there's an oil leak from the pump of your TKR Group Nail Gun, it needs to be repaired through the manufacturer.
Emphasizes careful reading of the manual before use.
Explains various warning and instructional symbols used in the manual.
Identifies and labels parts of the riveting tool with letters A-F.
Describes the tool's purpose and development for thin sheet metal.
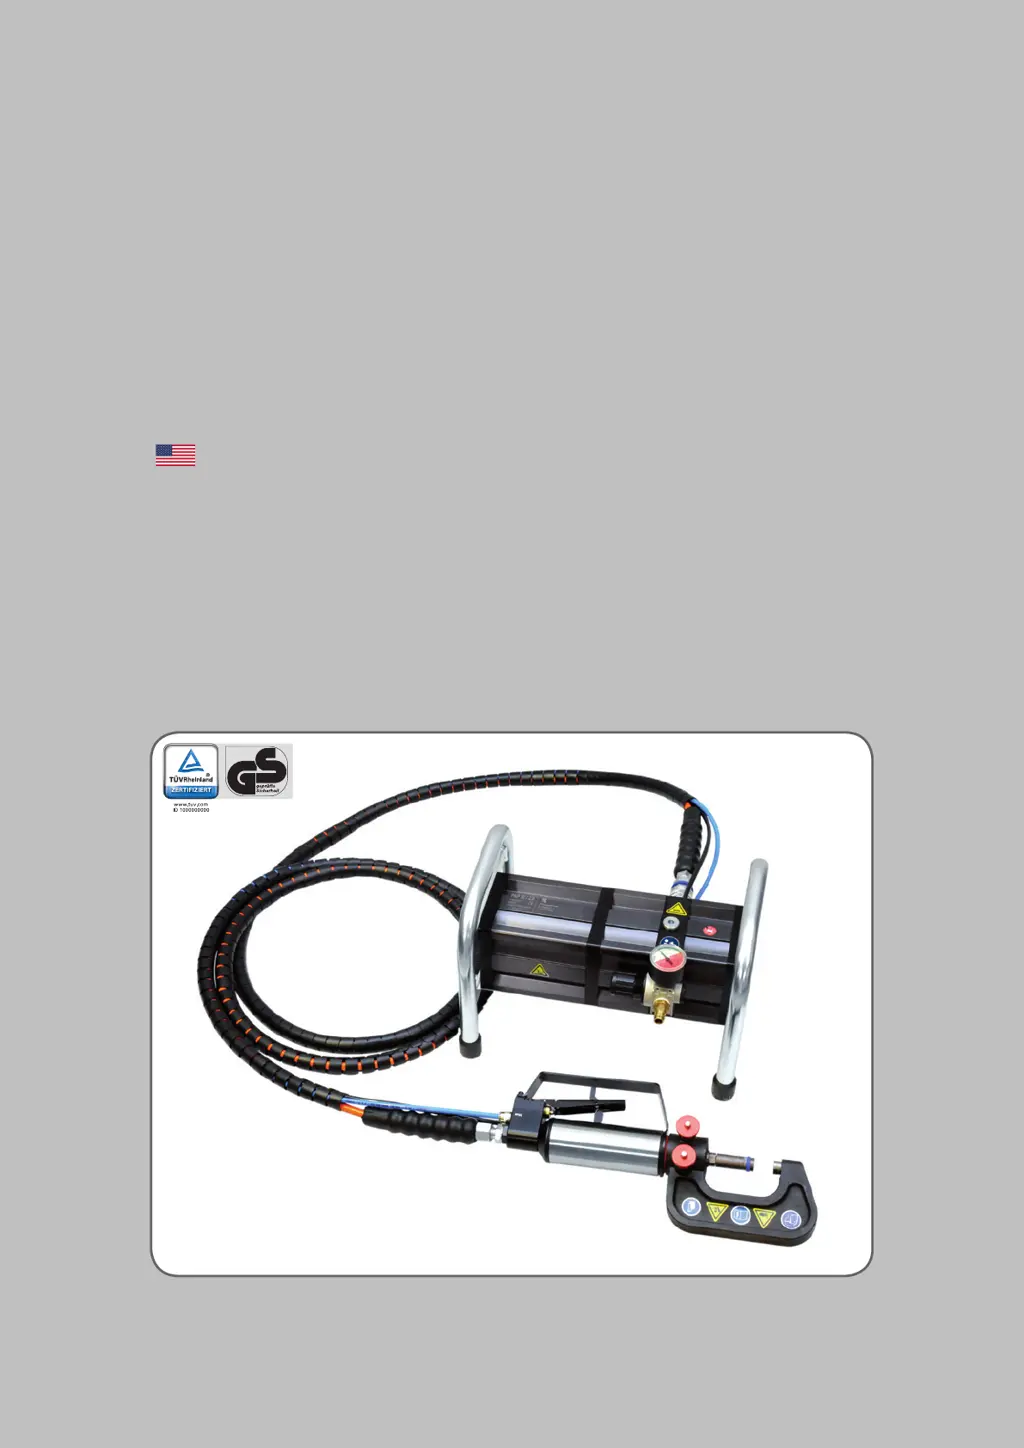
Details the connection of the hydraulic actuator to the pump.
Lists items included in the complete kit PNP 90 UN 2.0.
Lists optional accessories available for purchase.
Provides technical data like oil type, pressure, temperature, and noise levels.
States the tool is approved only for manufacturer's intended purposes and trained personnel.
Warns against non-genuine accessories and unapproved hoses/fittings.
Specifies temperature limits and prohibits use in explosive areas.
Advises on routing lines to prevent tripping and hose whipping hazards.
Stresses checking air pressure and using clean, dry compressed air.
Outlines warranty validity, exclusions, and invalidation conditions.
Emphasizes keeping hydraulic and pneumatic systems free from contamination.
States maintenance must be done with the pump and air disconnected.
Details oil changes every 80 hours or 12 months and proper disposal.
Limits user maintenance to manual procedures; others by professionals.
Details the 12-month warranty, excluding wearing parts and hydraulic oil.
Specifies conditions for validity and reasons for invalidation, like misuse.
Explains manufacturer's discretion in handling defects or faults.
Lists dimensions, weight, and pressure specifications for the pump.
Provides length, diameter, and weight for the hose package.
Lists dimensions, weight, operating pressure, and travel for the actuator.
Shows dimensions and details for Rivet Clamp NB 40.
Shows dimensions and details for Rivet Clamp NB 115.
Shows dimensions and details for Rivet Clamp NB 230.
Provides a table summarizing technical data for all rivet clamps.
Lists items, descriptions, and article numbers for the riveting tool kit components.
Notes the factory state of the compressed air connection and guides its setup.
Instructs to remove the closing cap from the pressure regulator.
Details connecting pneumatic hoses to the correct couplings.
Warns about checking the actuator and hoses for damage before use.
Advises inspecting hoses and couplings for any damage.
Instructs to connect compressed air and set the pressure.
Warns against exceeding the maximum permitted air pressure of 6 bar/87 psi.
Details removing protective caps from hydraulic connections.
Explains the procedure for connecting the hydraulic actuator to the hose.
Guides on correctly connecting pneumatic control hoses by color coding.
Advises on safe placement and hose routing to prevent damage and tripping.
Specifies requirements for the work area, avoiding heat and contaminants.
Reiterates the need for a secure surface for the pump.
Details selecting and preparing tools and locking pins for connection.
Explains the method for inserting the locking pins and ensuring engagement.
Confirms the tool is ready for operation after assembly.
Warns about checking the mounting adapter, locking bolts, and tool holes for cleanliness and damage.
Lists available rivet clamps for the RIVKIT UN 2.0 tool kit.
Describes how to screw the riveting tool into the rivet clamp holder.
Explains attaching the rivet insert counterpart to the clamp.
Stresses checking rivet inserts, bolt, and die for compatibility before installation.
Advises checking riveting head seating after each operation.
Introduces the need for rivet removal in body panel repair.
Explains using extraction tools to remove rivets, minimizing damage.
States that flow form rivets eliminate the need for pre-drilling holes.
Warns that the punch may stick and requires movement to free.
Details the use of specific die and closing heads for flow form rivets.
Emphasizes the correct engagement of the die head's centering lug.
Describes the riveting process for flow form rivets, including closing head upsetting.
Notes the closing head's relief hole and the need to clear it for stable riveting.
Stresses proper seating of rivets during installation.
Advises replacing defective rivet punches with genuine parts.
Clarifies that the rivet die, not the rivet, is placed on the sheets to be joined.
States the necessity of checking riveting results post-operation and determining fault reasons.
Advises checking the seating of rivet mandrel and die after each operation.
Instructs to remove adhesive residue from tools after each completed riveting operation.
Details cleaning tools using acetone or other solvents.
Instructs to disconnect compressed air and seal control hoses after riveting.
Advises preventing hoses from touching the floor and not transporting by hoses.
Recommends checking for oil leaks and preventing contamination in oil/lines.
Instructs to store the tool in its designated transport case.
Details the process of draining oil from the pump into a container.
Explains how to refill the pump with fresh hydraulic oil.
Details the process of draining oil from the pump into a container.
Explains how to refill the pump with fresh hydraulic oil.
Warns to ensure oil is free from contamination during oil changes.
Lists part numbers and descriptions for the pump and related components.
Lists part numbers and descriptions for riveting tool kit components.
Lists causes and remedies for the pump not running or not shutting off.
Lists causes and remedies for rivets not being affixed correctly.
Lists causes and remedies for slow or non-existent plunger travel.
Lists causes and remedies for air leaks and oil leaks.
States disposal must follow national laws, regulations, and stipulations.
Suggests using licensed professional operators for equipment disposal.
Identifies the manufacturer and the person compiling technical documentation.
Specifies the tool type and its designation.
Lists the standards and EU Machine Directive the tool complies with.