The two universal hosetails should then be screwed into the other inlet/outlet at
either end of the unit. Hosetails should be tightened using hand pressure only.
The blanking caps should be inserted and also only tightened by hand. Ensure
that the “O” rings are in position before assembling. Do not use jointing
compound or PTFE tape. Please note that there is no correct flow direction
through the unit. Either end of the unit may be used as the inlet or outlet.
However, the flow must be from one end of the unit to the other to ensure
correct operation.
To prevent the unit inadvertently being dropped into the pond, we strongly
recommend that it is securely positioned at least 2 metres from the edge of the
pond. Any flexible cabling used between the unit and the permanent wiring
should also be kept to a minimum length. We recommend a maximum length
of 1.5 metres.
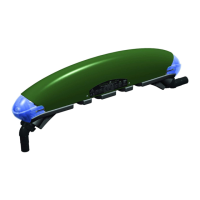
MOUNTING ON A VERTICAL WALL
Caution: To prevent this unit falling into water, do not install it above or
alongside your pond.
The unit may be mounted horizontally onto a vertical wall using the mounting
brackets included (see diagram below). The 8 screws provided are suitable for
fixing the brackets to a wooden surface. You should ensure that the unit is the
correct way round with the wall spacers positioned at the back of the unit so
that the unit sits securely. The water connections may be made in either of the
inlets/outlets on the bottom of the unit, the ends of the unit, or a combination of
both (see diagram below). Please note that there is no correct flow direction
through the unit. Either end of the unit may be used as the inlet or outlet.
However, the flow must be from one end of the unit to the other to ensure
correct operation and the two blanking caps should be fitted to the inlet and
outlet not being used. Hosetails should be tightened using hand pressure only.
The blanking caps should be inserted and also only tightened by hand. Ensure
that the “O” rings are in position before assembling. Do not use jointing
compound or PTFE tape.
CONNECTION TO THE WATER SUPPLY
Connection with flexible hose
The Pro Clear Advantage unit is supplied with two universal hosetails to take
1”, 1
1
⁄4”, and 1
1
⁄2” diameter flexible hose. If you are using one of the two larger
sizes, the smaller sections of the hosetails must be cut off to ensure sufficient
water flow and prevent possible damage to the pump. We recommend that you
use the largest diameter hose available. The hosetails should be trimmed away
from the unit as shown in the diagram below. Using a hacksaw, carefully cut
off the excess hosetail, ensuring that the sections are cut off at the second ridge
and that the cut follows the line of the ridge.
Once the hosetails have been trimmed, attach them to the unit as described
above. Secure the hosepipe to the hosetail with a stainless steel hose clip.
The hosetails supplied are made from a translucent material which will glow
when the unit is operating correctly.
Connection using rigid pipe
The unit may also be rigid plumbed by the use of an adaptor (not supplied).
The inlets and outlets of the unit are 1
1
⁄2” BSP thread and an adaptor or union
(1
1
⁄2” male thread to female plain) to suit your pipework should be obtained from
your nearest supplier of plumbing fittings.
CUT LINE
1 Mark the wall through the
brackets then fix with (8) 1”
No.8 screws
2 Vertical wooden wall or
fence.
CUT LINE
1
1
2
2
2

 Loading...