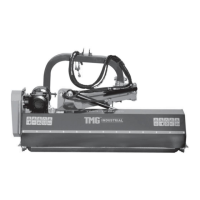
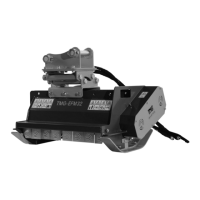
This document is the product manual for the TMG-TFN48/60/72 3PT Finish Mower, a piece of agricultural equipment designed for maintaining lawns and fields. The manual provides comprehensive information on assembly, operation, adjustments, maintenance, and troubleshooting for the mower.
Function Description
The TMG 3PT Finish Mower is a category 1 three-point hitch implement designed for use with tractors. Its primary function is to cut grass and maintain lawns and fields, providing a clean and even finish. The mower is suitable for various applications, including ripping, leveling, finish grading, and backfilling at feedlots, outdoor arenas, building sites, and maintenance operations on farm and ranch lanes or roadways. It is designed to be operated by a single person.
Important Technical Specifications
The TMG-TFN48/60/72 series includes three models: TMG-TFN48, TMG-TFN60, and TMG-TFN72, with varying cutting widths and dimensions.
Model Specifications:
| Model |
Cutting Width (W1) |
Dimensions (LWH) |
Cutting Height |
Wheel Sizes |
No. of Blades |
Blade Material |
CAT Type |
PTO Speed |
Power Required |
Product Weight |
Shipping Weight (G.W.) |
| TMG-TFN48 |
48"(1200mm) |
49"x61"x29" |
1"-4" (25-100mm) |
210x80mm |
3 |
65Mn |
CAT 1 |
540rpm |
18-30HP |
425LBS |
525LBS |
| TMG-TFN60 |
60"(1500mm) |
55"x61"x29" |
1"-4" (25-100mm) |
210x80mm |
3 |
65Mn |
CAT 1 |
540rpm |
25-40HP |
458LBS |
565LBS |
| TMG-TFN72 |
72"(1800mm) |
73"x61"x29" |
1"-4" (25-100mm) |
210x80mm |
3 |
65Mn |
CAT 1 |
540rpm |
30-50HP |
500LBS |
630LBS |
Driveline Specifications:
- Driveline Shaft U-Joints: Type of Lubrication: Multi-purpose Grease (25 Hours)
- Roller Bearing (Both Ends): Type of Lubrication: Multi-purpose Grease (25 Hours)
- Cutter Rotor Bearing (Both Ends): Type of Lubrication: Multi-purpose Grease (25 Hours As Required)
- Gearbox: Type of Lubrication: SAE 90W Gear Lube (20 Hours)
- Check oil level in gearbox by removing the plug located on the right-hand side. Oil should be level with bottom of plug hole. Add oil if necessary, by removing top fill plug and side plug. Add oil until it flows from side plug hole.
- Do not overfill!
- IMPORTANT: Mower should be level when checking oil in gearbox!
- Driveline Profiles: Type of Lubrication: Multi-purpose Grease (20 Hours)
Bolt Torque Specifications:
The manual provides detailed bolt torque specifications in both English and Metric units for various bolt diameters and grades (SAE 2, SAE 5, SAE 8, 8.8, 10.9). These tables are crucial for proper assembly and maintenance to ensure the safety and longevity of the equipment. For example, a 1/2" SAE 5 bolt requires 80 lb-ft (110 N.m) of torque, while an M10 8.8 bolt requires 37 lb-ft (50 N.m).
Usage Features
Safety Information:
The manual emphasizes safety with a "Safety Decal" and "Safety Alert Symbol" to highlight potential hazards. Key safety instructions include:
- Always read and understand the instructions in the manual.
- Do not allow anyone to operate the equipment who has not fully read and comprehended the manual.
- Ensure all guards and shields are in place and secured before operating.
- Never operate the mower with loose or damaged parts.
- Wear proper safety goggles or other protective gear.
- Keep hands, feet, and clothing away from power-driven parts.
- Watch out for wires, trees, etc., when raising implements.
- Turning the tractor too tight may cause the implement to ride up on wheels.
- Disengage PTO and turn off the engine before leaving the operator's seat.
- Always lower the implement to the ground, put the tractor in park, turn off the engine, and remove the key before performing maintenance.
Assembly and Set-Up:
The mower is shipped in a crate and requires assembly. The manual provides detailed instructions and diagrams for installing the long pivot bar, short pivot bar, upper lift bracket, wheel frame, and wheel bracket assemblies. It also includes a packing description list with quantities and package forms for each component.
Installation Wizard:
The installation process requires specific tools, including a 1/2" ratchet wrench with 13mm, 16mm, 24mm sleeves, 17-19, 22-24 spanner, side cutter, and industrial scissors. Safety goggles and gloves are also recommended. The wizard guides the user through installing the long pivot bar, short pivot bar, upper lift bracket, and fittings, followed by the wheel frame and fittings, wheel bracket assembly, and discharge guide and fittings. Proper tightening of all locknuts and bolts is crucial.
Tractor Hook-Up:
- Ensure the tractor draw bar will not interfere with the mower.
- Align lower link arms of the tractor to hitch clevises on the mower.
- Attach tractor top link to upper floating hitch on mower with a secured pin.
- Adjust the tractor top link to place the upper hitch pin vertically above or slightly behind the lower hitch pins to allow mower flotation. The mower should be run with the back 15 degrees lower than the front.
Driveline Installation:
- Slide the driveline end with an extended safety cone over the spline shaft of the gearbox and secure it with an attaching device.
- Slide the driveline over the tractor's spline PTO shaft and secure it with a locking device.
- The driveline should now be moved back and forth to ensure it is secure on the PTO shaft of the tractor and mower gearbox.
- Attach the chain from the driveline shield to one of the upper hitch braces to ensure the shield does not rotate.
- Shorten the driveline if necessary to ensure it does not bottom out or interfere during operation.
Operating Instructions:
- Transporting: Always disengage the PTO before raising the mower to transport position.
- Mowing Instructions: Clear the area of objects and debris. Mow dry grass; wet grass can cause plugging. Adjust cutting height to match grass conditions.
- Operating Instructions: Check oil level in the gearbox, check all plugs, bolts, and nuts, ensure all guards and shields are in place, grease driveline shaft and all other grease fittings. Clear the area to be mowed of rocks, branches, and other foreign objects. Lower the mower to the ground. Set the tractor throttle at approximately 1/4 open. Engage PTO to start blades rotating. Operate with 540 rpm PTO. Begin mowing at a slow forward speed and shift up until the desired speed is achieved. Mower knives will cut better at a faster blade speed than at a reduced throttle. After mowing the first 50 feet, stop and check the mower. Do not make sharp turns or attempt to back up while the mower is on the ground. Do not engage the PTO with the mower in the fully raised position.
Adjustments:
- Leveling the Mower: The tractor and mower should be on a level ground. Leveling can be adjusted at the tractor's 3-point arms and center link.
- Cutting Height Adjustment: The machining cutting height depends upon the position of the rear roller. Remove the bolts that fix the roller on both sides, lift or lower both sides of the roller in equal measurements, and replace bolts and re-tighten.
- 3-Point Hitch Adjustments: Adjust the tractor's 3-point hitch lift height so that the driveline does not contact the mower deck in the fully raised position. Adjust the tractor's top center link to place the upper hitch pin vertically above or slightly behind the lower hitch pins. The mower should be run with the back 15 degrees lower than the front. The hitch can also be adjusted from side to side by turning the adjustment handle.
- Belt Tension: The belt tension should be checked after the first 20 hours of use and then every 40 hours of use. Tension on the belt can be adjusted with the belt tension bolt. Turn the bolt until the desired tension is achieved. When the belt has the correct tension, the gearbox should be adjusted so that the gearbox extension is running straight (parallel) with the flail mower. Loosen bolts at the bottom of the gearbox and move the gearbox until the gearbox extension is running straight. Excessive tension on the belt may lead to premature failure of belt and drive components.
Maintenance Features
Maintenance Schedule:
Proper servicing and adjustments are key to the long life of any farm implement. With careful and systematic inspection, you can avoid costly maintenance, time, and repair.
Lubrication:
- Clean as necessary.
- Check knives for wear and replace if necessary.
- Inspect the mower for loose, damaged, or worn parts and adjust or replace as needed.
- Store the unit inside if possible for longer life.
- Repaint parts where paint is worn or scratched to prevent rust.
- Replace all damaged or missing decals.
Driveline Shaft U-Joints: Lubricate with multi-purpose grease every 25 hours.
Roller Bearing (Both Ends): Lubricate with multi-purpose grease every 25 hours.
Cutter Rotor Bearing (Both Ends): Lubricate with multi-purpose grease as required.
Gearbox: Check oil level in the gearbox every 20 hours. Use SAE 90W Gear Lube. Ensure the mower is level when checking oil.
Knife Replacement:
- IMPORTANT: Make sure that the knife is the same length as the others on the mower. This will keep the rotor rotation balanced.
- Remove the bolt and nut.
- Remove the old knife.
- Install a new knife and existing bolt.
- Secure with a nut.
V-Belt Installation:
- Ensure the belt drive system is under spring tension.
- Remove the belt guard fender and belt cover.
Troubleshooting:
The manual includes a troubleshooting guide with common problems and their solutions:
| Problem | Solution The TMG-TFN48/60/72 3PT Finish Mower is a robust and versatile piece of agricultural equipment designed for efficient and precise lawn and field maintenance. This product manual serves as a comprehensive guide for users, covering everything from initial assembly and setup to detailed operating instructions, essential adjustments, routine maintenance, and troubleshooting. The mower is engineered to deliver a clean, even finish across various terrains and for diverse applications, including general lawn care, sports fields, parks, and light agricultural land management.
Function Description
The TMG 3PT Finish Mower is a tractor-mounted implement, specifically designed to connect to a Category 1 three-point hitch system. Its primary function is to cut and maintain grass and other vegetation, providing a manicured appearance. Unlike rough-cut mowers, finish mowers are built for precision, leaving a smooth and aesthetically pleasing surface. This makes them ideal for areas where a high-quality cut is desired. The mower's design allows for effective use in various settings, including residential lawns, commercial properties, public parks, golf courses, and even light agricultural applications such as maintaining feedlots, outdoor arenas, building sites, and farm lanes. The machine is designed for single-person operation, emphasizing ease of use and efficiency. Its robust construction ensures durability and reliability, even under demanding conditions. The ability to adjust cutting height and other parameters allows for customization based on specific terrain and desired grass length, enhancing its versatility.
Important Technical Specifications
The TMG-TFN series of 3PT Finish Mowers is available in three distinct models, each tailored to different cutting width requirements, ensuring there's a suitable option for various tractor sizes and operational scales.
Model-Specific Data:
-
TMG-TFN48:
- Cutting Width (W1): 48 inches (1200mm) – Ideal for smaller to medium-sized areas, offering maneuverability.
- Dimensions (LWH): 49"x61"x29" – Compact footprint for easier storage and transport.
- Product Weight: 425 LBS – Lighter weight for smaller tractors.
- Shipping Weight (G.W.): 525 LBS.
- Power Required: 18-30 HP – Suitable for compact utility tractors.
-
TMG-TFN60:
- Cutting Width (W1): 60 inches (1500mm) – A balanced option for medium to larger areas, combining efficiency with manageable size.
- Dimensions (LWH): 55"x61"x29" – Moderate size for broader applications.
- Product Weight: 458 LBS.
- Shipping Weight (G.W.): 565 LBS.
- Power Required: 25-40 HP – Accommodates a wider range of utility tractors.
-
TMG-TFN72:
- Cutting Width (W1): 72 inches (1800mm) – Designed for larger properties and commercial use, maximizing coverage per pass.
- Dimensions (LWH): 73"x61"x29" – Largest model, requiring more space.
- Product Weight: 500 LBS.
- Shipping Weight (G.W.): 630 LBS.
- Power Required: 30-50 HP – Best suited for larger, more powerful tractors.
Common Specifications Across All Models:
- Cutting Height: Adjustable from 1 inch to 4 inches (25-100mm) – Allows for precise control over grass length, adapting to different aesthetic and agronomic needs.
- Wheel Sizes: 210x80mm – Provides stable support and smooth movement across various surfaces.
- Number of Blades: 3 – Ensures efficient and even cutting performance.
- Blade Material: 65Mn – Indicates durable, high-quality steel for prolonged sharpness and resistance to wear.
- CAT Type: CAT 1 – Refers to the Category 1 three-point hitch compatibility, a standard for many compact and utility tractors.
- PTO Speed: 540 rpm – Standard Power Take-Off speed for agricultural implements, ensuring optimal blade rotation.
Driveline and Lubrication Specifications:
- Driveline Shaft U-Joints: Require multi-purpose grease lubrication every 25 hours of operation.
- Roller Bearing (Both Ends): Require multi-purpose grease lubrication every 25 hours of operation.
- Cutter Rotor Bearing (Both Ends): Require multi-purpose grease lubrication as required, indicating a need for regular inspection.
- Gearbox: Requires SAE 90W Gear Lube. The oil level should be checked every 20 hours. It is crucial to ensure the mower is level when checking the gearbox oil to get an accurate reading, and overfilling must be avoided.
- Driveline Profiles: Require multi-purpose grease lubrication every 20 hours.
Bolt Torque Specifications:
The manual provides comprehensive bolt torque tables for both English (SAE 2, SAE 5, SAE 8) and Metric (8.8, 10.9) fasteners. Adhering to these specifications is paramount for the structural integrity and safe operation of the mower. For instance, a 1/2" SAE 5 bolt requires 80 lb-ft (110 N.m) of torque, while an M10 8.8 bolt requires 37 lb-ft (50 N.m). These precise torque values prevent loosening during operation and avoid over-tightening, which can damage threads or components.
Usage Features
The TMG 3PT Finish Mower is designed with user-friendliness and safety in mind, offering features that streamline its operation and ensure operator protection.
Safety First:
The manual places a strong emphasis on safety, integrating "Safety Decals" and "Safety Alert Symbols" throughout. Key safety protocols include:
- Pre-Operation Checks: Always read and understand the entire manual before operating. Ensure all guards and shields are securely in place.
- Personal Protective Equipment (PPE): Operators must wear appropriate safety goggles and other protective gear.
- Clearance: Keep hands, feet, and clothing away from moving parts. Be aware of surroundings to avoid contact with wires, trees, or other obstacles.
- Tractor Operation: Avoid sharp turns that could cause the implement to ride up on wheels. Disengage the PTO and turn off the engine before dismounting or performing any adjustments.
- Maintenance Safety: Always lower the implement to the ground, engage the parking brake, turn off the tractor, and remove the key before any maintenance or inspection.
Assembly and Setup:
The mower is shipped in a crate and requires assembly. The manual provides step-by-step instructions with detailed diagrams for installing various components, including:
- Long and Short Pivot Bars: These components are critical for the mower's linkage to the tractor's three-point hitch.
- Upper Lift Bracket: Connects the mower to the tractor's top link.
- Wheel Frame and Wheel Bracket Assemblies: Provide support and allow for height adjustment.
- Discharge Guide and Fittings: Directs the cut grass away from the mower.
A packing list is included, detailing all components and their quantities, facilitating a smooth assembly process.
Installation Wizard:
The manual includes an "Installation Wizard" that guides users through the setup process, specifying required tools such as various ratchet wrenches, spanners, side cutters, and industrial scissors. It also reiterates the importance of safety goggles and gloves. The wizard covers:
- Mounting Components: Detailed steps for attaching the long pivot bar, short pivot bar, upper lift bracket, wheel frame, wheel bracket assembly, and discharge guide.
- Tightening Procedures: Emphasizes the importance of properly tightening all locknuts and bolts to ensure structural integrity and prevent loosening during operation.
Tractor Hook-Up:
Proper attachment to the tractor is crucial for safe and effective operation:
- Draw Bar Clearance: Ensure the tractor's draw bar does not interfere with the mower.
- Linkage Alignment: Align the tractor's lower link arms with the mower's hitch clevises.
- Top Link Connection: Attach the tractor's top link to the mower's upper floating hitch, securing it with a pin.
- Mower Flotation: Adjust the tractor's top link to allow the mower to float, ensuring the back of the mower is approximately 15 degrees lower than the front for optimal cutting.
Driveline Installation:
The driveline transmits power from the tractor's PTO to the mower. Correct installation is vital:
- Shaft Connection: Slide the driveline end with the safety cone over the gearbox spline shaft and secure it. Repeat for the tractor's PTO shaft.
- Security Check: Move the driveline back and forth to confirm it is securely attached to both the tractor and the mower gearbox.
- Shield Rotation Prevention: Attach the chain from the driveline shield to an upper hitch brace to prevent the shield from rotating.
- Driveline Length: Shorten the driveline if necessary to prevent bottoming out or interference during operation, which can cause damage.
Operating Instructions:
- Transporting: Always disengage the PTO before raising the mower for transport.
- Mowing Preparation: Clear the area of any objects or debris that could damage the mower or be thrown. Mow dry grass whenever possible, as wet grass can cause clogging and an uneven cut.
- Pre-Operation Checklist:
- Check gearbox oil level.
- Verify all plugs, bolts, and nuts are tight.
- Ensure all guards and shields are in place.
- Grease all driveline shaft and other grease fittings.
- Confirm the area is clear of obstacles.
- Starting and Operation: Lower the mower to the ground. Set the tractor throttle to approximately 1/4 open. Engage the PTO to start the blades. Operate at 540 rpm PTO speed. Begin mowing at a slow forward speed and gradually increase speed. Regularly check the mower's performance.
- Maneuvering: Avoid sharp turns and backing up while the mower is engaged. Do not engage the PTO when the mower is in the fully raised position.
Adjustments:
- Mower Leveling: The mower should be leveled on a flat surface using the tractor's 3-point arms and center link.
- Cutting Height Adjustment: The cutting height is adjusted by modifying the position of the rear roller. This involves removing bolts, raising or lowering the roller equally on both sides, and re-securing the bolts.
- 3-Point Hitch Adjustments: Adjust the tractor's 3-point hitch lift height to prevent driveline contact with the mower deck when raised. The top center link should position the upper hitch pin vertically above or slightly behind the lower hitch pins, with the mower's back 15 degrees lower than the front for optimal cutting. Side-to-side adjustments can be made via the adjustment handle.
- Belt Tension: Belt tension should be checked after the first 20 hours of use and then every 40 hours. Adjust tension using the belt tension bolt. Ensure the gearbox is aligned parallel with the flail mower by loosening its bolts and repositioning it. Proper belt tension prevents premature failure of belt and drive components.
Maintenance Features
Regular and systematic maintenance is crucial for the longevity, performance, and safety of the TMG 3PT Finish Mower. The manual outlines a comprehensive maintenance schedule and specific procedures.
General Maintenance Practices:
- Cleaning: Clean the mower as necessary to prevent buildup of debris and ensure proper operation.
- Inspection: Regularly inspect the mower for loose, damaged, or worn parts. Adjust or replace components as needed.
- Storage: Store the unit indoors when not in use to protect it from the elements and prolong its life.
- Rust Prevention: Repaint any scratched or worn areas to prevent rust and corrosion.
- Decal Integrity: Replace any damaged or missing safety and informational decals.
Lubrication Schedule:
Adhering to the lubrication schedule is vital for reducing friction and wear on moving parts:
- Driveline Shaft U-Joints: Lubricate with multi-purpose grease every 25 hours.
- Roller Bearing (Both Ends): Lubricate with multi-purpose grease every 25 hours.
- Cutter Rotor Bearing (Both Ends): Lubricate with multi-purpose grease as required, indicating a need for frequent checks.
- Gearbox: Check the oil level every 20 hours. Use SAE 90W Gear Lube. Ensure the mower is level during the check, and avoid overfilling.
- Driveline Profiles: Lubricate with multi-purpose grease every 20 hours.
Knife Replacement:
Maintaining sharp and balanced blades is essential for a quality cut and to prevent excessive vibration.
- Balance: Always ensure replacement knives are the same length as the others to maintain rotor balance.
- Procedure: Remove the old knife by unbolting it. Install the new knife and secure it with the existing bolt and nut.
V-Belt Installation:
Proper V-belt installation and tension are critical for power transmission.
- Access: Remove the belt guard fender and belt cover to access the V-belt system.
- Tension: Ensure the belt drive system is under spring tension, which is crucial for efficient operation and belt longevity.
Troubleshooting Guide:
The manual includes a detailed troubleshooting section to help users diagnose and resolve common issues. This table lists potential problems, their probable causes, and recommended solutions:
| Problem | Solution To be continued...