7
Assembling the Overhead Beater cont’d
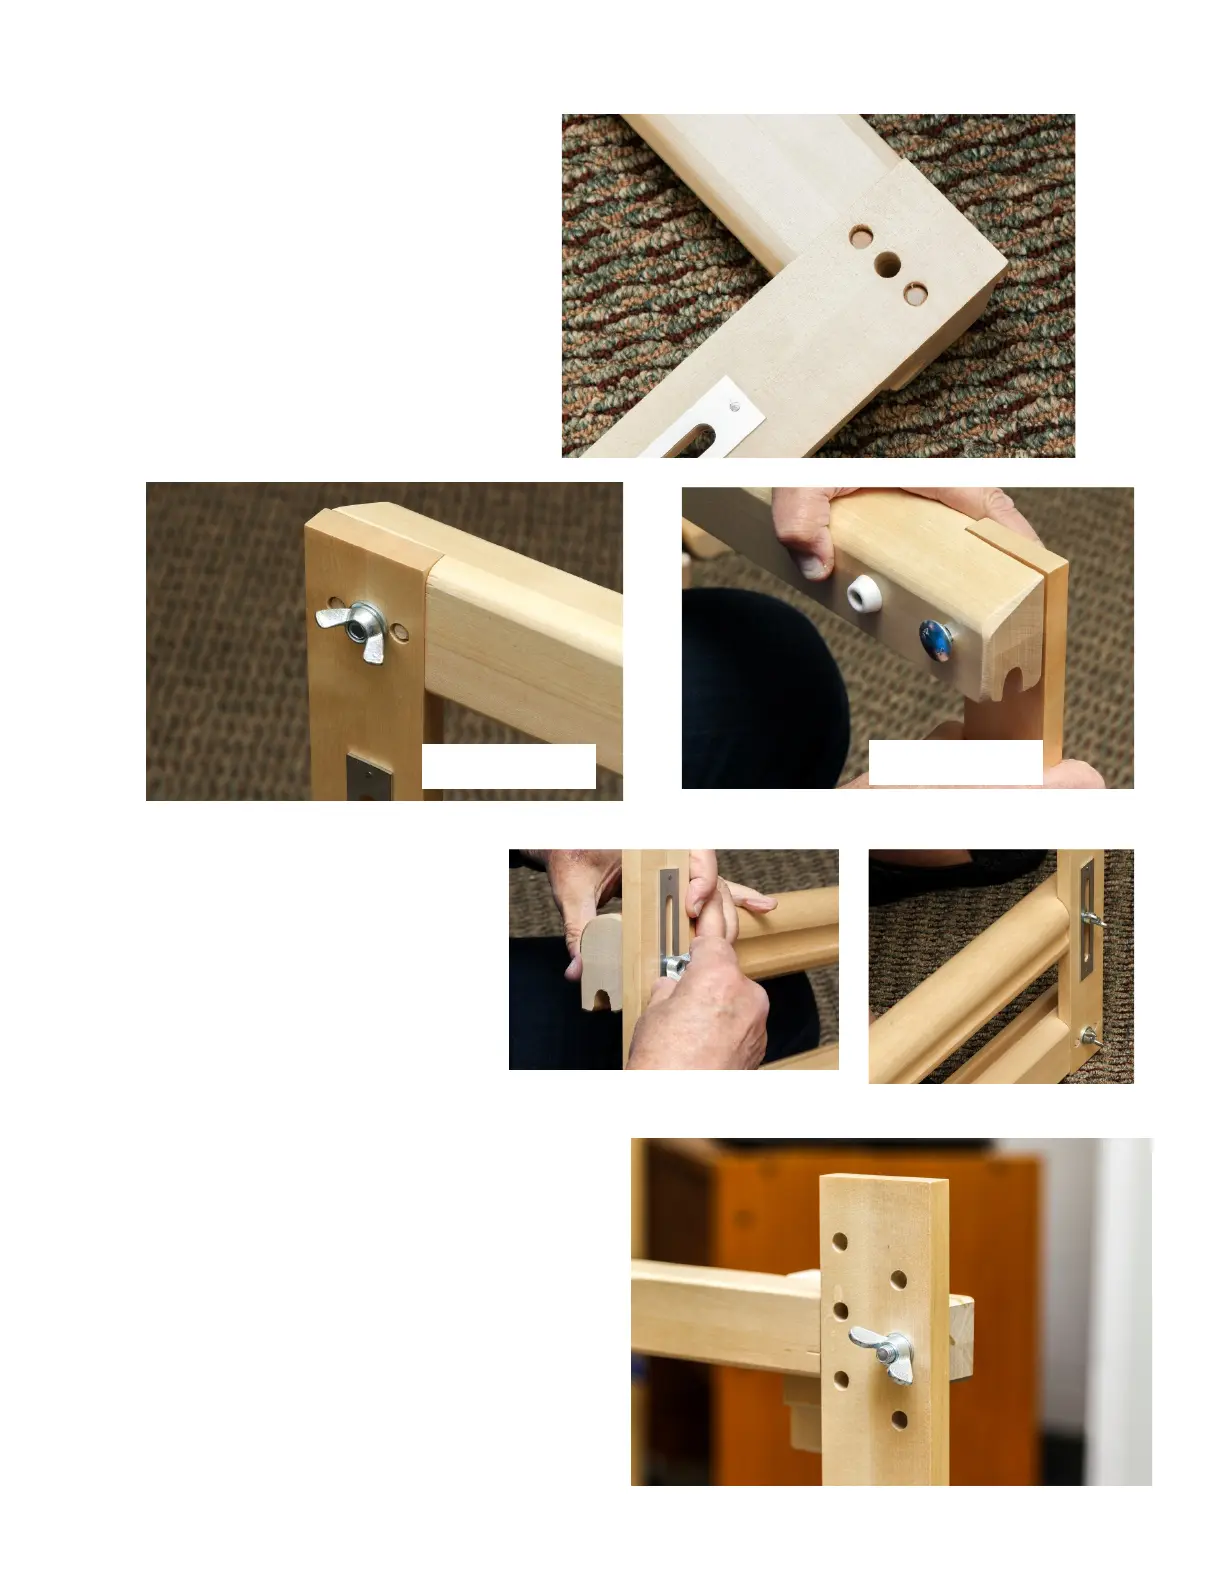
Aach the beater boom to the sides by
lining up the dowels on the beater boom
with the holes on the side piece. Note that
the rubber bumpers on the beater face
forward and the metal slides on the side
pieces face the back. Tap the side piece to
push onto the dowels. Fasten with a long
bolt and wingnut—the wingnut should be
on the back side.
Back side
Front side
Aach the beater cap to the sides with
bolts and wingnuts, fastening near the
top of the metal slides with the
wingnuts facing the back. The cap can
be moved up and down to accommo-
date dierent height reeds.
The top connector aaches to the side pieces with
bolts and wingnuts (wingnuts can face either front
or back). We recommend using the 2nd or 3rd hole
down to start, then adjusng as needed once you
have your rst warp on. (see ‘Leveling the rst
warp’ on page 13).


 To Next Page
 Loading...