Checking and Filling Fuel
Engine Oil Change
OPERATING INSTRUCTIONS
14
TO PREVENT SERIOUS INJURY FROM FIRE:
Fill the fuel tank in a well-ventilated area away from ignition sources. If the engine is hot from use, shut
the engine off and wait for it to cool before adding fuel. Do not smoke.
1. Clean the Fuel Cap and the area around it.
2. Unscrew and remove the Fuel Cap.
Note: Do not use gasoline containing more than 10% ethanol (E10). Do not use E85 ethanol.
Note: Do not use gasoline that has been stored in a metal fuel container or a dirty fuel container. It can
cause particles to enter the carburetor, effecting engine performance and/or causing damage.
3. If needed, fill the Fuel Tank to about 1 inch under the fill neck with 87 octane or higher unleaded
gasoline that has been treated with a fuel stabilizer additive. Follow fuel stabilizer manufacturer’s
recommendations for use.
4. Replace the Fuel Cap.
5. Wipe up any spilled fuel and allow excess to evaporate before starting engine. To prevent FIRE, do
not start the engine while the smell of fuel hangs in the air.
CAUTION! Oil is very hot during operation and can cause burns. Wait for engine to cool before changing oil.
1. Make sure the engine is stopped and is level.
2. Close the Fuel Valve.
3. Place a drain pan (not included) underneath the crankcase’s drain plug.
4. Remove the drain plug and, if possible, tilt the crankcase slightly to help drain the oil out. Recycle used oil.
5. Replace the drain plug and tighten it.
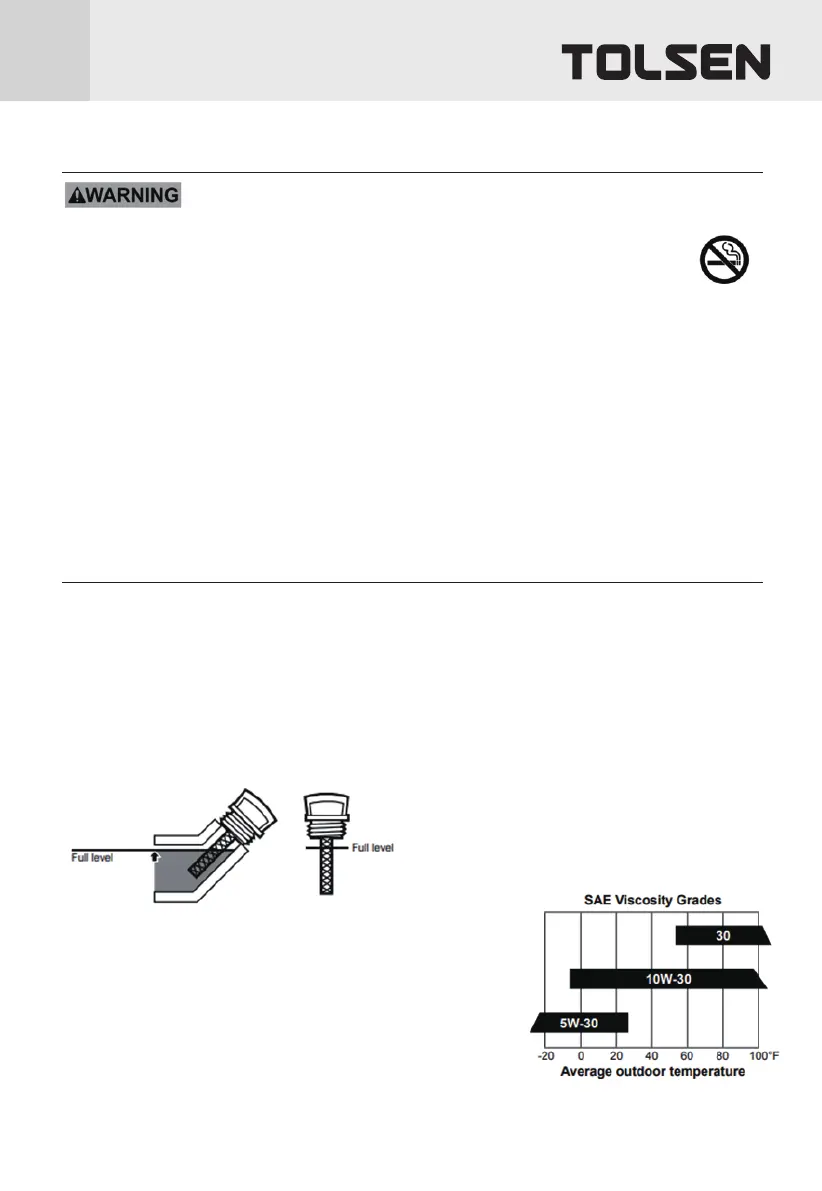
6. Clean the top of the Dipstick and the area around it. Remove the Dipstick by threading it
counterclockwise, and wipe it off with a clean lint free rag.
7. Add the appropriate type of oil until the oil level is at the full level.
SAE 10W-30 oil is recommended for
general use.
The SAE Viscosity Grade chart shows other viscosities to use in
different average temperatures.
NOTICE: Do not run the engine with too little oil.
Engine will not start with low or no engine oil.