EN - 12
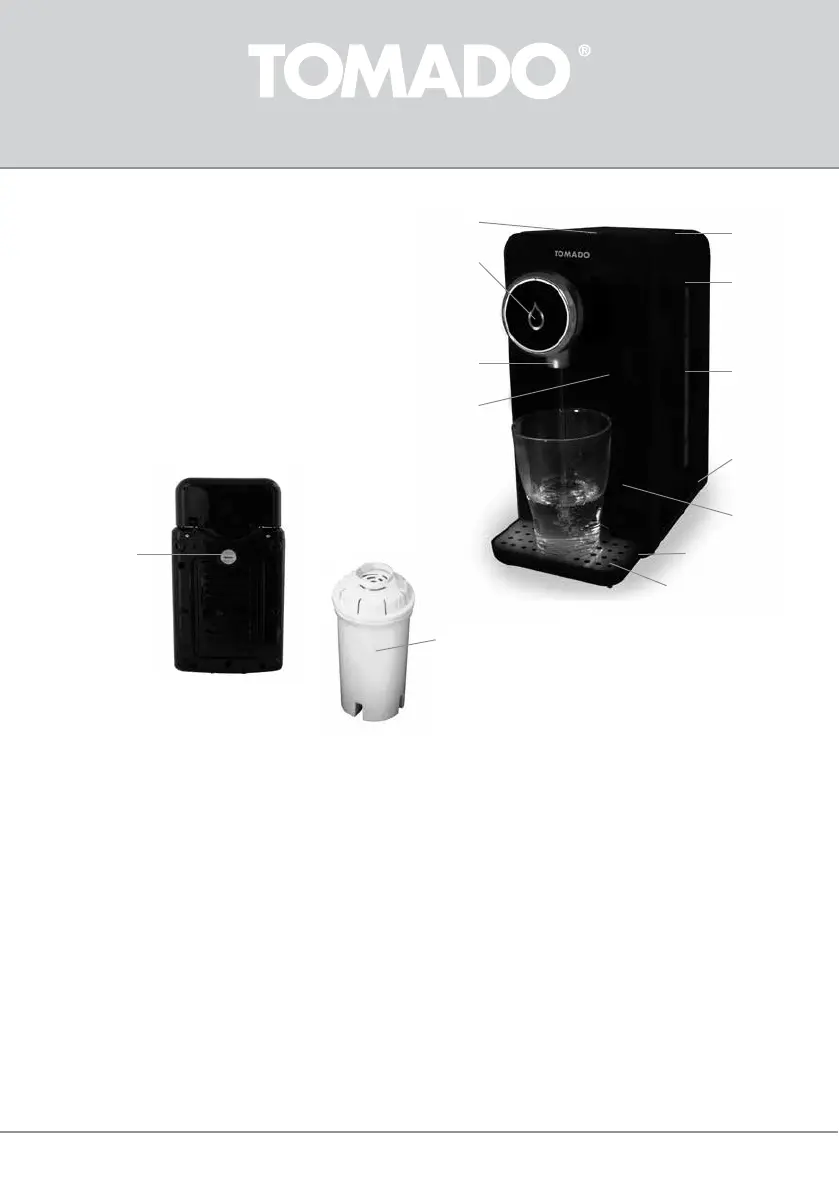
PRODUCT DESCRIPTION
1
2
10
11
3
4
5
6
7
8
9
1. ON/OFF buon with indicator led
2. Extra indicator led (blue/green)
3. Lid
4. Water reservoir
5. Water level indicator
6. Boom plate
7. Drip tray height adjustment
8. Drip tray
9. Cup grille
10. Water outlet
11. Reset buon (top right in the recess at the front)
12. Rubber cap for water drain (boom side)
13. Water lter
12
13
PRIOR TO FIRST USE
Before using the hot water dispenser for the rst me, proceed as follows: carefully unpack the appliance and remove all
packaging material as well as any promoonal sckers. Keep the packaging (plasc bags and cardboard) out of reach of children.
Aer unpacking the appliance, carefully check it for external damage that may have occurred during transport.
Place the hot water dispenser on a at, heat-resistant surface.
Check that the voltage stated on the informaon plate matches the voltage used in your region. Insert the plug of the hot water
dispenser in a suitable wall socket.
Cauon: This appliance does not have a separate switch that allows you to switch the power supply to the appliance on or o.
When the plug is in the socket, the appliance is connected directly to the mains voltage and ready for use. Always rst remove
the plug from the socket and allow the appliance to cool before cleaning it or performing maintenance.
Placingthedriptray
The drip tray can be snapped in place in two posions. The top posion is for cups and glasses. The boom posion is for large
mugs and jugs. First, snap the drip tray in place in the boom posion, to be able to rinse the appliance more easily.