Notice Ecotop - Page 10 - Pilatus B4 (2 mètres)
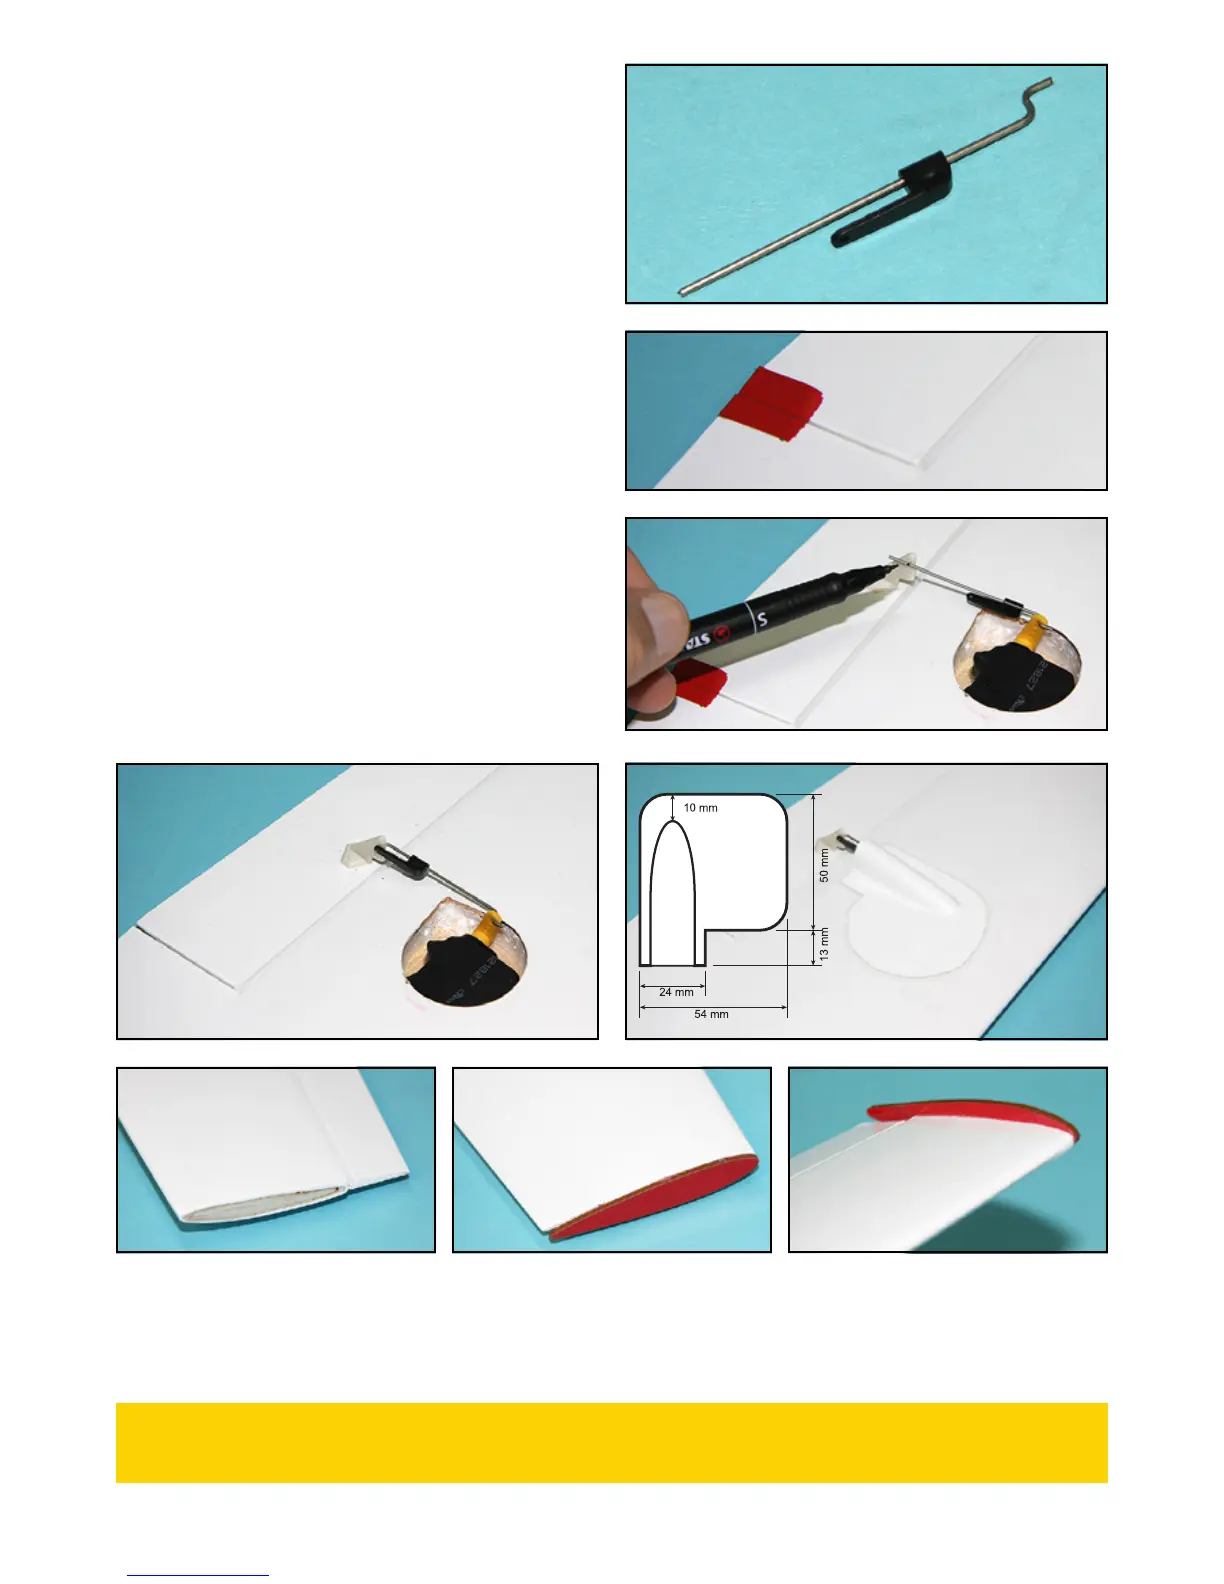
15) Enfilez un connecteur rapide sur la commande d'aileron
comme représenté.
Slide a quick snap lock on the aileron linkage as shown.
16) Bloquez l'aileron au neutre à l'aide d'un morceau de ruban
adhésif.
Using tape, set the aileron to neutral.
17) Insérez le pli en Z de la commande dans le trou extérieur
du palonnier de servo. Tracez une marque sur la commande en
face des trous du guignol.
Insert the Z bend of the aileron linkage in the outer hole of
the servo arm. Use a felt pen to mark the linkage in front of
the holes of the control horn.
18) Avec une pince plate, pliez la commande au niveau de la
marque. Insérez le pli dans le guignol. Verrouillez la commande
à l'aide du raccord rapide.
Using flat nose pliers, bend the end of the linkage on the mark.
Insert the end of the linkage in the control horn. Secure the
linkage with the quick snap lock.
19) Découpez le cache servo suivant les besoins et scotchez-le
au-dessus du servo.
Cut the servo cover as needed, then, tape it over the servo.
20) Découpez l'entoilage pour dégager le bois de la nervure marginale. Collez ensuite le saumon à l'époxy, affleurant à l'extrados.
Il déborde à l'intrados, et forme ainsi un patin de protection à l'atterrissage.
Cut the covering on the wing tip rib. Then, use epoxy to secure the wing tip, flush with the upper side of the wing. At bottom
side, the wing tip protrudes, so it makes a skid and protect the wing during landings.
MONTAGE DE L'AILE GAUCHE
LEFT WING ASSEMBLY
Répétez les opérations 1 à 20 pour l'aile gauche.
Repeat steps 1-20 for the left wing.