3
PLACING THE TOOL IN SERVICE
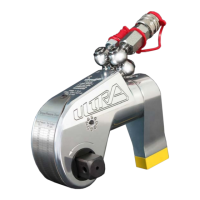
CONNECTING THE TOOL
1. Attach the twin line hose to the swivel inlets of the square drive torque wrench using the
spring–loaded quick connect ends.
2. Connect the opposite ends of the hose to the pump in the same manner.
ADJUSTMENTS
SETTING THE SQUARE DRIVE FOR ROTATION
The position of the square drive when looking toward the shroud will determine if the tool is
set to tighten or loosen the nut. When the square drive extends to the left (when looking at
the shroud with the inlets away from you), the tool is set to loosen the nut. When the square
drive extends to the right, the tool is set to tighten the nut. To change the direction of rotation
for models TU-2 TU-3, TU-7 and TU-11 simply push the square drive into the housing until the
drive projects out the opposite side of the tool. For models TU-5, TU-20, TU-27 and
TU-60, loosen and remove the square drive retaining knob and pull the square drive out of the
housing. Insert the square drive into the opposite side of the housing and secure it by install-
ing the knob in the splined end of the drive.
SETTING THE TORQUE
Afterdeterminingthedesiredtorque,usethecalibrationcerticateprovidedwiththetoolto
determine the pressure necessary to achieve that torque. You may also refer to the chart en-
graved on the shroud of the tool or the charts provided on pages 9-16 of this manual.
1. Connect the tool to the power supply and turn the pump on.
2. Depress the remote control button causing the pressure to be shown on the gauge.
3. Adjust the pressure by loosening the wing nut that locks the pressure adjustment thumb
screw. Rotate the thumbscrew clockwise to increase the pressure and counterclockwise to
decrease the pressure. When decreasing pressure, always lower the pressure below the
desired point and then bring the gauge back up to the desired pressure.
4. When the desired pressure is reached, retighten the wing nut and cycle the tool again to
conrmthatthedesiredpressuresettinghasbeenobtained.
 Loading...