5
OPERATING THE WRENCH
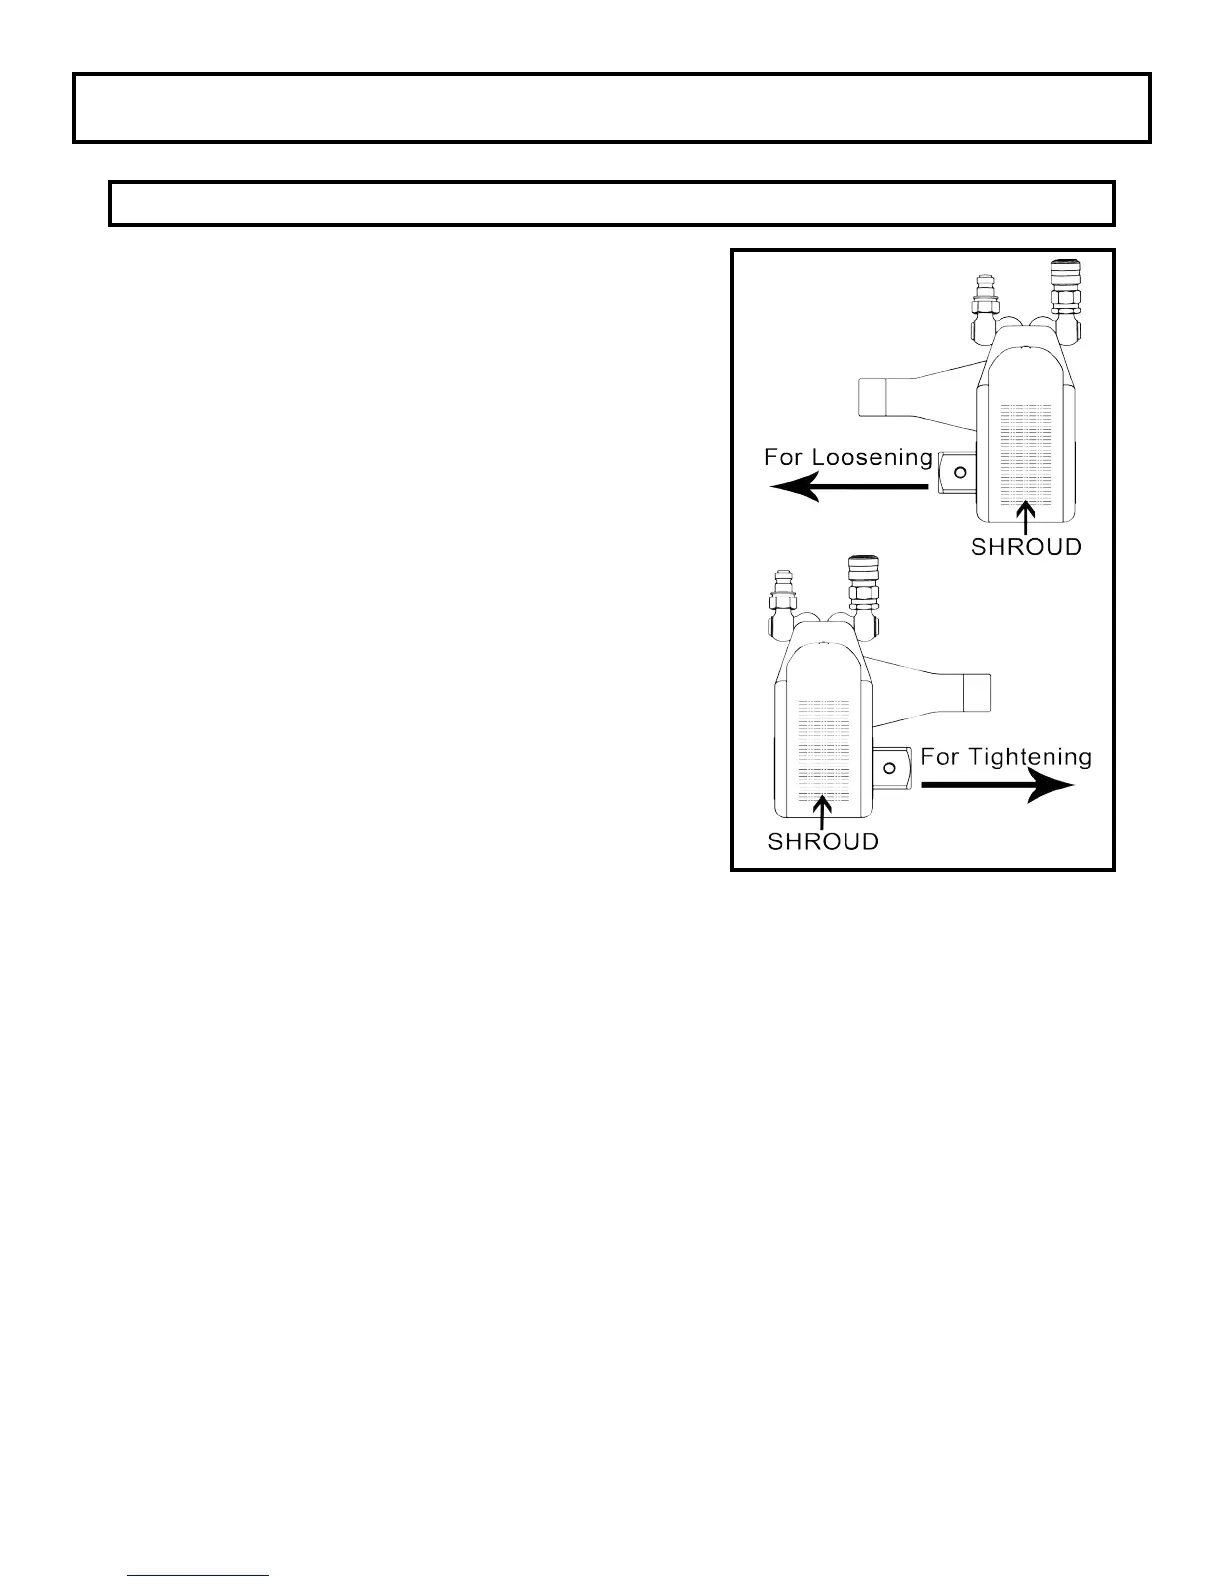
The position of the square drive relative to the shroud
determines whether the action will tighten or loosen the
nut. (Refer to Dwg. 02 for application examples).
The power stroke of the piston assembly will always
turn the square drive toward the shroud.
1. Insert the square drive into the mating socket. Then,
insert the safety pin through the socket and seat the
included O-ring into the groove to capture the pin.
Place the socket onto the nut making sure the socket
is the proper size and that all mating parts are fully
seated.
2. Position the reaction arm or surface against an
adjacentnut,angeorsolidsystemcomponent.Make
certain that there is clearance for the hoses, swivels,
inlets and end plug. DO NOT allow the tool to react
against the hoses, swivels, inlets or end plug.
3. After turning the pump on and presetting the
pressure for the correct torque, depress the remote control button to advance the piston
assembly.
4. Once the wrench is started, the reaction surface of the wrench or reaction arm will move
against the contact point and the nut will begin to turn.
5. When the nut is no longer turning and the pump gauge reaches the preset pressure,
release the remote control button. The piston rod will retract when the button is released.
Under normal conditions, an audible “click” will be heard as the tool resets itself.
6. Continue to cycle the tool until it “stalls” and the preset psi/torque has been attained.
7. Cycle the tool one additional time to ensure full torque.
Square Drive Position for Loosening and Tightening (Dwg.02)
(Dwg. 02)