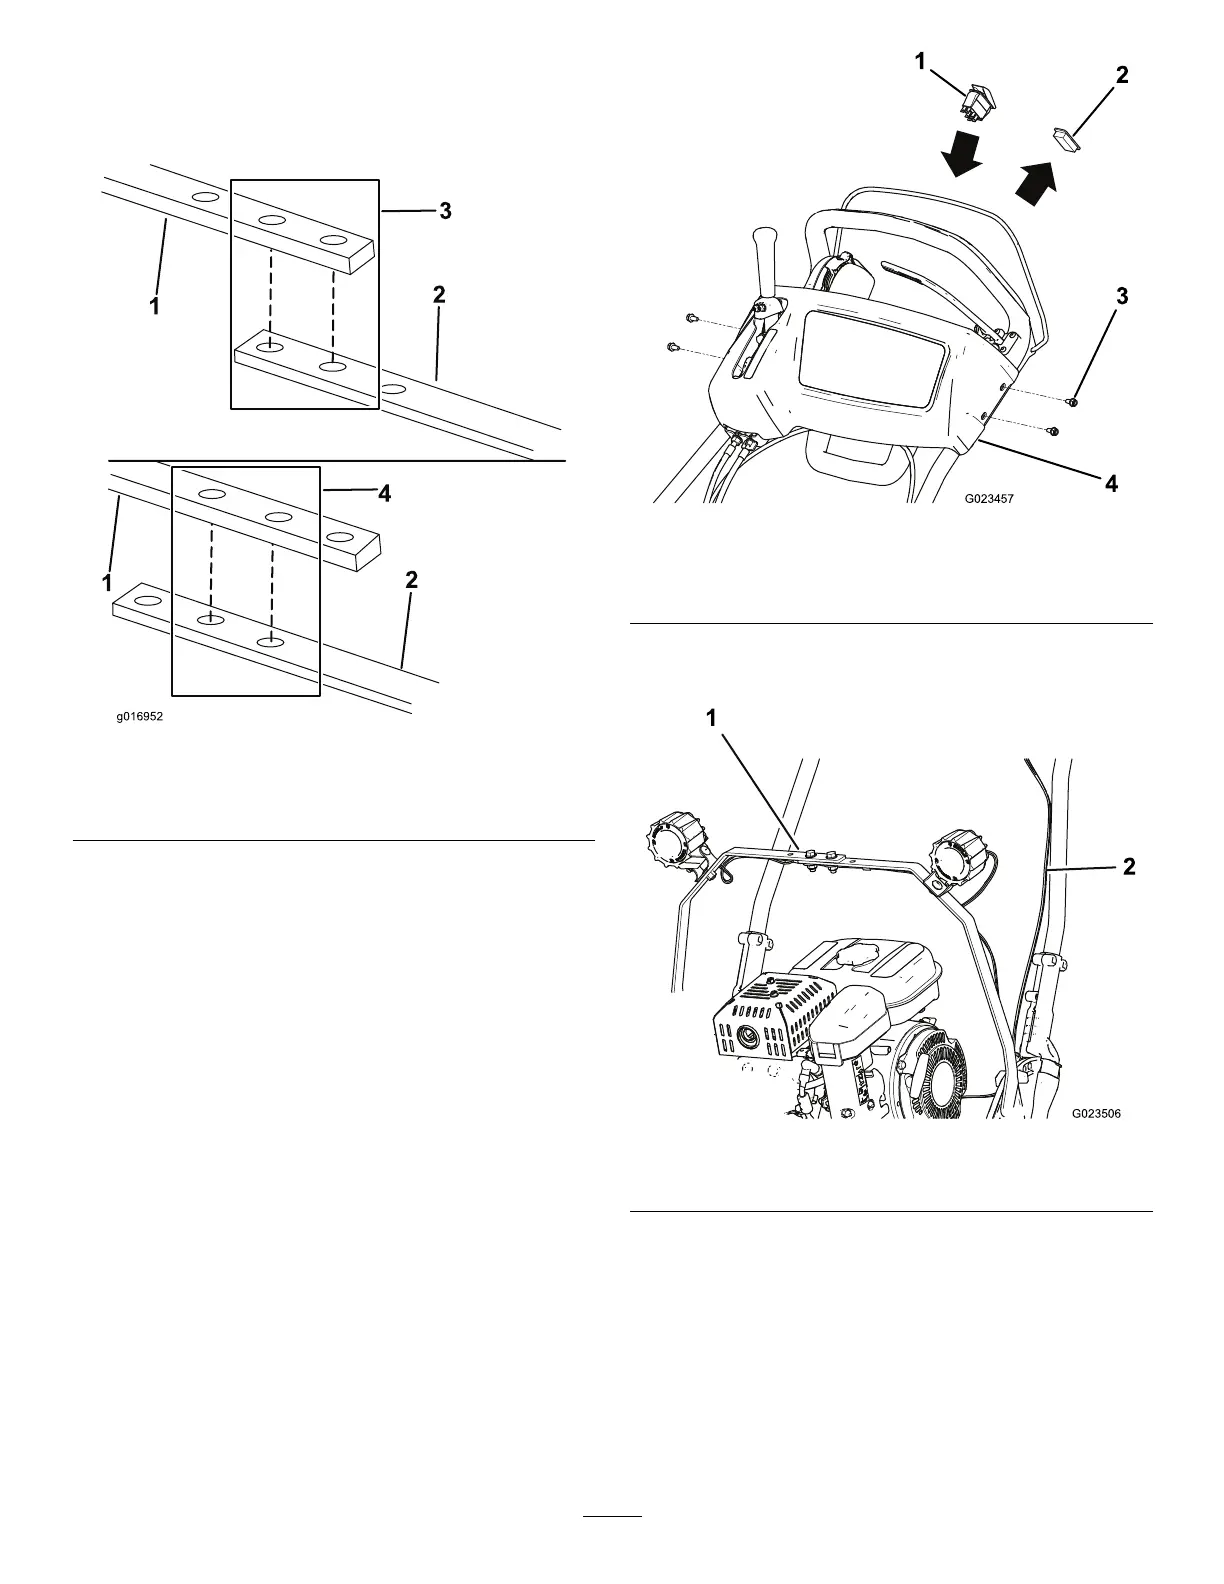
3.Securethetwobarstogetherusing2bolts(5/16x
1inch),2washers,and2angenuts(Figure1and
Figure2).Alignthebarholesfor18or21inchwide
mowers.
Figure2
1.Rightbar3.21inchalignment
2.Leftbar
4.18inchalignment
4.MounttheLEDlightstothebarsusingthehardware
suppliedwiththelights(Figure1).
5.Removethe(4)screwssecuringtheconsolecoverto
thehandleandremovethecover(Figure3).Retain
thecoverandscrews.
6.Removetheholeplugfromthecontrolpanel
(
Figure3).
7.InserttheOn/Offswitchintotheholeinthe
controlpanel,positioningitsothethinnerendis
towardthebottomofthecontrolpanel(
Figure3).
Figure3
1.On/Offswitch3.Screws(4)
2.Holeplug
4.Consolecover
8.RoutetheLEDwireharnessdowntheLHsideofthe
handleandacrossthelightbarasshowninFigure4.
Figure4
1.Lightbar2.Wireharness
9.Plugthewireharnessconnectorsintothelights
(Figure4).
10.Connectthewireharnessasfollows:
•Ongasmodels
A.Plugthepowersupplywireharnessconnector
intotheOn/Offswitch.
B.Plugthepowersupplywireharnessconnector
intotheconnectoronLEDlightwireharness.
3
 Loading...