Note:Max.ll:0.55L(0.58qtor18.6oz),type:SAE
30detergentoilwithanAPIserviceclassicationof
SF,SG,SH,SJ,SL,orhigher.
7.Waitabout3minutesfortheoiltosettleinthe
crankcase.
8.Wipethedipstickcleanwithacleancloth.
9.Insertthedipstickintotheoil-lltube(butdonot
screwitin),thenremovethedipstick.
10.Readtheoillevelonthedipstick(Figure20).
•Iftheoillevelislow ,slowlypourasmallamountof
oilintotheoil-lltubeandrepeatsteps8through
10untiltheoillevelonthedipstickiscorrect.
•Iftheoillevelishigh,draintheexcessoiluntilthe
oillevelonthedipstickiscorrect.
Important:Iftheoillevelinthecrankcaseistoo
lowortoohighandyouruntheengine,youmay
damagetheengine.
11.Installthedipsticksecurely.
12.Recycletheusedoilproperly.
ReplacingtheBlade
ServiceInterval:Yearly
Important:
Y ou will need a torque wr ench to install the
blade pr oper l y
.Ifyoudonothaveatorquewrenchor
areuncomfortableperformingthisprocedure,contact
anAuthorizedServiceDealer.
Examinethebladewheneveryourunoutofgasoline.Ifthe
bladeisdamagedorcracked,replaceitimmediately.Ifthe
bladeedgeisdullornicked,haveitsharpenedandbalanced,
orreplaceit.
WARNING
Thebladeissharp;contactingthebladecanresult
inseriouspersonalinjury.
Weargloveswhenservicingtheblade.
1.RefertoPreparingforMaintenance(page13).
2.Tipthemachineeitherontoitssidewiththedipstick
down.
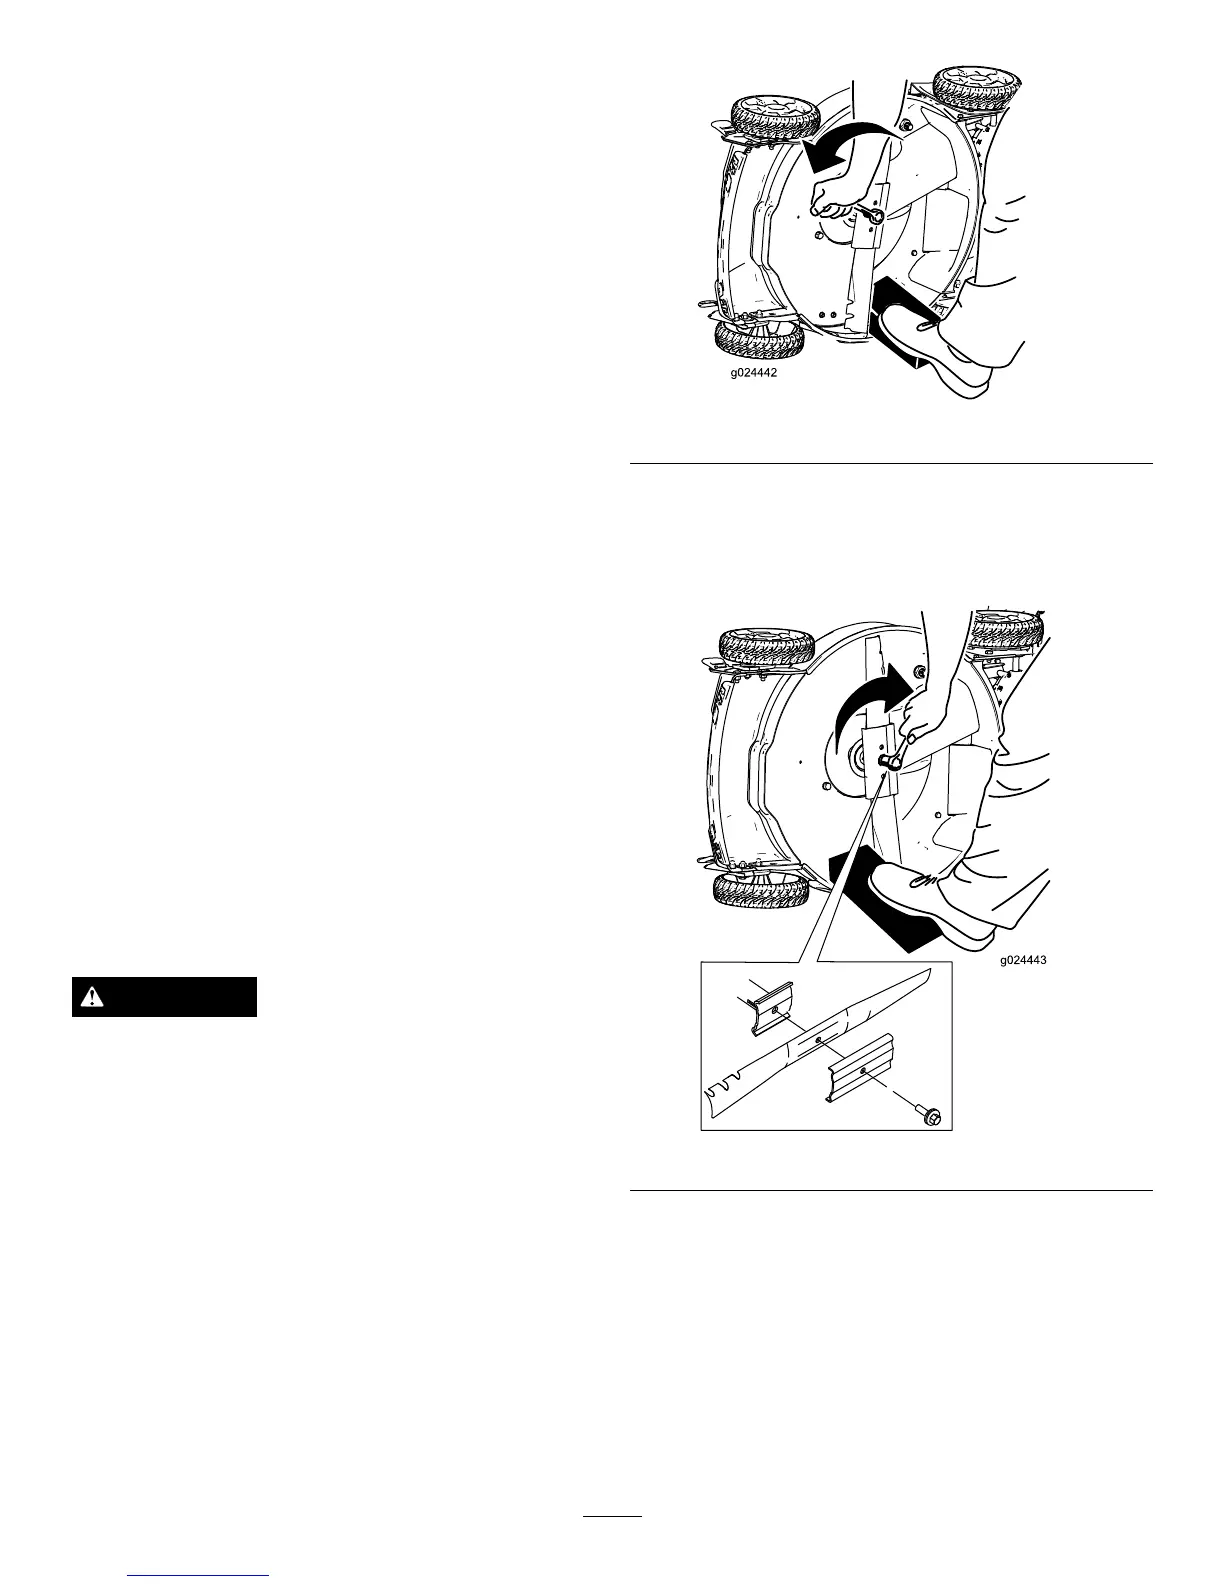
3.Useablockofwoodtoholdthebladesteady(Figure
22).
Figure22
4.Removetheblade,savingallmountinghardware
(Figure22).
5.Installthenewbladeandallmountinghardware
(Figure23).
Figure23
Important:Positionthecurvedendsoftheblade
topointtowardthemachinehousing.
6.Useatorquewrenchtotightenthebladeboltto
82N-m(60ft-lb).
Important:Abolttorquedto82N-m(60ft-lb)is
verytight.Whileholdingthebladewithablock
ofwood,putyourweightbehindtheratchetor
wrenchandtightentheboltsecurely.Thisboltis
verydifculttoovertighten.
15