10
SET-UP INSTRUCTIONS
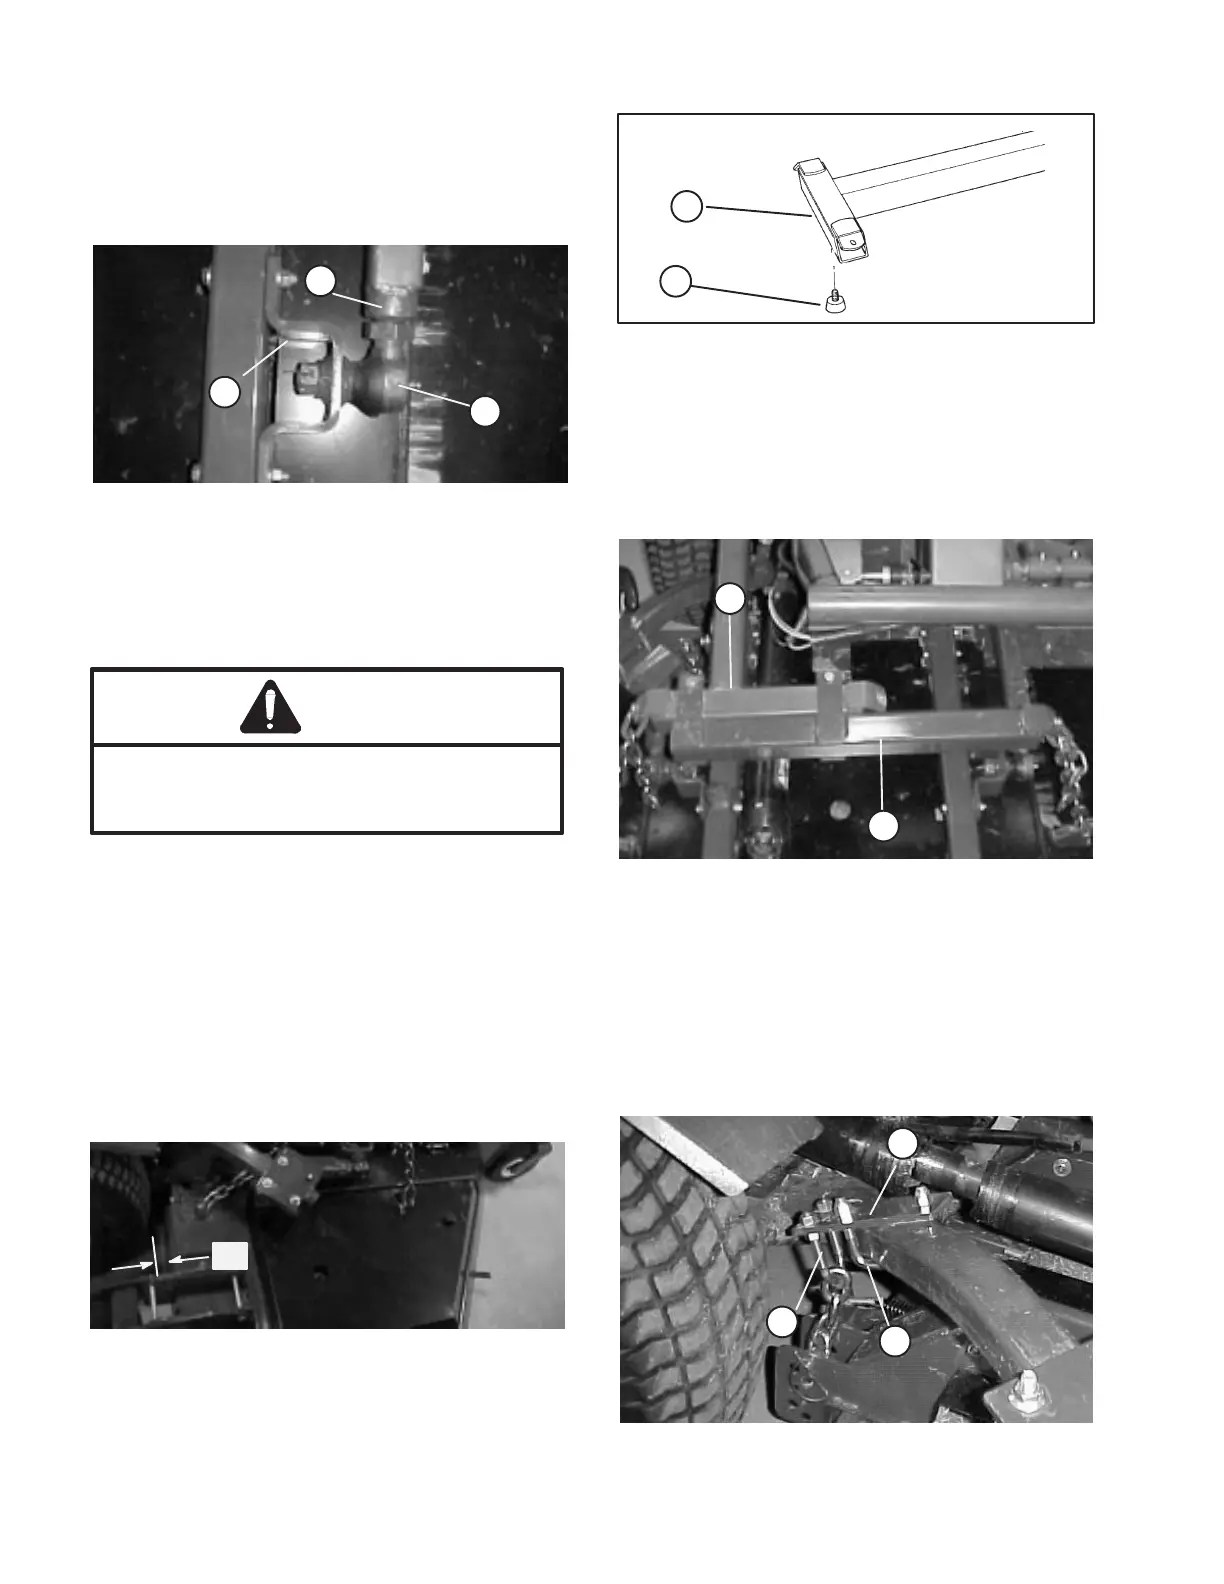
3. Remove (2) flange head capscrews and flange
nuts securing left hand ball joint mount to castor arm.
Remove ball joint mount from castor arm.
4. Install ball joint to left hand ball joint mount with a
castle nut and cotter pin.
Figure 8
1. L.H. Push Arm
2. Ball joint
3. Ball Joint Mount
1
2
3
5. Have a helper carefully push down on the push
arm until holes in ball joint mount line up with holes in
castor arm. Immediately slide a 4 x 4 in. block of wood
between top of push arm and underside of chassis.
Make sure the wooden block does not slip out
accidentally. Sudden release of the push arm
could cause injury.
WARNING
6. Secure ball joint mount to castor arm with flange
head capscrews and flange nuts previously removed.
Note: Flange head capscrew heads to be positioned
on inside of castor arm.
7. Tighten large jam nut securing ball joint to push
arm. When tightening jam nut, hold ball joint straight to
permit proper oscillation during raising and lowering of
cutting unit. Carefully remove wood block holding
push arm down.
Note: Position deck so there is a 2" gap between
front of traction unit tires and rear of deck (Fig.).
Figure 9
2"
8. Tighten fasteners securing right push arm adapter
to right push arm.
MOUNT FRONT LIFT ARM (Fig. 10 & 11)
1. Remove rubber bumper from bottom of .traction
T-bar.
Figure 10
1. Traction T-bar
2. Rubber bumper
1
2
2. Slide front lift arm onto traction unit t-bar,
positioning as shown in figure 11.
3. Secure front lift arm to t-bar with with (2)
capscrews and locknuts.
Figure 11
1. Front lift arm
2. Traction unit T-bar
1
2
MOUNT REAR LIFT BRACKET (Fig. 12-)
1. Loosely mount rear lift bracket to right push arm
with square U-bolt, (2) nuts and flange nuts. Bracket
to be positioned on push arm so it is centered and
parallel to castor arm.
Figure 12
1. Lift bracket
2. Square u-bolt
3. U-bolt
1
2
3