Maintenance
Note:Determinetheleftandrightsidesofthemachinefromthenormaloperatingposition.
RecommendedMaintenanceSchedule(s)
MaintenanceService
Interval
MaintenanceProcedure
Afterthersthour
•Checkthecontrolcablebothinitiallyandafterthersthourofoperation;adjustit
ifnecessary.
•Checkforloosefastenersandtightenthemifnecessary.
Yearly
•Checkthecontrolcableandadjustitifnecessary.
•Checkforloosefastenersandtightenthemifnecessary.
•HaveanAuthorizedServiceDealerinspectthesparkplugandreplaceitifnecessary.
•InspecttherotorbladesandhaveanAuthorizedServiceDealerreplacetherotor
bladesandscraperifnecessary.
•HaveanAuthorizedServiceDealerinspectthedrivebeltandreplaceitifnecessary.
Yearlyorbeforestorage
•Preparethesnowthrowerforstorage.
AdjustingtheControlCable
CheckingtheCable
ServiceInterval:Afterthersthour
Yearly—Checkthecontrolcableand
adjustitifnecessary.
Important:Checkthecontrolcableforproper
adjustmentinitially,aftertherstoperatinghour,
andthenannuallythereafter.
1.Movethecontrolbarbacktowardthehandleto
removetheslackinthecable.
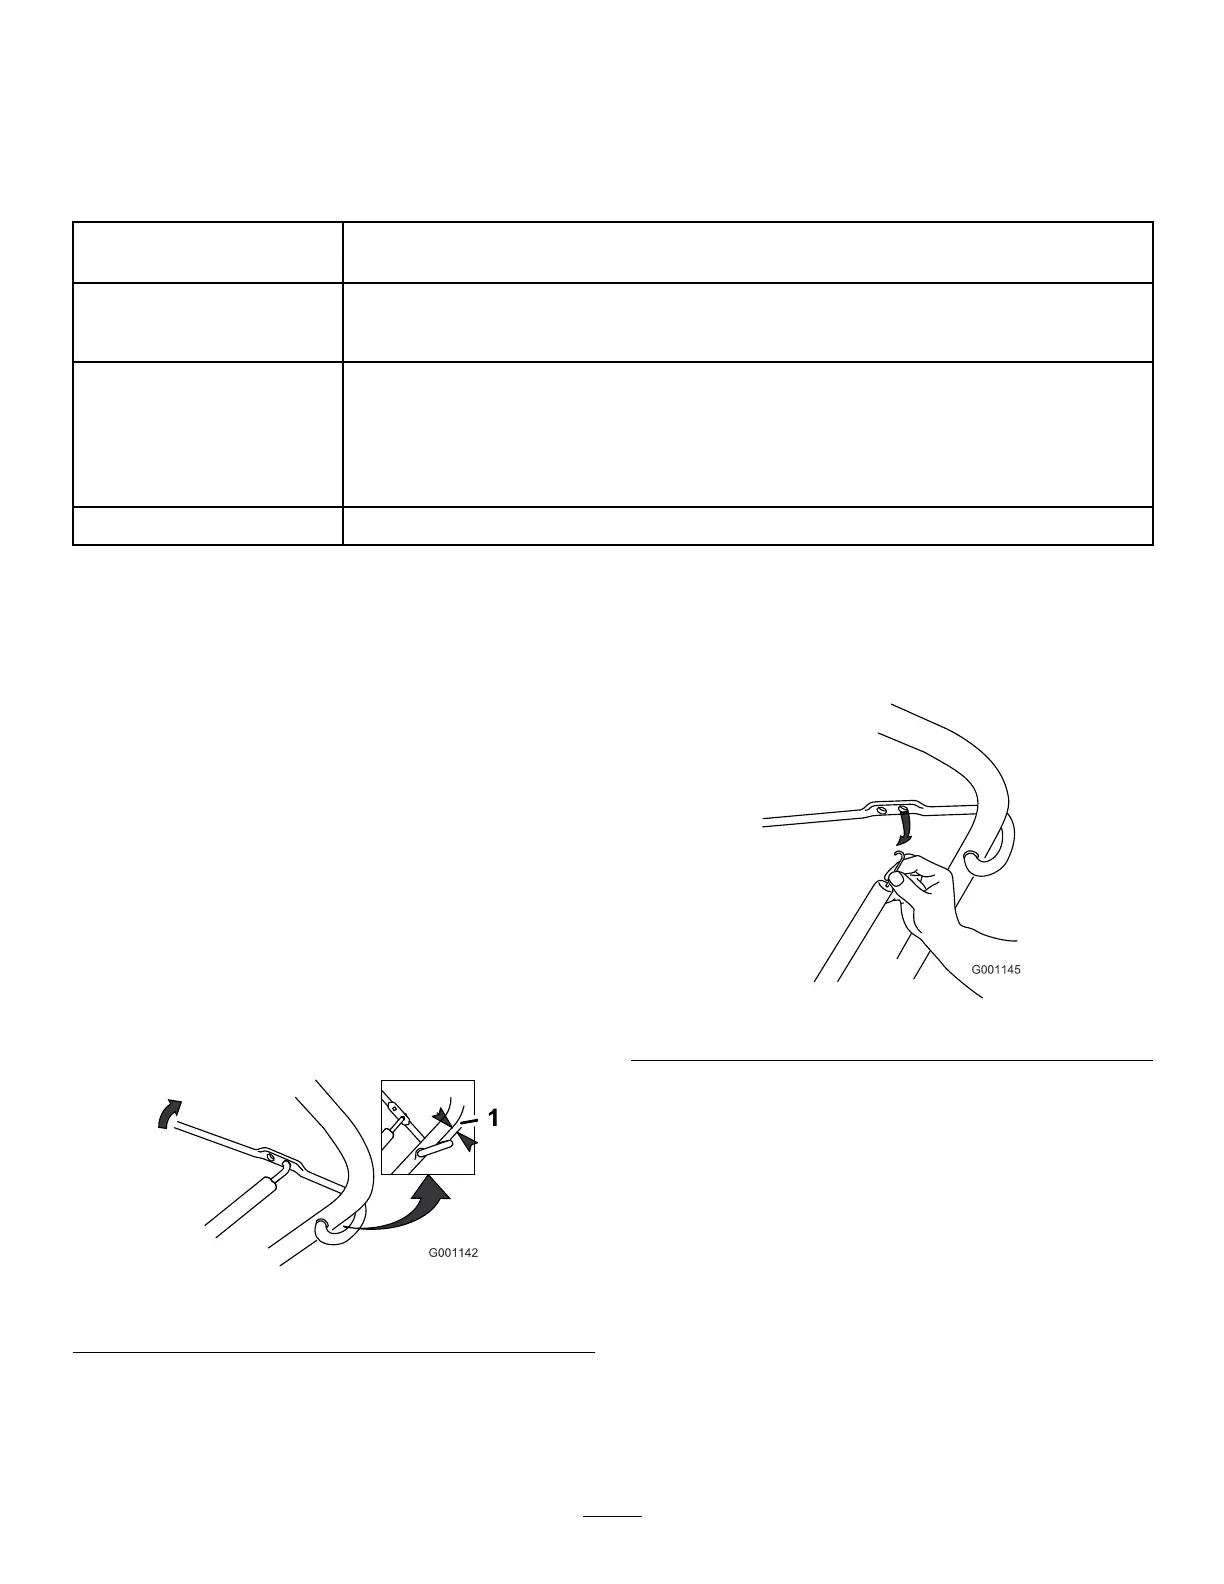
2.Ensurethata1/16to1/8inch(2to3mm)gapexists
betweenthecontrolbarandthehandle(Figure20).
Toadjustthecable,refertoAdjustingtheCable
below .
Figure20
1.1/16to1/8inch(2to3mm)gap
Important:Thecontrolcablemustcontain
someslackwhenyoudisengagethecontrolbar
fortherotorbladestostopproperly.
AdjustingtheCable
1.Unhooktheendofthecontrolcablespringfromthe
controlbar(Figure21).
Figure21
2.MovetheZ-ttingtoahigherorlowerholeonthe
adjusterlinkasneededtoobtainthe1/16to1/8
inch(2to3mm)gapbetweenthecontrolbarand
thehandle(Figure22).
11



 To Next Page