13.Connectthewiretothesparkplug.
Note:Ensurethatthebreathertubeisroutedabove
thespark-plugwireasshowninFigure36.
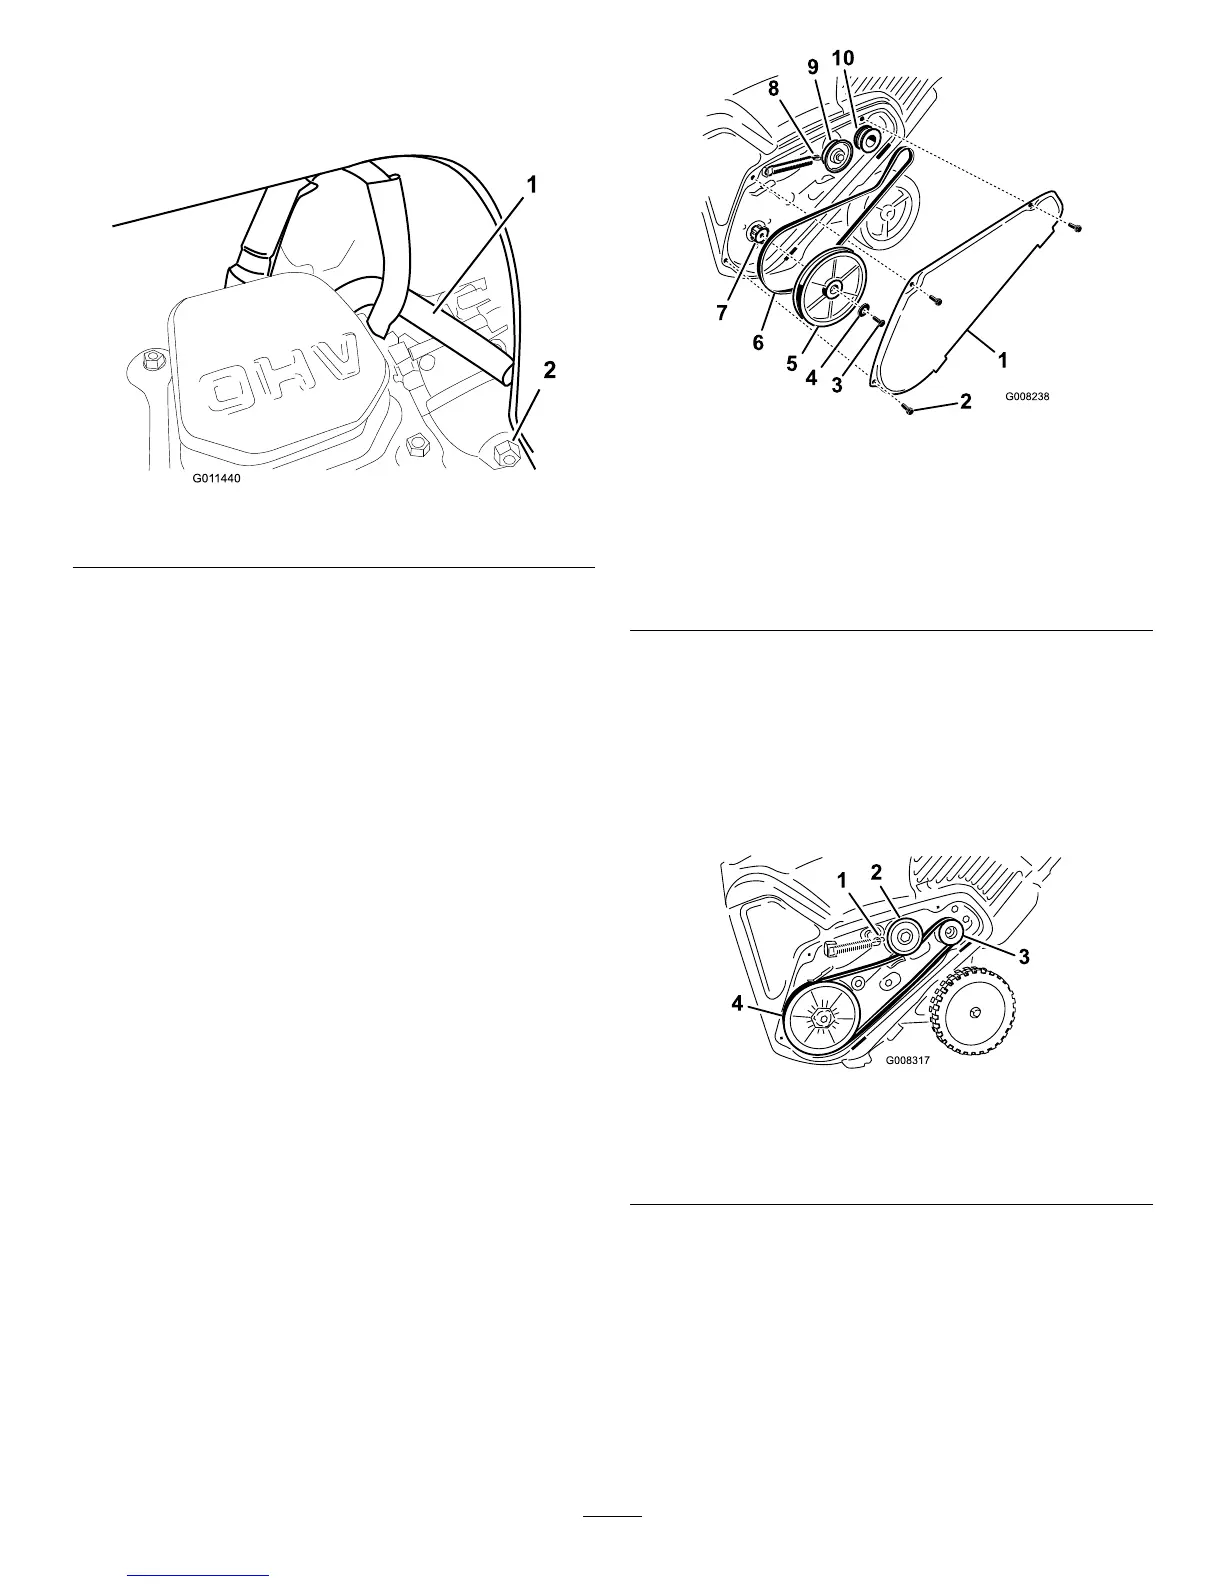
Figure36
1.Breathertube
2.Carburetordrainbolt
14.Removethefuel-tankcap.
15.Installtheshroudwiththescrewsthatyouremoved
instep4.
Note:Ensurethattheupperandlowershroudst
togetherinthesidegrooves.
16.Installthefuel-tankcap.
17.Installthechuteseal,thedischargechute,andthe
dischargechutehandleontothemachineusingthe
hardwarethatyouremovedinstep3.
Note:Thesmallscrewgoesthroughthesmallhole
inthechutesealatthefrontofthedischarge-chute
opening.
ReplacingtheDriveBelt
Ifthedrivebeltbecomesworn,oil-soaked,excessively
cracked,frayed,orotherwisedamaged,replacethebelt.
1.Removethedrivebeltcoverbyremovingthe3boltsas
showninFigure37.
Figure37
1.Drive-beltcover6.Drivebelt
2.Bolt(3)7.Rotorshaft
3.Rotor-pulleybolt
8.Brakespring(unhookfrom
idlerarmhere)
4.Curvedwasher
9.Idlerpulley
5.Rotorpulley10.Enginepulley
2.Unhookthebrakespringfromtheidlerarmtorelease
thebelttension(Figure37).
3.Removethescrewandcurvedwasherthatholdsthe
rotorpulley(Figure37).
4.Removetherotorpulleyandthedrivebelt(Figure37).
5.Installthenewdrivebelt,routingitasshownin(Figure
38).
Figure38
1.Brakespring(installon
idlerarmhere)
3.Enginepulley
2.Idlerpulley4.Rotorpulley
Note:Routethenewdrivebeltrstaroundtheengine
pulley,thentheidlerpulley,andnallyaroundthe
looserotorpulleypositionedjustabovetherotorshaft
(Figure37).
6.Installtherotorpulleyontotherotorshaft(Figure37).
7.Installthecurvedwasherandtherotor-pulleyboltand
tightenthemsecurely(Figure37).
Note:Theconcavesideofthecurvedwashergoes
againsttheoutsideofthepulley.
16