4. Slide the red terminal boot of f the positive (red)
battery terminal and remove the positive (+)
battery cable ( Figure 44 ).
5. Remove the wing nuts securing the J-hooks
( Figure 44 ).
6. Remove the clamp ( Figure 44 ).
7. Remove the battery .
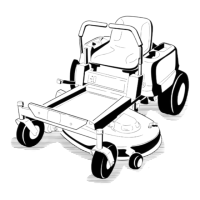
g025144
Figure 44
1. Negative (black) battery
cable
4. Clamp
2. Wing nut
5. Positive (red) battery cable
3. J-hook
Charging the Battery
W ARNING
Charging the battery produces gasses that
can explode.
Never smoke near the battery and keep sparks
and ames away from the battery .
Important: Always keep the battery fully charged
(1.265 specic gravity). This is especially
important to prevent battery damage when the
temperature is below 0°C (32°F).
1. Remove the battery from the chassis; refer to
Removing the Battery ( page 43 ) .
2. Charge the battery for 10 to 15 minutes at 25 to
30 A or for 30 minutes at 10 A.
Note: Do not overcharge the battery .
3. When the battery is fully charged, unplug
the charger from the electrical outlet, then
disconnect the charger leads from the battery
posts ( Figure 45 ).
4. Install the battery in the machine and connect
the battery cables; refer to Installing the Battery
( page 44 ) .
Note: Do not run the machine with the battery
disconnected; electrical damage may occur .
g000960
Figure 45
1. Positive (+) battery post 3. Red (+) charger lead
2. Negative (–) battery post 4. Black (–) charger lead
Installing the Battery
1. Position the battery in the tray with the terminal
posts opposite from the hydraulic tank ( Figure
44 ).
2. Install the positive (red) battery cable to the
positive (+) battery terminal.
3. Install the negative (black) battery cable and
ground wire to the negative (-) battery terminal.
4. Secure the cables with 2 bolts, 2 washers, and
2 locknuts ( Figure 44 ).
5. Slide the red terminal boot onto the positive
(red) battery post.
6. Install the clamp and secure it with the wing nuts
and J-hooks ( Figure 44 ).
Servicing the Fuses
The electrical system is protected by fuses. It requires
no maintenance; however , if a fuse blows check the
component/circuit for a malfunction or short.
1. The fuses are located on right side behind the
seat.
2. T o replace the fuses, pull out on the fuse to
remove it.
3. Install a new fuse.
44

 Loading...