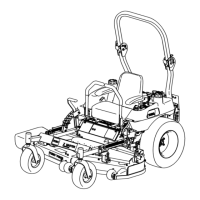
Figure 24
1. Oil lter 2. Adapter
4. Install the re placement oil filter to the adapter .
T ur n the oil filter cloc kwise until the r ubber
g ask et contacts the filter adapter , then tighten
the filter an additional 3/4 tur n ( Figure 24 ).
5. Fill the crankcase with the proper type of new
oil; refer to Changing and Draining the Oil.
Servicing the Air Cleaner
F oam Element: Clean and oil after ev er y
25 operating hours .
P aper Element: Clean after ev er y 100 operating
hours . R e place after ev er y 200 operating hours or
yearly , whic hev er comes first.
Note: Ser vice the air cleaner more frequently
(ev er y few hours) if operating conditions are
extremely dusty or sandy .
Removing the Foam and Paper
Elements
1. Diseng ag e the PTO and mo v e the control
lev ers to the neutral loc k ed position and apply
the parking brak e .
2. Stop the engine , remo v e the k ey , and w ait for
all mo ving par ts to stop before lea ving the
operating position.
3. Clean around the air cleaner to prev ent dir t
from g etting into the engine and causing
damag e . Unlatc h the tw o side latc hes and
remo v e the air cleaner co v er ( Figure 25 ).
4. Carefully remo v e the foam element from the
paper element ( Figure 25 ).
5. Unscrew the wing n ut and remo v e the paper
element ( Figure 25 ).
Figure 25
1. Cover
4. Wing nut
2. Foam element 5. Air cleaner base
3. Paper element 6. Latches
Cleaning the Foam and Paper
Elements
1. F oam Element
A. W ash the foam element in liquid soap and
w ar m w ater . W hen the element is clean,
rinse it thoroughly .
B . Dr y the element b y squeezing it in a clean
cloth (do not wring). Allo w the element to
air dr y .
C . Soak the element in new engine oil.
( Figure 26 ). Squeeze the element to remo v e
ex cess oil.
Important: R eplace the f oam
element if it is tor n or w or n.
Figure 26
1. Foam element 2. Oil
2. P aper Element
A. Lightly tap the element on a flat surface to
remo v e dust and dir t ( Figure 27 ).
B . Inspect the element for tears , an oily film,
and damag e to the r ubber seal.
24