18
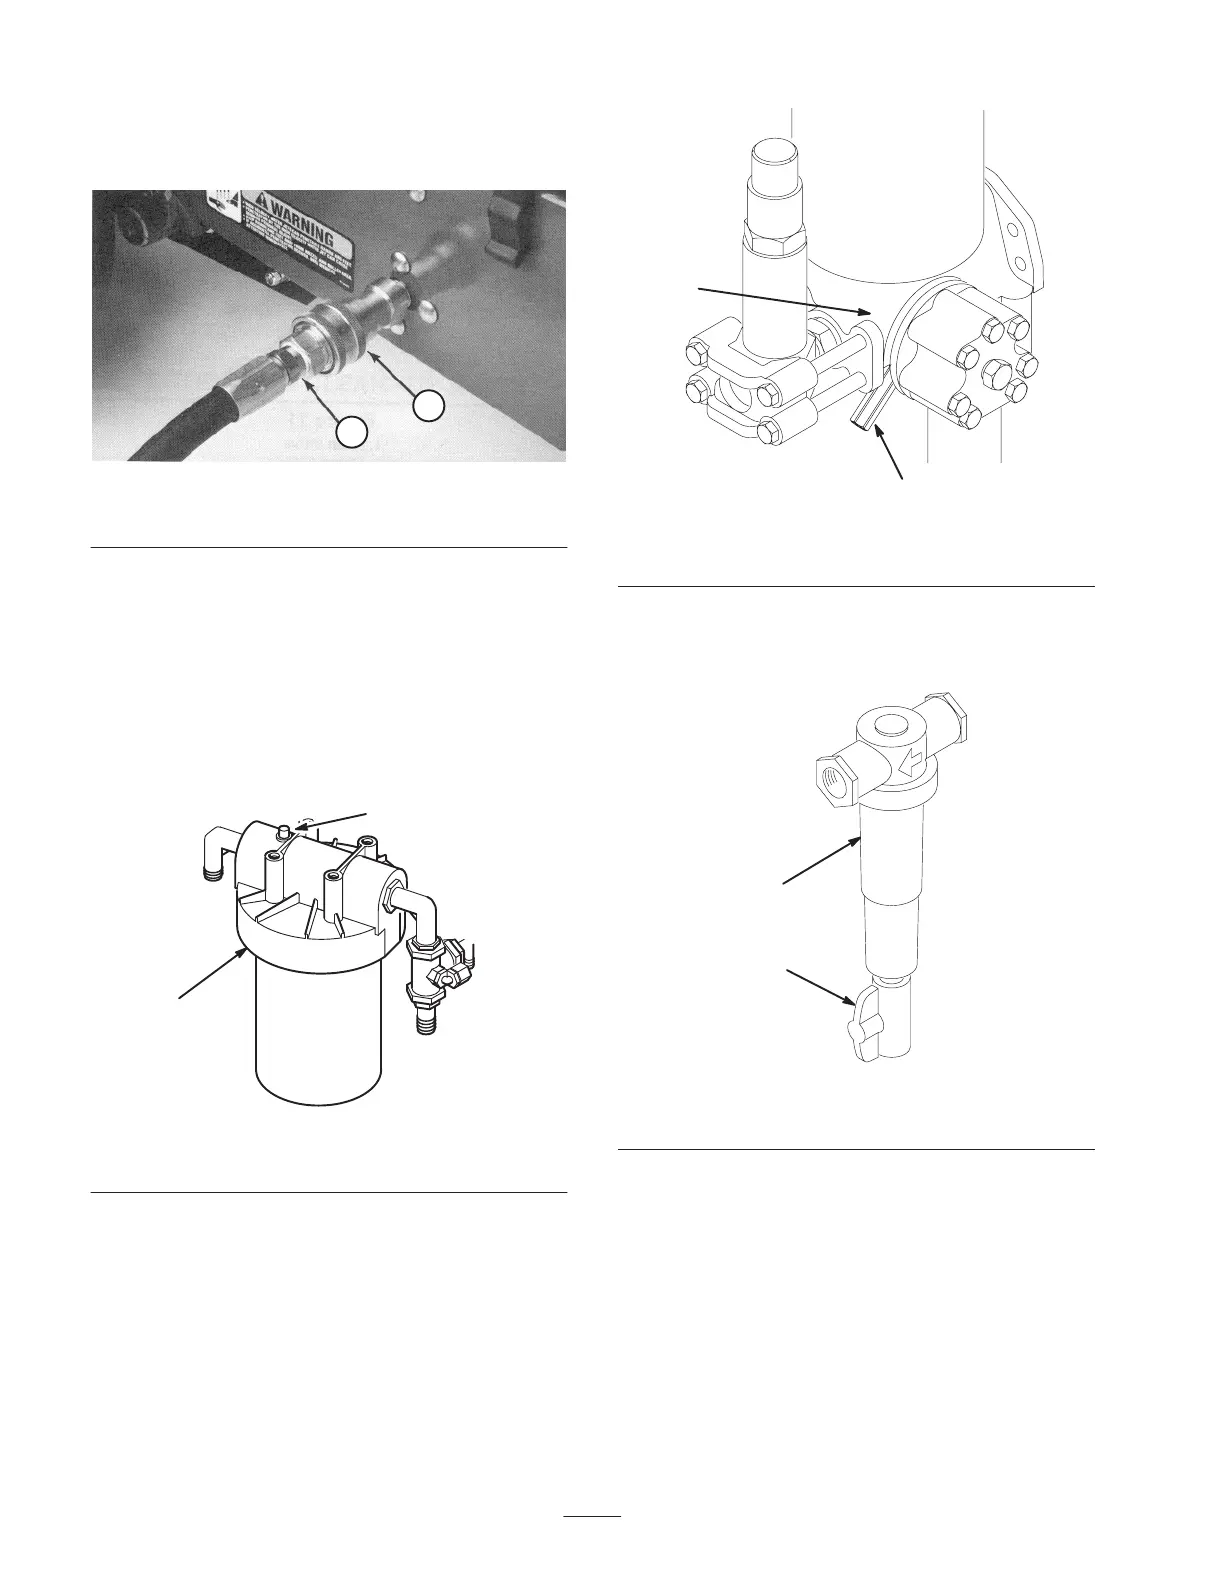
3. Connect the hose adapter (Fig. 9) to the garden hose,
then connect the adapter to the quick coupler on the side
of the machine.
2
1
Figure 9
1. Hose adapter 2. Quick coupler
4. Turn on the water supply and check the water pressure.
The water pressure must be at least 30 p.s.i.. If the
system pressure is not 30 p.s.i., make sure that the hose
is not kinked or obstructed, the water supply is turned
on, and the water filter is not plugged.
5. Reach under the fuel tank and press the bleed button on
top of the water filter head (Fig. 10). Hold the bleed
button down until all air is purged from the filter and
water comes out of the opening.
1
2
Figure 10
1. Main water filter head 2. Bleed button
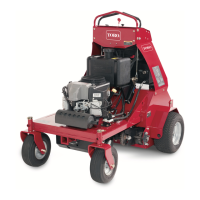
6. Reach under the hood and open the bleed valve on the
main valve at the rear of the machine (Fig. 11). Bleed
the system until a steady flow of water comes from the
outlet; then close the valve.
1
2
Figure 11
1. Main valve 2. Bleed valve
7. If desired, the valve on the pre-filter (Fig. 12) may be
opened slightly (cracked) to provide continuous
flushing during operation of the machine.
1
2
Figure 12
1. Pre-filter 2. Valve
8. Start the engine; refer to Starting and Stopping the
Engine, page 17. Move the throttle to the FAST position
and disengage the parking brake.
9. Engage the traction bail and approach the area to be
aerated. Make sure that there are no obstructions
between the aerator and water supply.
10. Engage and hold the transport/aerate toggle switch to
fully lower the machine onto the rollers. Release the
switch when the machine is fully lowered; then press
the engagement button to start water injection.