14
Step
1
Removing the Shipping
Bracket
Parts needed for this step:
None
Procedure
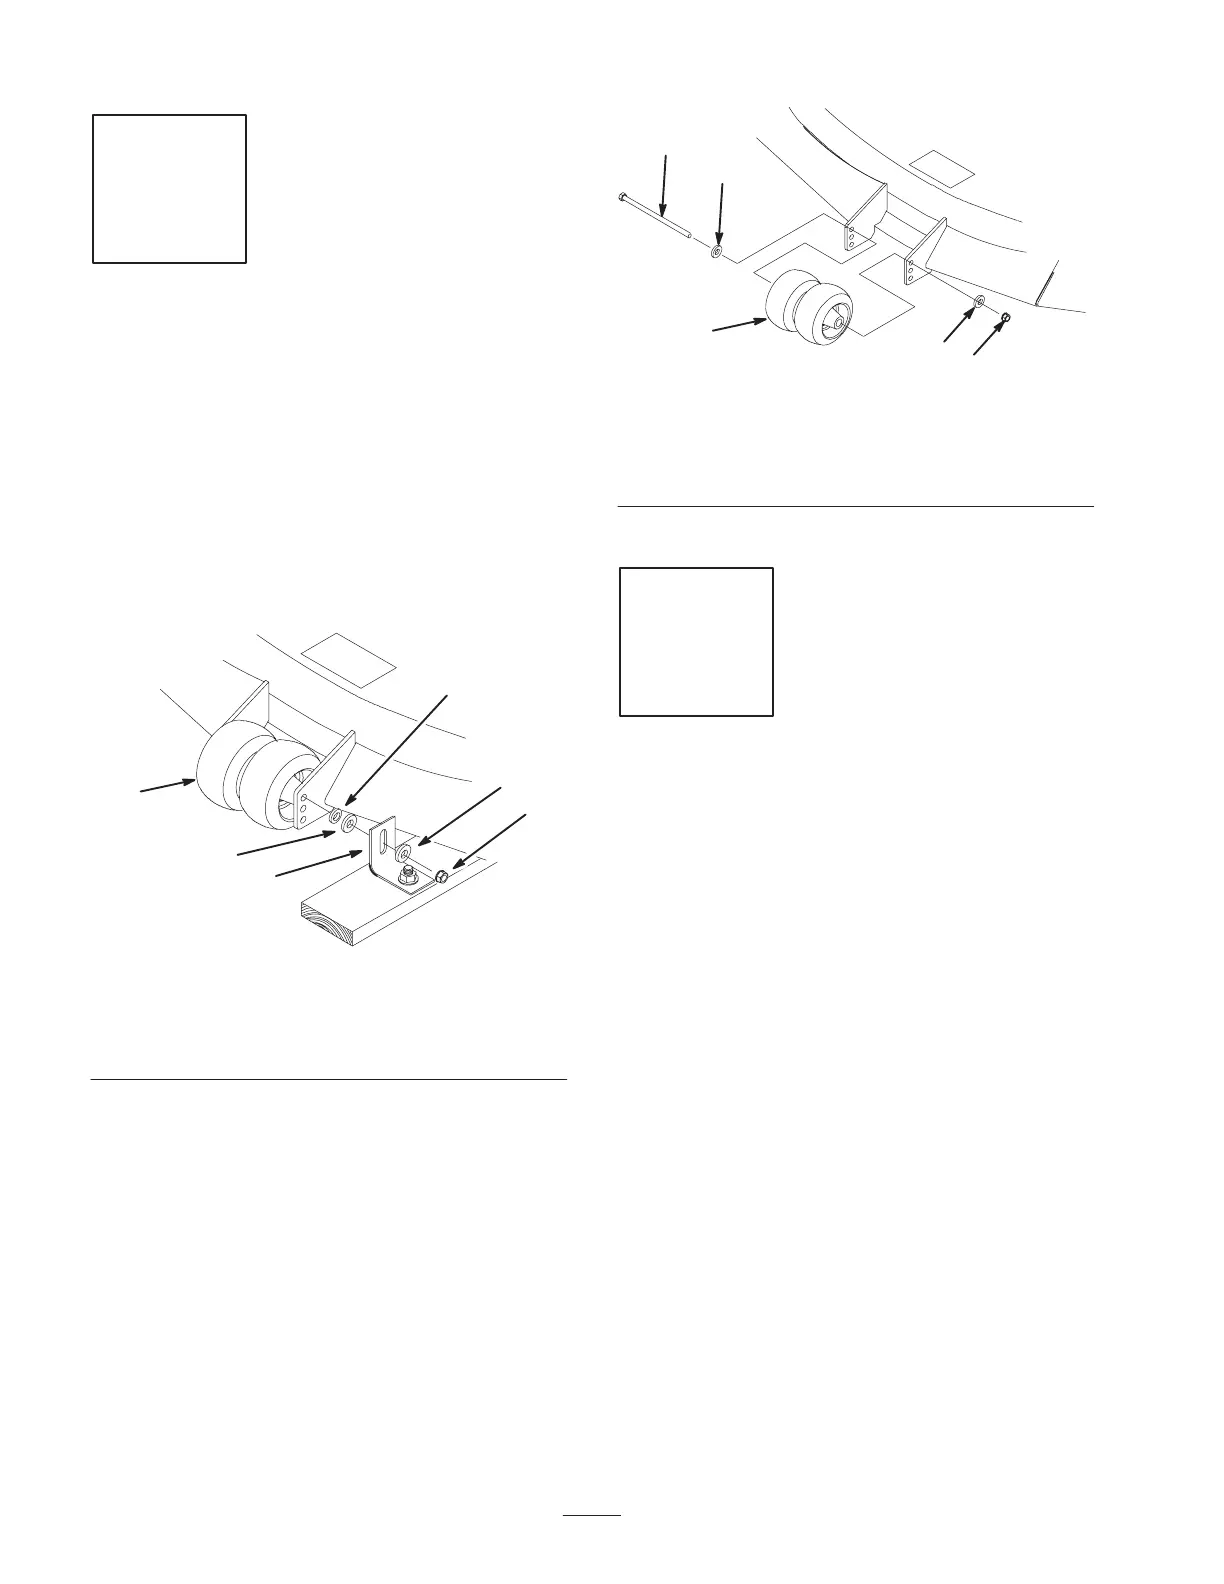
1. Remove the center gage wheel nut, 2 large washers,
angle bracket and 1 small washer (Fig. 4). Discard the
2 large washers and the angle bracket.
1
2
m–7585
3
3
4
5
Figure 2
1. Center Gage Wheels and
Spacer
2. Nut
3. Large washer—discard
4. Angle bracket—discard
5. Small washer
2. Install the center gage wheels with the previously
removed bolt, small washer and nut (Fig. 3).
1
2
3
4
4
m–6510
Figure 3
1. Center Gage Wheels and
Spacer
2. Nut
3. Bolt
4. Washer
Step
2
Installing the Handle Assembly
Parts needed for this step:
Qty. Part
1
Handle assembly
2
Flanged bolt, 3/8 x 1 inch
2
Flanged bolt, 3/8 x 1–1/4 inch
4
Flange nut, 3/8 inch
Procedure
1. Align handle with upper mounting holes in rear frame
(Fig. 4).
2. Secure the handle at each upper mounting hole with a
flange bolt (3/8 x 1–1/4 inch) and flange nut (Fig. 4).
3. Select the low position for the lower mounting hole
(Fig. 4).