EasyManua.ls Logo

Toro TimeCutter series User Manual

Toro TimeCutter series
8 pages
To Next Page IconTo Next Page
Page #1 background imageLoading...
Page #1 background image
FormNo.3420-276RevB
TimeCutter
®
RidingMowers
ForTimeCutter
®
RidingMowerswithMyRide
®
Suspension
Setup
LooseParts
Usethechartbelowtoverifythatallpartshavebeenshipped.
ProcedureDescription
Qty.
Use
Pin1
1
Roundclip2
InstalltheMyRidesuspension.
2
Nopartsrequired
Connectthebattery.
3
Nopartsrequired
Installtheseat(machineswithMyRide
suspensionandshippedinawoodcrate
only).
Rearhitch1
Bolt(5/16x1inch)
2
4
Locknut(5/16inch)
2
Installtherearhitch.
5
Nopartsrequired
Setupthemotion-controllevers.
6
Nopartsrequired
Checkthemoweradjustment.
Ignitionkey1
Hosecoupling(notincludedwithCE
models)
1
Operator'sManual
1
Engineowner’smanual(non-Toro
engines)
1
7
Operatortrainingmaterial
1
Completingthesetup.
Note:Determinetheleftandrightsidesofthemachinefromthenormaloperatingposition.
©2018—TheToro®Company
8111LyndaleAvenueSouth
Bloomington,MN55420
Registeratwww.Toro.com.
OriginalInstructions(EN)
PrintedintheUSA
AllRightsReserved
*3420-276*B

Other manuals for Toro TimeCutter series

Question and Answer IconNeed help?

Do you have a question about the Toro TimeCutter series and is the answer not in the manual?

Toro TimeCutter series Specifications

General IconGeneral
Deck MaterialSteel
Engine BrandKohler, Kawasaki, or Toro
Cutting Height1 to 4.5 inches
Fuel Capacity3 gal
TransmissionHydrostatic
SpeedUp to 7 mph
Warranty3-year limited warranty
Weight500-700 lbs

Summary

Setup

Installing the MyRide Suspension

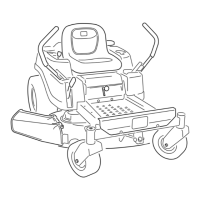
Install the MyRide suspension system onto the machine, securing it with the provided pin and clips.

Connecting the Battery

Connect the negative battery cable to the battery post using the provided fasteners for power.

Installing the Seat

Mount the seat assembly onto the machine platform, securing the seat-pivot rod with hairpin cotters.

Installing the Rear Hitch

Attach the rear hitch bracket to the machine frame using the specified bolts and locknuts.

Setting Up the Motion-Control Levers

Position motion-control levers upright, align holes, install fasteners, and set to neutral position.

Checking the Mower Adjustment

Verify side-to-side level and front-to-rear blade slope as per the Operator's Manual.

Completing the Setup

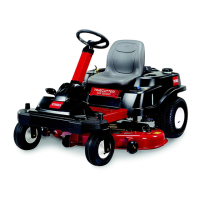
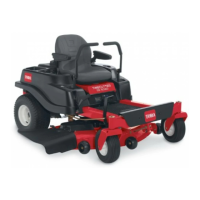
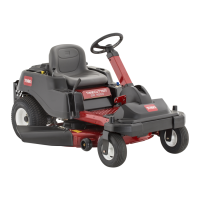
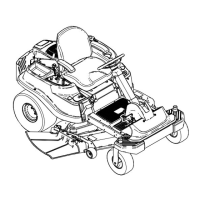
Install ignition key, check tire pressure, side-discharge chute, and oil level; organize materials.

Related product manuals