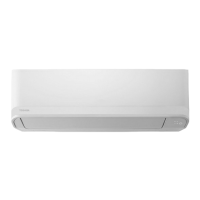
This document is an owner's manual for a Toshiba R32 Inverter Air Conditioner (Split Type), intended for general public use. It covers indoor units RAS-22, 24E2KVG-A and outdoor units RAS-22, 24E2AVG-A. The manual provides detailed instructions on the air conditioner's functions, operation, and maintenance, emphasizing safety precautions throughout.
Precautions for Safety
The manual begins with crucial safety information, categorized as "DANGER" and "WARNING," and "CAUTION." It advises users to read the manual carefully and keep it accessible. The appliance is filled with R32 refrigerant.
DANGER warnings highlight risks such as electric shock, fire, explosion, and injury. Users are cautioned against installing, repairing, opening, or removing the cover themselves due to dangerous voltages. It's stressed that turning off the power supply does not prevent potential electric shock. Installation must comply with national wiring regulations, requiring a disconnection means with at least 3 mm contact separation in all poles. The appliance must be stored in a room free from continuously operating ignition sources like open flames or electric heaters. Operating the unit when harmful gases are detected is prohibited to prevent fire, explosion, or injury.
WARNING messages advise against direct exposure to cool or warm air for extended periods and inserting fingers or objects into the air inlet/outlet. In case of abnormalities like a burning smell, the air conditioner should be stopped, and the power supply disconnected. The appliance can be used by children aged 8 and above, and persons with reduced physical, sensory, or mental capabilities, or lack of experience and knowledge, if supervised or instructed on safe use and understanding of hazards. Children should not play with the appliance, and cleaning/maintenance should not be done by children without supervision. Installation, maintenance, repair, and removal must be performed by qualified professionals. Children should be supervised to ensure they do not play with the appliance.
Further safety precautions under "PRECAUTIONS FOR SAFETY" include:
- Using only R32 refrigerant for complement or replacement to avoid abnormally high pressure, product failure, or injury.
- Not using unauthorized means to accelerate defrosting or cleaning.
- Storing the appliance away from ignition sources.
- Being aware that refrigerants may not have an odor.
- Not piercing or burning the pressurized appliance, nor exposing it to heat, flames, sparks, or other ignition sources, to prevent explosion and injury.
CAUTION warnings include:
- Not washing the unit with water to prevent electric shock.
- Not using the air conditioner for purposes other than its intended use, such as preserving food or breeding animals.
- Not stepping or placing objects on the indoor/outdoor unit to prevent injury or damage.
- Avoiding contact with aluminum fins to prevent injury.
- Turning off the main switch or circuit breaker before cleaning or when the unit will not be used for a long time.
- Recommending specialist maintenance for units operated for extended periods.
- Stating that the manufacturer is not liable for damages resulting from non-observance of manual instructions.
Indoor Unit Display
The indoor unit display features several indicators:
- ECO (White): Indicates ECO mode.
- Wi-Fi access (White): Indicates Wi-Fi connectivity (requires an accessory adapter).
- Hi-Power (White): Indicates Hi-Power mode.
- Timer (White): Indicates timer operation.
- Operation Mode: Displays Cool (Blue) or Heat (Orange).
Display brightness can be adjusted.
Preparation Before Use
Preparing Filters:
- Open the air inlet grille.
- Remove the air filters.
- Attach the filters (detailed in the Installation Manual).
Loading Batteries (for wireless operation):
- Remove the slide cover.
- Insert two new AAA batteries, observing (+) and (-) positions.
Clock Setup:
- Press the CLOCK button with a pencil tip. If the timer indication is flashing, proceed to step 2.
- Press ON or OFF to adjust the time.
- Press SET to set the time.
Remote Control Reset:
- Press RESET with a pencil tip or remove the batteries.
- Press ON.
- Insert the batteries.
Remote Control
The remote control features:
- Infrared signal emitter
- Memory and Preset button (PRESET)
- Start/Stop button
- Mode select button (MODE)
- Air flow button
- Fireplace/8°C button
- ECO button
- Comfort sleep button (COMFORT SLEEP)
- Weekly timer (ON/OFF)
- Temp for Weekly timer
- On timer button (ON)
- Set clock button (CLOCK)
- Check button (CHECK)
- Filter reset button (FILTER)
- Temperature button (TEMP)
- Swing louver button (SWING)
- Fan speed button (FAN)
- Set louver Left-Right button (FIX)
- Set louver Up-Down button (FIX)
- High power button (Hi POWER)
- Power selection/Silent button (P-SEL/SILENT)
- Program P1 - P4
- Day/Edit button
- Setup button (SET)
- Off timer button (OFF)
- Clear button (CLR)
- Reset button (RESET)
The remote control can be used wirelessly or wired. In wired operation, it reverts to initial conditions (PRESET, TIMER, CLOCK) upon power shutdown.
Air Flow Direction
- Press FIX to move the louver in the desired vertical direction.
- Press FIX to move the louver in the desired horizontal direction.
- Press SWING for louver swing operation (Vertical (Up-Down) swing and Horizontal (Left-Right) swing).
- Press AIRFLOW to select specific air flow directions (Wide center, Wide right, Wide left, Spot left, Spot right, Spot center, Cancel Air Flow).
The indoor unit emits a "Pi" sound for receiving tones and "PiPi" when AIR FLOW is canceled. Louvers should not be moved manually as they may automate positioning based on the operation mode.
Cooling / Heating / Fan Only Operation
- Press MODE to select Cool, Heat, or Fan only.
- Press TEMP. to set the desired temperature (Min. 17°C, Max. 30°C). Fan Only mode has no temperature indication.
- Press FAN to select fan speed: AUTO, LOW, LOW+, MED, MED+, HIGH, or Quiet.
Automatic Operation
To automatically select cooling, heating, or fan only operation:
- Press MODE to select Auto.
- Press TEMP. to set the desired temperature (Min. 17°C, Max. 30°C).
- Press FAN to select fan speed: AUTO, LOW, LOW+, MED, MED+, HIGH, or Quiet.
Dry Operation
For dehumidification, a moderate cooling performance is automatically controlled.
- Press MODE to select Dry.
- Press TEMP. to set the desired temperature (Min. 17°C, Max. 30°C).
In DRY mode, fan speed is set to Auto only.
Hi Power Operation
To automatically control room temperature and airflow for faster cooling or heating (except in DRY and FAN ONLY mode):
Press HIPOWER to start and stop the operation.
ECO Operation
To automatically control room temperature for energy saving (except in DRY and FAN ONLY mode):
Press ECO to start and stop the operation.
In cooling, the set temperature increases by 1 degree/hour for 2 hours (max 2 degrees). In heating, the set temperature decreases.
Fireplace and 8°C Heating Operation
Fireplace Operation:
Keeps the indoor unit's fan blowing continuously during thermo-off periods to circulate heat from other sources. There are three settings: Default, Fireplace 1, and Fireplace 2.
- Fireplace 1: During thermo-off, the indoor unit's fan runs at the user-selected speed.
- Fireplace 2: During thermo-off, the indoor unit's fan runs at a factory-programmed super-low speed.
8°C Heating Operation (8°C):
Heat mode operation to maintain room temperature between 5-13°C with less energy usage.
Fireplace and 8°C operations function only in Heating mode. Cold air breezing might occur during Fireplace operation.
Comfort Sleep Operation
For comfortable sleep, this mode automatically controls airflow and turns OFF the unit (except in DRY mode).
- Press COMFORT SLEEP to select 1, 3, 5, or 9 hours for OFF timer operation.
- Press CLR to cancel comfort sleep operation.
In cooling, the set temperature increases by 1 degree/hour for 2 hours (max 2 degrees). In heating, the set temperature decreases.
Power-Selection and Silent Operation (Outdoor Unit)
Power-Selection (P-SEL):
Limits maximum current and power consumption to 100%, 75%, or 50% when sharing a circuit breaker with other appliances. Lower percentages offer higher savings and longer compressor lifetime. The selected level flashes on the remote LCD for 3 seconds. Inadequate cooling or heating capacity may occur due to current limitation.
Silent Operation (SILENT):
Keeps the outdoor unit operating silently for nighttime comfort. Heating capacity is optimized for silent experience. There are three settings: Standard, Silent 1, and Silent 2.
- Silent 1: Prioritizes heating/cooling capacity while operating silently, balancing comfort and sound level.
- Silent 2: Compromises heating/cooling capacity to prioritize reducing the maximum outdoor unit sound level by 4 dB(A).
Inadequate heating or cooling capacity may occur during Silent operation.
Timer Operation
Setting the ON Timer:
- Press ON to set the desired ON timer.
- Press SET to set the timer.
- Press CLR to cancel the timer.
Setting the OFF Timer:
- Press OFF to set the desired OFF timer.
- Press SET to set the timer.
- Press CLR to cancel the timer.
The remote control should be in accessible transmission range to the indoor unit to avoid time lag. Settings are saved for the next operation.
Preset Operation
Sets preferred operation for future use (except airflow direction).
- Select preferred operation.
- Press and hold PRESET for 3 seconds to memorize the setting. A mark displays.
- Press PRESET to operate the preset operation.
Display Lamp Brightness Adjustment
To decrease display lamp brightness or turn it off:
- Press and hold FAN for 3 seconds until brightness level (d0, d1, d2, or d3) is shown on remote control LCD, then release.
- Press TEMP. Rise or TEMP. Decrease to adjust brightness in 4 levels.
- d3: Full brightness (100%).
- d2: 50% brightness.
- d1: 50% brightness, operation lamp off.
- d0: All lamps turned off.
For d1 and d0, the lamp illuminates for 5 seconds before turning off.
Auto Restart Function Setting
The product is designed to restart automatically in the same operating mode after a power failure. This function is ON by default.
To turn OFF: Press and hold the [OPERATION] button on the indoor unit for 3 seconds (3 beeps, but OPERATION lamp does not blink).
To turn ON: Press and hold the [OPERATION] button on the indoor unit for 3 seconds (3 beeps, and OPERATION lamp blinks 5 times/sec for 5 seconds).
Auto Restart does not activate if ON or OFF timers are set.
Remote Control A-B Selection
To use separate remote controls for two indoor units installed nearby:
Remote Control B Setup:
- Press RESET button on the indoor unit to turn the air conditioner ON.
- Point the remote control at the indoor unit.
- Push and hold CHECK button on the Remote Control with a pencil tip. "00" will be shown.
- Press MODE during pushing CHECK. "B" will show, "00" will disappear, and the air conditioner will turn OFF. Remote Control B is memorized.
To reset to A, repeat the steps. Remote Control A does not show "A" display. Default setting is A.
- Three-minute protection: Prevents unit activation for 3 minutes after sudden restart or switching ON.
- Preheating operation: Warms up the unit for 5 minutes before heating starts.
- Warm air control: Fan speed reduces automatically, and outdoor unit stops when room temperature reaches set temperature.
- Automatic defrosting: Fans stop during defrost.
- Heating capacity: Heat is absorbed from outdoors. If outdoor temperature is too low, use another heating apparatus.
- Consideration for accumulated snow: Select outdoor unit position to avoid snow drifts, leaves, or other debris.
- Minor cracking sound: Normal, caused by expansion/contraction of plastic.
Items 2 to 6 apply to Heating models.
Air conditioner operating conditions:
- Heating: Outdoor Temp: -15°C~24°C, Room Temp: 0~28°C.
- Cooling: Outdoor Temp: -10°C~46°C, Room Temp: 21°C~32°C.
- Dry: Outdoor Temp: -10°C~46°C, Room Temp: 17°C~32°C.
Self Cleaning Operation (Cool and Dry Operation Only)
To prevent bad smells caused by humidity in the indoor unit:
- If the FAN button is pressed once during "Cool" or "Dry" mode, the fan runs for 30 minutes, then turns off automatically, reducing moisture.
- To stop immediately, press the FAN button more than 2 times within 30 seconds.
Temporary Operation
In case of misplaced or discharged remote control:
- Pressing the RESET button starts or stops the unit.
- Operation mode is set to AUTOMATIC, preset temperature 24°C, and fan operation is automatic speed.
Maintenance
First, turn off the circuit breaker.
Indoor Unit and Remote Control:
- Clean with a wet cloth when needed.
- Do not use benzine, thinner, polishing powder, or chemically-treated duster.
Air Filters:
Clean every 2 weeks.
- Open the air inlet grille.
- Remove the air filters.
- Vacuum or wash and then dry them.
- Reinstall the air filters and close the air inlet grille.
Troubleshooting (Check Point)
The unit does not operate:
- Power main switch is off.
- Circuit breaker is activated.
- Stoppage of electric current.
- ON timer is set.
Cooling or Heating is abnormally low:
- Filters are blocked with dust.
- Temperature is set improperly.
- Windows or doors are open.
- Air inlet or outlet of outdoor unit is blocked.
- Fan speed is too low.
- Operation mode is FAN or DRY.
- POWER SELECTION function is set to 75% or 50% (depends on remote controller).
Weekly Timer Operation
How to set WEEKLY TIMER:
- Press DAY/EDIT to enter WEEKLY TIMER setting. "WEEKLY" and "SU" (Sunday) blink.
- Press DAY/EDIT to select desired day in sequence (SU → MO → TU → WE → TH → FR → SA → SU MO TU WE TH FR SA (All day)).
- Press PROGRAM to select the program number (PG-1 to PG-4). PG-1 appears when DAY/EDIT is pressed.
- Press ON or OFF to select the desired time (0:00 to 23:50 in 10-minute intervals). Press and hold to change time by 1 hour. Only one ON or OFF timer can be set per program.
- Press MODE to select desired operation (Cool, Heat, Fan, Dry, Auto).
- Press TEMP. to select desired temperature (17°C to 30°C).
- Press FAN to select desired fan speed.
- Add operations if required: 8°C, ECO, Hi POWER, Silent. (Fireplace cannot be selected).
- Adding or editing the program: Program can be set for all required days until SET is pressed.
- If adding or editing, repeat steps 2-8 before confirmation.
- After adding or editing, press SET to confirm the setting.
Point remote control at air conditioner, press SET until "PiPi" sound. "Pi" sounds correspond to the number of days. Blinking TIMER lamp indicates incomplete setting.
Notes on Weekly Timer:
- Place remote control where indoor unit can receive signal.
- ON/OFF timer can be set during Weekly Timer operation; normal timer runs first, then Weekly Timer function resumes.
- All operations (MODE, TEMP, FAN, HI POWER, ECO, etc.) can be adjusted during Weekly Timer, but operation reverts to set items when clock reaches program setting.
- Avoid interference when sending signal to air conditioner.
Edit Weekly timer program:
- Press DAY/EDIT. Current day and program number displayed.
- Press DAY/EDIT to select day, and PROGRAM to select program number to confirm.
- Press SET to exit confirming mode.
Deactivating WEEKLY TIMER operation:
Press WEEKLY while "WEEKLY" is displayed on LCD. "WEEKLY" indicator disappears. Program remains in remote control. TIMER lamp goes off. To reactivate, press WEEKLY again; LCD shows next program.
To delete programs:
Individual program:
- Press DAY/EDIT. Day and program number displayed. Select day to delete.
- Press PROGRAM to select program number to delete.
- Press CLR. ON or OFF timer clears, LCD blinks.
- Press SET to delete program. Press SET while LCD blinks. Program deleted.
All programs:
- Press DAY/EDIT. Day and program number displayed.
- Press CLR and hold for 3 seconds. All programs deleted, LCD displays current operation.
Ensure remote control receiving module on air conditioner receives the signal.