Do you have a question about the Toshiba 24W1333G and is the answer not in the manual?
Ensure adequate ventilation by leaving space around the TV to prevent overheating.
Avoid placing the TV in direct sunlight or near heat sources to prevent damage.
Operate the TV from a 220-240 V AC 50 Hz outlet and do not remove the mains plug.
Keep candles or open flames away from the product to prevent fire.
Read instructions, ensure proper connections, consult dealer for doubts, and handle glass carefully.
Avoid exposing to voltage, obstructing ventilation, liquids, heat sources, makeshift stands, or leaving unattended.
Locate the TV away from direct sunlight on a stable surface, securing it to a wall if necessary.
Be aware of screen issues, avoid chemicals, clean with a dry cloth, and consider stationary image retention.
Toshiba is not liable for product damage or loss caused by fire, misuse, neglect, or consequential damages.
Do not place items between TV and furniture, educate children, hold plug when disconnecting, use soft dry cloth.
Caution regarding touching the aerial connector.
Avoid using the TV during moisture condensation to prevent internal damage.
Use an appropriate wall bracket, requires two people for installation.
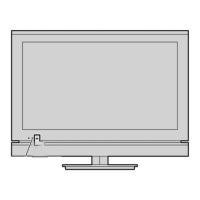
Carefully lay TV face down, remove screws, and detach the stand and plastic moulding.
Insert batteries correctly, do not mix types, remove old batteries, and be aware of the 5m range.
Connect aerial to ANT socket. Use SCART for decoders/recorders, set to standby.
Connect surround sound to DIGITAL AUDIO. Use HDMI for digital audio/video, supports HD.
Use supplied cables for Side AV and YPbPr inputs. Refer to equipment manuals.
Refer to equipment manuals. Use SOURCE button to switch inputs.
Receives digital audio/video. Supports HDCP. Category 2 cable needed for 1080p/ >50Hz.
Connect via HDMI-to-DVI cable. Requires separate audio cables to Side AV inputs.
Turn on TV first, then device. Turn off device first, then TV.
Connect via RGB/PC or HDMI for display and sound. Use PC audio cable for RGB/PC input.
Connect USB Flash Drive to display/play music, photos, or video files.
This TV is designed to consume less energy to save the environment and money.
Configure Power Save Mode in Picture Settings to enable energy-saving mode.
Refer all servicing to qualified personnel. Contact your local dealer for information.
Check mains plug, press button on side control switch to turn on. Press remote button for standby.
Turn off TV at mains for zero energy use. Reducing brightness saves energy.
Press MENU to see menus. Use navigation buttons to select topics and options.
Use the menu wheel on the side for volume, channel, source, and standby functions.
Select language and country for initial setup. Also choose Teletext language.
Choose to scan channels automatically via Aerial or Cable. Configure frequency ranges if needed.
Retune the TV to update the channel list. All current channels and settings will be lost.
Digital scans aerial DVB, Analogue scans analogue, Full scans both. Confirm scan type.
Enter multiplex or frequency number to search for digital aerial channels.
Enter frequency, modulation, symbol rate, and network channel scan options.
Tune manually by entering channel number or frequency. Stores new channels found.
Fine-tune analogue channels using Left/Right buttons. Not available if no analogue channels stored.
Select Stereo, Mono, Dual 1, Dual 2, or Mono using the LANG. button.
Press SUBTITLE button to activate or deactivate subtitles for digital broadcasts.
Access the main menu using the MENU button or the 'Menu Wheel'.
Use V/V buttons for volume. Press Mute button to turn sound off/on.
Select channels via numeric buttons, CH/CH. Use INFO for programme details.
View messages like 'No Signal' or 'Shut Down?' on next startup after specific events.
View stored channels. Edit Channel List to manage, move, delete, rename, or lock channels.
Highlight channel, select Move, enter new channel number. Warning for occupied numbers.
Select channel, choose Delete, confirm with Yes. Use GREEN/YELLOW to tag/untag.
Select channel, choose Edit Name. Use navigation and numeric buttons to change name.
Select channel, choose Lock, enter PIN. A lock symbol appears next to locked channels.
Press INFO for channel/programme details. PIN required for locked channels.
Press EPG to view programme details. Use navigation buttons to scroll and select programmes.
Adjust preferred language settings for audio, subtitles, teletext, and guide.
Settings used if available, otherwise current settings apply. Adjust audio and subtitle.
Change audio and subtitle languages if supported or available.
Enter PIN to access Parental Control menu: Menu Lock, Maturity Lock, Child Lock, Set PIN.
Lock All Menus or Installation Menu. Options: OFF, ALL MENUS, INSTALLATION MENU.
Disables access to broadcasts based on maturity information from the broadcast.
Disables TV buttons but not remote control buttons. Useful for preventing unauthorized use.
Set a new PIN for parental controls. Requires entering the new PIN twice for verification.
Adjust Mode, Contrast, Brightness, Sharpness, and Colour for desired picture.
Configure Power Save Mode, Backlight, Noise Reduction, and Advanced Settings.
Adjust Dynamic Contrast, Colour Temp, Picture Zoom, Full Mode, HDMI True Black, Film Mode.
Adjust Skin Tone, Colour Shift, and RGB Gain for fine-tuning colour temperature.
Select aspect ratio: Auto, 16:9, Subtitle, 14:9, 14:9 Zoom, 4:3, or Cinema using SCREEN button.
Adjust Contrast, Brightness, Colour Temperature. Reset settings to default.
Display PC position menu: Autoposition, H Position, V Position, Dot Clock, Phase.
Automatically shifts picture horizontally/vertically to correct unwanted positions.
Shifts the image horizontally to the right or left side of the screen.
Shifts the image vertically towards the top or bottom of the screen.
Corrects interference/banding and adjusts phase for clear picture.
Adjust Volume, Equalizer, Balance, and Headphone output level.
Configure Sound Mode, AVL, Dynamic Bass, Surround Sound, and Digital Out.
Access Settings menu. Options: Conditional Access, Language, Parental, Timers, Date/Time, Sources.
Details on using CAM and viewing card for subscription broadcasts. Insert/remove when TV is OFF.
Set Sleep Timer, Programme Timers. Add, edit, delete timers.
Configure date/time preferences. Set Time Settings Mode to Auto or Manual.
Enable or disable selected source options. TV will not switch to disabled sources.
Use SOURCE button or Up/Down/Right to change sources if auto-switch fails.
Configure Menu Timeout, Scan Encrypted Channels, Blue Background, Software Upgrade.
Select items with Up/Down, set with Left/Right, view sub-menus with OK.
Set display timeout for menu screens (15 sec, 30 sec, or 60 sec).
Set to Yes to locate encrypted channels, or Off to exclude them from searches.
Configure Blue Background, Software Upgrade, Application Version, Hard of Hearing, Audio Description.
Set Auto TV Off, Broadcast Type, Standby Search, Store Mode, Power Up Mode.
Access Media Browser via MENU or Quick button, or automatically upon USB connection.
Limited USB device support. Avoid USB Hubs. Obtain permissions for copyrighted content.
Use menu screen to play mp3 files. Controls: Play, Stop, Pause, Sort, Loop/Shuffle, Jump.
View photo files from USB. Controls: Navigate, Jump, Slideshow, Thumbnails, Sort, View full screen.
Display photos as a slideshow. Controls: Pause, Continue, Rotate, Loop/Shuffle, Previous/Next.
Play video files. Controls: Play, Stop, Pause, Rewind, Forward, Previous/Next, Subtitle/Audio.
Adjust subtitle timing for video playback. Use OK to confirm or RET/BACK to cancel.
Access Picture, Sound, and Settings menus within Media Browser mode.
Set View Style, Slideshow Interval, Show Subtitle, Subtitle Language/Position/Font Size.
Choose the required language region before using text services.
Press TXT to view text services. Re-press TXT to superimpose or return to normal viewing.
Enter sub-page numbers (e.g., 01, 02) or use coloured links to access sub-pages.
Press INFO button to reveal solutions on quiz and joke pages.
Press OK and HOLD to freeze a text page on screen. Press again to unfreeze.
Press RETURN to access an initial page, which depends on the broadcaster.
Lists typical video display modes supported by the TV. May scale resolutions automatically.
A warning OSD will appear if the PC is switched to an unsupported mode.
Details supported signals for SCART, Side AV, YPbPr, and HDMI inputs.
Contact dealer/manufacturer if signal display issues occur due to source equipment inconsistency.
Signal information table for the Mini D-sub 15 pin connector, detailing pin number and signal name.
Lists supported video file extensions, codecs, formats, and notes for movie playback.
Lists supported audio file extensions and formats for music playback.
Lists supported image file extensions and formats for photo display.
Lists supported subtitle file extensions.
Details broadcast systems (DVB-T, MPEG2) and video input standards (PAL, SECAM, NTSC).
Lists all external connection types: SCART, YPbPr, Side AV, HDMI, PC, Digital Audio.
Details USB port interface version and file system, and headphone socket type.
Specifies operating temperature, humidity, and lists included accessories like remote control.
Provides details on screen size, power consumption (on mode, annual, standby), and resolution.
Shows approximate unit dimensions and VESA compliance for wall mounting.
Information on HDMI, DVB trademarks, and EIA/CEA-861-D compliance for digital video.
Details licensing for MPEG Layer-3 audio coding and AVC video encoding/decoding.
Notes on Dolby Laboratories licensing and Dolby trademarks.
Information for EU states on proper disposal of product and batteries, with symbols explained.
Troubleshooting for no sound, picture without sound, one speaker sound, or incorrect audio language.
Troubleshooting for poor picture, no video playback, black/white display, or PC mode screen problems.
Troubleshooting for remote, Media Browser, subtitles, channel locks, standby LED, TV controls, DVB-T, PIN.
Product CE-Marked per European Directives for safety, EMC, RoHS, and energy efficiency.
States reproduction is prohibited without permission and specifications are subject to change.
Provides contact numbers for owner's manual helpline in various countries for advanced functions.
| Comb filter | 3D |
|---|---|
| Screen shape | Flat |
| Response time | 8.5 ms |
| Display diagonal | 24 \ |
| Display brightness | 250 cd/m² |
| Display resolution | 1366 x 768 pixels |
| Native aspect ratio | 16:9 |
| Native refresh rate | 50 Hz |
| LED backlighting type | Edge-LED |
| Supported video modes | 1080i, 1080p, 480i, 480p, 576i, 576p, 720i, 720p |
| Display diagonal (metric) | 60 cm |
| Supported graphics resolutions | 1366 x 768 |
| Motion interpolation technology | AMR (Active Motion Rate) 50 |
| Annual energy consumption | 35 kWh |
| Video formats supported | H.264 |
| Tuner type | Analog & digital |
| Number of tuners | 2 tuner(s) |
| Channels quantity | 805 channels |
| Analog signal format system | NTSC, PAL BG, PAL DK, PAL I, SECAM B/G, SECAM D/K, SECAM L |
| Digital signal format system | DVB-C, DVB-T |
| Audio system | Virtual Surround |
| Audio decoders | Dolby Digital, Dolby Digital Plus |
| RMS rated power | 5 W |
| Number of speakers | 2 |
| DVI-D ports quantity | 0 |
| USB 2.0 ports quantity | USB 2.0 ports have a data transmission speed of 480 Mbps, and are backwards compatible with USB 1.1 ports. You can connect all kinds of peripheral devices to them. |
| Smart modes | Dynamic, Game, PC |
| Number of OSD languages | 25 |
| On Screen Display (OSD) languages | BUL, DAN, DEU, DUT, ENG, ESP, FIN, FRE, HUN, ITA, NOR, POL, POR, RUM, RUS, SLK, SLV, TUR, UKR |
| Product color | Black |
| Panel mounting interface | 75 x 75 mm |
| Power consumption (max) | 50 W |
| Power consumption (standby) | 0.23 W |
| Power consumption (typical) | 24 W |
| Package depth | 110 mm |
| Package width | 700 mm |
| Package height | 418 mm |
| Package weight | 7500 g |
| Sustainability certificates | RoHS |
| Depth (with stand) | 163 mm |
|---|---|
| Height (with stand) | 387 mm |
| Weight (with stand) | 5500 g |
| Depth (without stand) | 46 mm |
| Width (without stand) | 566 mm |
| Height (without stand) | 349 mm |
| Weight (without stand) | 4800 g |