EasyManua.ls Logo

Toshiba 40RV52RZ User Manual

Toshiba 40RV52RZ
10 pages
To Next Page IconTo Next Page
Page #1 background imageLoading...
Page #1 background image
© 2009 Toshiba America Consumer Products, LLC.
S.M.A.R.T.
Service Material and Reference Tips
Product: LCD Date: 2/4/2010
Models: 32RV525RZ, 37RV52R, 37RV52RZ, 37RV525RZ, 40RV52R,
40RV52RZ, 40RV525R, 40RV525RZ, 46RV525R, 46RV525RZ
Doc Ref/File: SMART2009-LCD209-V9
Purpose: The purpose of this document is to give the service provider
troubleshooting information designed to expedite the diagnosis and service
process to modular/sectional level for Toshiba products.
[The information contained within the document will evolve over time so a version number has
been indicated in the document name. The servicer should always use the latest version
available.]
Table of Contents
Section l Chassis Layout and Plug location
Chassis and Plug Layout…....…………....…..….2
Interconnect…………………………….……….....3
Section ll Modular Troubleshooting Flowcharts
Dead Set …………………………………………...4
Video Problems …………………....……….......5,6
Audio Problems …………………...………………7
Section lll Diagnostic Aids
Firmware Updates…………………………….…8,9
Factory Mode…………………………………..…10
Feedback: Please provide any comments or suggestions about this document
to technical_support@tacp.com
When commenting, please provide
the document and version number on all correspondence.
SMART2009-LCD209-V9 Page 1 of 10
Question and Answer IconNeed help?

Do you have a question about the Toshiba 40RV52RZ and is the answer not in the manual?

Toshiba 40RV52RZ Specifications

General IconGeneral
Screen Size40 inches
Display TechnologyLCD
HDMI Ports3
Component Video Input1
Composite Video Input1
Built-in Wi-FiNo
Smart TVNo
Resolution1920 x 1080 pixels

Summary

Dead Set Troubleshooting

Check Standby 5V DC

Verify 5 VDC presence on the power supply for standby operation.

Check Power On Signal

Verify the 4.0V signal for power on when the button is pressed.

Check Secondary 12V Source

Verify secondary 12V source appearance after the on/off button press.

Check Power Good Signal

Verify the Power Good (AC Detect) level at pin 14 of P802.

Video Troubleshooting

Backlight Functionality

Check if the backlight functions normally when the unit is turned on.

Screen Discoloration/Streaks

Assess if the screen is discolored or has streaks and dark areas.

LVDS Activity and Voltage Check

Check LVDS activity at CN3 and power supply voltages at P802.
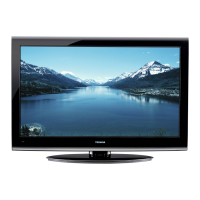
Backlight Troubleshooting

Audio Troubleshooting

Firmware Updating

Factory Mode

Related product manuals