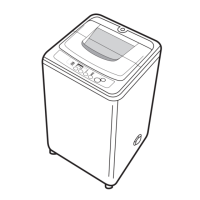
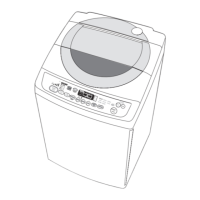
This document is a service manual for the Toshiba Fully Automatic Washing Machine models AW-9500SER/SB/SBB, AW-9500SBJ/SBK/SBX, and AW-G9930S/G1130S. It provides detailed information on specifications, safety precautions, technical points, installation, schematic diagrams, checking procedures, disassembly instructions, repair checkpoints, and exploded views with parts lists.
Function Description:
The Toshiba Fully Automatic Washing Machine is designed for efficient and convenient laundry care. It features a fully automatic operation, handling various wash cycles and functions. The machine is equipped with a microcomputer for precise control of washing processes. It includes a water level sensor, a capacitor motor, and a drain valve motor to manage water intake, washing, spinning, and draining. The machine offers different wash cycles, including standard, heavy rinse, heavy wash, and blanket, with options for wash-only, rinse-only (one, two, or three times), and spin-only operations. It also includes a "Tub Cleaning Course" for maintenance.
Important Technical Specifications:
- Models: AW-9500SER/SB/SBB, AW-9500SBJ/SBK/SBX, AW-G9930S/G1130S
- Revolution (Wash/Spin): 50Hz: 900 rpm
- Water Level (High): 51 L
- Water Consumption (Regular cycle): 119 L
- Motor Type: Capacitor Motor
- Water Pressure: 30 kPa - 1000 kPa
- Hot Water Temperature: 50 degrees C or less
- Overall Dimension (W x D x H): 600 mm x 564 mm x 986 mm
- Net Weight: 39 kg
- Power Source & Plug Type:
- AW-9500SER/SB/SBB: 230-240 V, 50Hz / 230-240 V, 50Hz / 220 V, 50/60Hz (EM (3P) / 3S / 3P)
- AW-9500SBJ/SBK/SBX: 220 V, 50Hz / 230-240 V, 50Hz / 220 V, 50Hz (3S / 3P / 3S)
- AW-G9930S/G1130S: 110 V, 60Hz (EM)
- Power Consumption:
- AW-9500SER/SB/SBB: 520 W
- AW-9500SBJ/SBK/SBX: 405 W
- AW-G9930S/G1130S: 630 W
- Destination:
- AW-9500SER/SB/SBB: Iran / Oman / Saudi Arabia
- AW-9500SBJ/SBK/SBX: Jordan / Kuwait / UAE
- AW-G9930S/G1130S: Taiwan
Usage Features:
The washing machine offers a variety of operational modes and settings:
- Automatic Water Level Setting: For standard, heavy rinse, and heavy wash cycles, the machine automatically sets the water level (10L-51L).
- Manual Water Level Setting: Available for the blanket cycle (51L or 41L).
- Cycle Options:
- Wash: Includes preparatory fill, water current detect, wash, unravel, drain, spin, and pause stages.
- Rinse: Features shower rinse, rinse 1, and rinse 2, each with preparatory fill, rinse, unravel, drain, spin, and pause stages.
- Spin: Includes spin, pause, and brake stages.
- Soak Course: Allows for soaking clothes before the main wash cycle, with adjustable soak times.
- Unravel Operation: An "unravel" operation is performed at the end of the wash or rinse cycles, with high, medium, and low settings (10", 10", 18" respectively).
- Timer Sequence Chart: Detailed charts illustrate the duration of each stage within different cycles, including wash, rinse, and spin, as well as soak and tub cleaning courses.
- Error Indication: The machine provides error codes (E1, E2, E3, E5, E7, E9, Eb) to indicate specific failures, such as draining failure, lid opening failure, unbalance failure, water supply failure, motor failure, water leakage failure, and auto-off failure. Each error has a corresponding cause, remedy, and countermeasure for troubleshooting.
Maintenance Features:
The manual provides comprehensive guidelines for maintenance and repair:
- Safety Precautions: Emphasizes critical safety measures for users and technicians, including warnings about electric shock, injury, and fire. It advises against modifying the product, disassembling without proper training, and spilling water on electrical parts.
- Installation: Detailed instructions for adjusting the machine's legs to ensure stability and prevent wobbling, using a horizontal level indicator.
- Checking Procedures:
- Pre-repair Checks: Before starting any repair, technicians must unplug the power cord and wait 5 seconds to discharge the capacitor. They are also advised to discharge static electricity by touching a ground pin or the two short plug pins together with the ground wire.
- Post-repair Checks: After repairs, it is crucial to perform a trial operation and check insulation resistance (1 MΩ or more), grounding, safety devices (spin basket braking time), designated parts, lead wire connections, screw tightening, absence of foreign matter, oil/water leakage, power cord condition, horizontal adjustment, and installation position.
- Disassembly Instructions: Step-by-step guides for disassembling various components, including the program timer, water intake valve, lid switch, drain valve motor, motor, revolution sensor, pulsator, wash tub (spin basket), drive assembly, reed switch, and tub. Each step includes notes on specific precautions, such as handling lead wires, preventing water leakage, and avoiding damage to parts.
- Exploded Views and Parts List: Detailed diagrams and lists of all components, categorized by assembly (Cabinet, Top Cover, Panel, Body, Drive, Motor and Packaging), with part numbers and quantities for each model. This aids in identifying and ordering correct replacement parts.
- Troubleshooting: A dedicated section for problem diagnosis, covering common issues like warning buzzer activation, operational stops, non-functional WASH/RINSE/SPIN buttons, poor drain, abnormal noise, non-operating machine, ineffective softener, remaining time display issues, water level control problems, pulsator rotation during water supply, and spinning speed variations. Each issue has a corresponding check point and recommended remedy.
- Specific Repair Notes:
- Program Timer: Sensitive to static electricity; technicians must wear gloves.
- Water Intake Valve/Feed Case: Ensure no water leakage after replacement.
- Lid Switch: Check operation angle, safety lever movement, and brake function after replacement.
- Drain Valve Motor: Ensure correct lead wire position and prevent water leakage.
- Motor: Check V-belt bending and secure lead wires.
- Drive Assembly: Prevent grease/oil on brake drum, apply grease to clutch spring, adjust clutch lever gap (0.5-1.5 mm), and confirm no water leaks after bearing replacement.
- Suspensor Rod: Note that the suspensor rod on the motor side differs from the opposite side.
- Air Tube: Ensure the air tube is wound correctly around the suspensor rod to prevent noise.