2.SETTING ITEMS (ADMIN)
GENERAL 67
2 SETTING ITEMS (ADMIN)
1
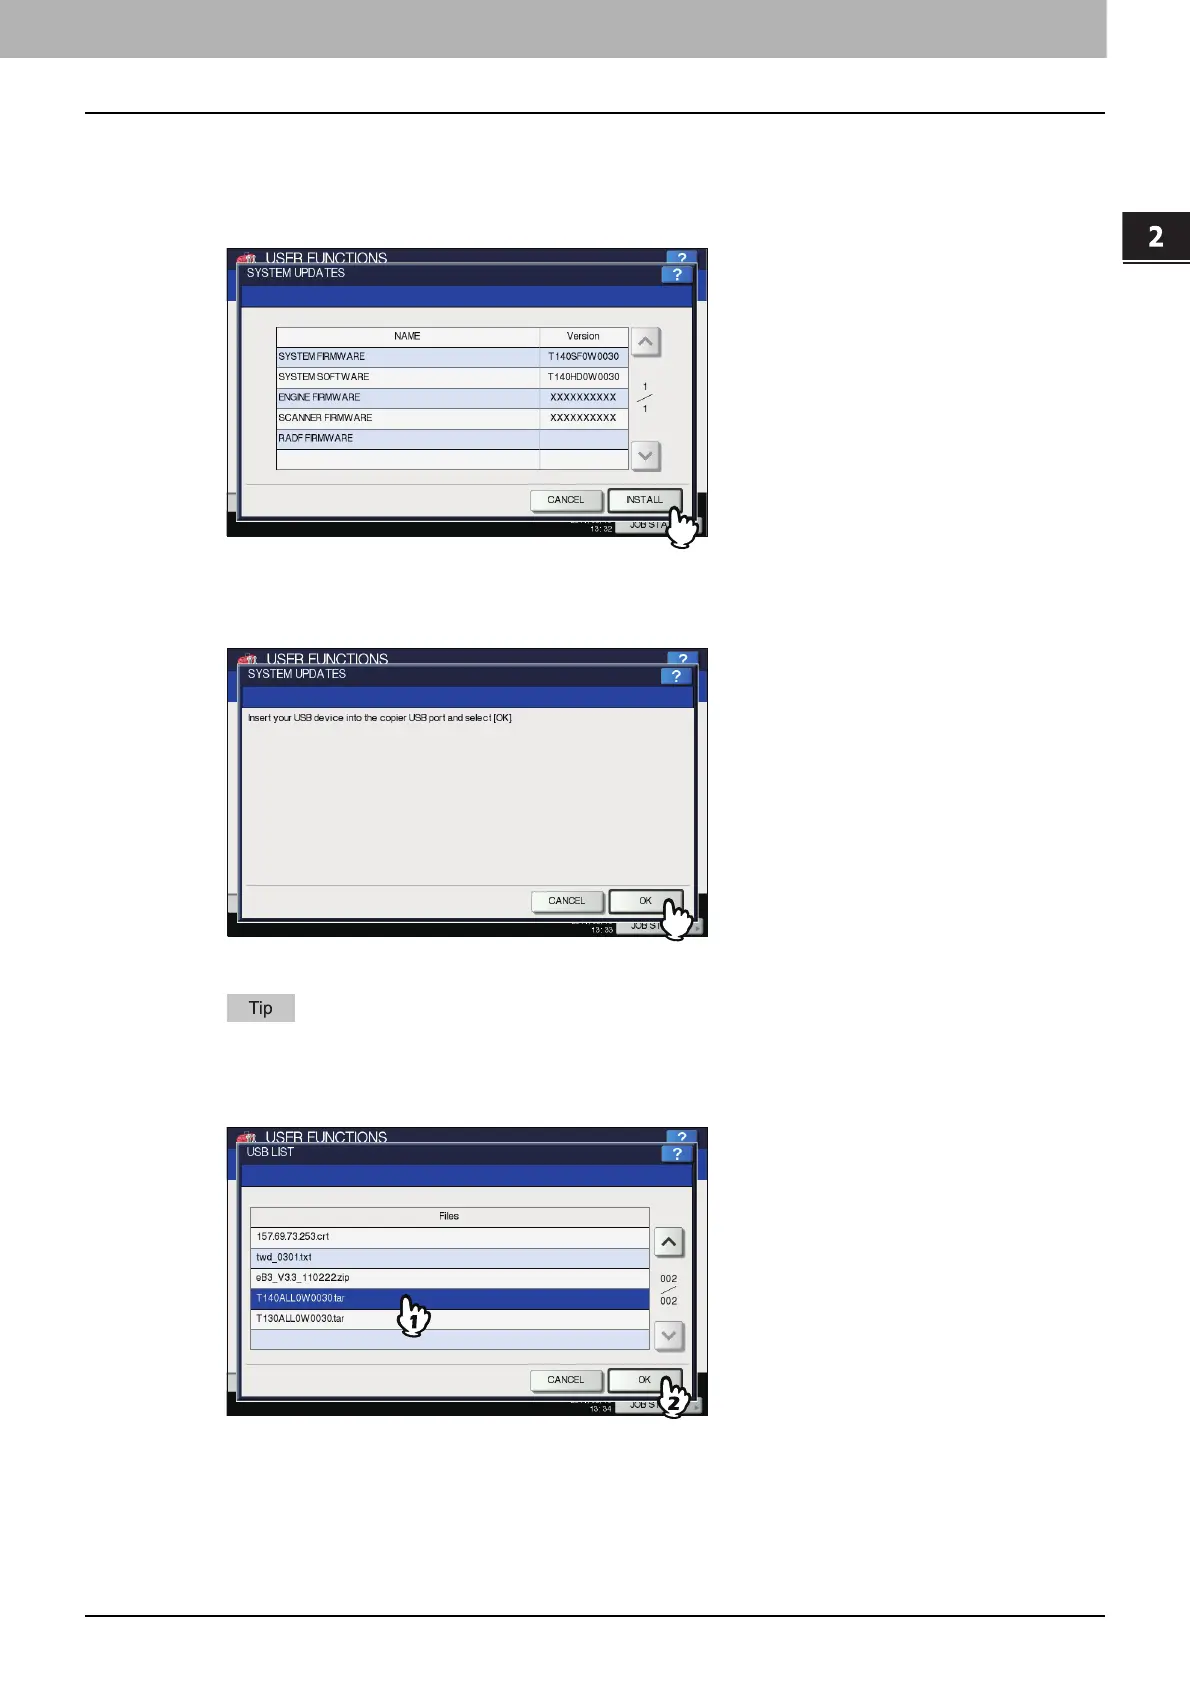
Press [SYSTEM UPDATES] on the GENERAL menu (2/2) screen.
The SYSTEM UPDATES screen is displayed, and you can view the software currently installed and the respective
versions.
2
Press [INSTALL].
A message appears prompting you to insert the USB storage device.
3
Connect your USB storage device in which the files for updating the system are stored
to the USB port on the equipment, and press [OK].
The USB LIST screen is displayed.
For the location of the USB port on the equipment, refer to the Quick Start Guide “Chapter 1:
PREPARATIONS”.
4
Select the file type, and press [OK].
The SYSTEM UPDATES screen is displayed.

 Loading...