Do you have a question about the Toshiba E-STUDIO207 and is the answer not in the manual?
FCC compliance statement and laser safety information for Class 1 laser products.
Information on environmental programs and battery recycling.
Overview of the different manuals provided for the e-STUDIO167/207/237.
Explanation of symbols, warnings, cautions, and notes used throughout the manual.
Information on recommended toner cartridges and their detection features.
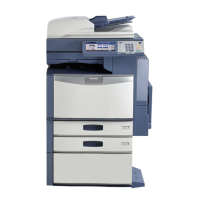
Highlights copying speed, printer/scanner capabilities, space-saving design, and optional features.
Details on energy-saving features like toner recycling and low power modes.
Electrical power requirements, grounding, and safe handling during installation/moving.
Advises on proper placement, stability, and environmental conditions for operation.
Warnings on covers, liquids, heavy objects, and finger safety during operation.
Location and identification of certification, explanatory, and warning labels.
Precautions during operation, maintenance, and handling supplies.
Product meets ENERGY STAR; details on low power and sleep modes.
Identifies key components like Platen Cover, ADF/RADF, Duplexing Unit, and Bypass Tray.
Identifies paper feed units, pedestals, drawers, and covers.
Details the control panel, power switch, and USB terminal.
Diagram showing how optional units connect to the main body.
Explains APS/AMS, MIXED SIZE, ENERGY SAVER, INTERRUPT, and USER FUNCTIONS buttons.
Describes SETTINGS button, SELECTING buttons, LCD screen, lamps, and START button.
Explains lamps, CANCEL/ENTER buttons, arrow keys, and original/density controls.
Explains the different areas and displays on the main copy screen.
Steps to turn on the machine and enter department code if required.
How to manually activate and cancel energy saving modes.
Details acceptable media types and capacities for feeders.
Lists acceptable paper types and provides storage guidelines.
Steps 1-3 for drawer preparation, including plate adjustment.
Steps 4-6 for adjusting guides and placing paper correctly.
Steps 7-8 for final guide adjustment and paper securing.
Steps 9-10 for updating indicator and closing drawer.
Steps 1-2 for preparing pedestal drawers and adjusting guides.
Steps to register standard paper sizes like LD, LT.
How to register non-standard paper sizes as 'OTHER'.
Acceptable originals and scan limits for glass and ADF.
Glass placement precautions and handling memory full errors.
Methods for transparent and booklet originals on glass.
Specifications and precautions for ADF/RADF use.
Steps for aligning originals and notes on loading.
Steps to check paper, place original, set quantity, select modes, and start.
Using CLEAR/STOP button to halt operations and resume jobs.
Responding to 'Next Original?', paper, and memory alerts.
Steps to interrupt, perform another job, and resume original job.
Acceptable media types, sizes, and the bypass copying procedure.
Automatic vs. manual paper selection.
Default settings and how to confirm current functions.
How APS works and when to use manual selection.
How to set up and use mixed-size copying.
Automatic Magnification Selection (AMS) overview.
Manually setting original and paper sizes for magnification.
Adjusting zoom percentage and selecting output paper.
Steps to select TEXT/PHOTO, PHOTO, or TEXT modes.
Selecting AUTO/MANUAL modes and adjusting density levels.
Overview of the copy menu and list of available functions.
Details on FINISHING options like SORT, ALTERNATION, and MAGAZINE SORT.
Introduces 1-sided to 2-sided and 2-sided to 2-sided copying.
Copying multiple originals onto a single sheet.
Steps to enable and use the ID card copying feature.
Adjusting zoom independently for X and Y directions.
Saving and retrieving custom function settings.
Overview of accessing and operating the settings menus.
Using buttons to navigate menus and return to the main screen.
Step-by-step guide to set the equipment's clock.
Selecting display formats for time and date.
Steps to switch the control panel display language.
Setting paper size for drawers and bypass tray.
Choosing the default screen displayed after power-on.
Configuring timers for auto clear, low power, and sleep modes.
Scheduling automatic power ON/OFF times by day.
Adjusting alarm, key touch, ringer, and monitor volumes.
Enabling or disabling audible feedback for button presses.
Steps to enable and configure departmental access control.
Steps to select, modify, or delete department information.
Steps to select and confirm the deletion of department codes.
Steps to select and clear counter values for departments.
How to print lists of department codes and their counts.
Steps to turn off department code management.
Adding frequently used functions to the custom menu.
Configuring the initial selection for Automatic Paper or Magnification.
Steps to select different image quality modes.
Selecting AUTO/MANUAL modes and adjusting density levels.
Choosing default finishing options like SORT or MAGAZINE SORT.
Controlling pop-up messages for paper size changes.
Printing lists for department codes, functions, and supply notices.
How to print the entire menu structure of the equipment.
How to check the equipment's firmware version.
Configuring email settings for service alerts.
How to send a test email to verify notification setup.
Managing email addresses for service notifications.
Troubleshooting equipment not operating or responding.
Resolving toner recognition, emptiness, and memory full errors.
Using display messages to find and clear paper jams.
Reasons for frequent jams and safe release practices.
Steps to remove jammed originals from the ADF/RADF.
Clearing jams in ADF/RADF, bypass tray, and duplexing unit.
Procedures for clearing jams in the duplexing unit and behind the transfer unit.
Safety warnings and steps to access the fuser unit for jam release.
Instructions for removing paper jams from the feed unit.
Instructions for removing paper jams from the feed pedestal.
Steps to replace the toner cartridge when empty.
Benefits of using recommended toner cartridges and detection features.
Accessing, removing, preparing, and inserting the new toner cartridge.
Preparing the new toner cartridge by shaking and removing seals.
Inserting the new cartridge and cleaning the charger unit.
Cleaning the transfer charger wire and closing covers.
Troubleshooting when equipment doesn't operate or respond.
Resolving toner alerts and recognition problems.
Resolving issues with copy density, staining, fogging, and streaks.
Addressing issues with missing image parts or streaks.
Recommended weekly cleaning for optimal scanning performance.
Steps to open the front cover and clean the charger.
Steps to open the side cover and access the transfer unit for cleaning.
Details on general, scanning, paper handling, performance, and physical specs.
Table showing copying speeds by model and paper size.
Specifications for ADF, RADF, Duplexing Unit, Feed Unit, Pedestal, and Drawer Module.
Lists items included in the product package.
Table showing compatibility between various copying functions.
Example formats for printing department, function, and supply lists.
| Brand | Toshiba |
|---|---|
| Model | E-STUDIO207 |
| Category | All in One Printer |
| Language | English |