Do you have a question about the Toshiba e-studio550 and is the answer not in the manual?
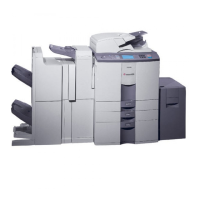
Provides instructions and requirements for the proper installation of the copier.
Guides users on how to power on the copier and initiate auto job start.
Provides a step-by-step guide for performing basic copying operations.
Outlines the fundamental steps for making copies using default settings and placing originals.
Lists the types and sizes of paper that can be used with the copier.
Specifies the types and sizes of originals that can be used with the copier.
Covers how to select paper for copying, including automatic and manual methods.
Explains the automatic paper selection feature that detects original size to match paper size.
Details how to manually select paper size and type when automatic selection is not suitable.
Describes how to use the AMS feature for automatic resizing of originals.
Explains how to manually set both original and copy paper sizes for reduction/enlargement.
Details how to use zoom keys to manually set reproduction ratios for resizing.
Explains how to perform duplex copying for various original types.
Specific instructions for duplex copying of book-type originals.
Guides on selecting the type of book copying, including binding margin options.
Explains the automatic mode for adjusting copy density based on original detection.
Details how to manually adjust the copy density level using the control panel.
Details how to set different reproduction ratios for horizontal and vertical directions.
Details how to copy multiple originals onto a single sheet of paper.
Provides the general procedure for making bypass copies when paper size is not specified.
Details the steps for bypass copying with standard size paper.
Details how to perform bypass copying with non-standard sized paper.
Explains how to set the time period before the copier enters energy-saving mode.
Details how to set the time period before the copier automatically shuts off.
Guides on registering a master code to enable department code management.
Details the process of registering new department codes after master code setup.
Covers registering, changing, and deleting department codes.
Provides an overview of the graphic symbols that appear on the touch panel indicating copier status.
Explains the meaning of various flashing graphic symbols on the touch panel.
Instructs on replacing the toner cartridge when indicated by the symbol.
Introduces the clear paper symbol and general steps for paper jam removal.
Provides detailed steps for removing paper jams from the automatic document feeder.
Guides on clearing paper jams from inside the copier, including bypass cover.
Explains how to remove paper jams from the optional inserter.
Details how to remove paper jams from the optional hole punch unit.
Provides instructions for removing paper jams from the optional finisher.
Guides on removing paper jams from the optional saddle stitch unit.
Explains error symbols requiring service and periodic maintenance messages.
Provides a checklist for daily inspection of the copier.
Details daily checks and recommended weekly cleaning tasks for maintaining the copier.
Offers solutions for common copier problems like not starting or display issues.
Provides steps to resolve issues causing blurred copied images.