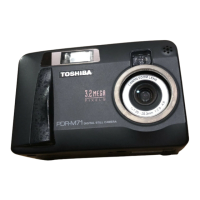
P
Phillip ButlerAug 20, 2025
Why does my Toshiba PDR-M25 Digital Camera keep turning off?
- MMarcus CampbellAug 20, 2025
If your Toshiba Digital Camera turns off during operation, the batteries are likely exhausted. Replace them with new batteries.
Why does my Toshiba PDR-M25 Digital Camera keep turning off?
If your Toshiba Digital Camera turns off during operation, the batteries are likely exhausted. Replace them with new batteries.
How to fix a Toshiba PDR-M25 with no power?
If your Toshiba Digital Camera isn't powering on, the batteries are likely exhausted. Replace them with new batteries.
Why does the battery on my Toshiba Digital Camera drain so fast?
If the battery in your Toshiba Digital Camera runs out quickly, especially in cold conditions, try warming the battery by placing it in your pocket or another warm place before loading it into the camera. Also, clean the battery terminals with a clean, dry cloth.
What to do if my Toshiba Digital Camera doesn't take a photo when I press the shutter button?
If your Toshiba Digital Camera isn't taking pictures when you press the shutter button, it might be due to several reasons. First, ensure a SmartMedia™ card is properly loaded. If it is, check if the card is write-protected and remove the write-protection. Also, the Auto Power OFF function might be activated; try pressing the shutter button fully down.
Why won't the flash charge on my Toshiba PDR-M25 Digital Camera?
If the flash on your Toshiba Digital Camera won't charge, it could be due to two reasons. First, check if the camera is set to Suppressed Flash mode. If so, change it to Auto, Red-Eye Reduction, or Forced Flash mode. Also, make sure the batteries aren't exhausted; if they are, replace them with new ones.
Why can't I use the flash on my Toshiba PDR-M25?
If you can't use the flash on your Toshiba Digital Camera, there are a few potential causes. Check that the mode dial is set to the correct setting. Also, ensure that the flash isn't set to Suppressed Flash mode; switch it to Auto, Red-Eye Reduction, or Forced Flash mode. Finally, make sure you wait until the flash is fully charged before pressing the shutter button.
What to do if buttons don't work on Toshiba PDR-M25?
If nothing happens when you press the buttons and switches on your Toshiba Digital Camera, it could be due to a few reasons. First, try turning the power OFF, removing the batteries, and then trying again. Also, ensure the mode dial is in the correct position. The camera may also be in Auto Power OFF mode; press the shutter button fully or change the mode dial setting.
Why are my Toshiba PDR-M25 photos too dark with flash?
If the playback image on your Toshiba Digital Camera is too dark even when using the flash, it might be because the subject is too far away. Move closer to the subject, ideally within approximately 1.3ft (0.4m) to 8.2ft (2.5m).
Why are my Toshiba PDR-M25 Digital Camera photos blurry?
If the playback image on your Toshiba Digital Camera is blurred, it could be due to a dirty lens. Clean the lens. Alternatively, the image may be out of focus; adjust the macro photography setting to ON or OFF depending on the subject's distance.
Why can't I erase frames on my Toshiba PDR-M25 Digital Camera?
If you can't erase all the frames on your Toshiba Digital Camera, it may be because the frame or the SmartMedia™ is write-protected. Remove the write-protection.
Information about registered trademarks and product names used in the manual.
Explanation of symbols and conventions used to convey information within the manual.
Defines abbreviations used for operating systems like Windows 98, 2000, and ME.
Defines hazard indications like DANGER, WARNING, and CAUTION.
Explains the meaning of graphic symbols used for safety instructions.
Provides guidelines for avoiding damage and ensuring proper use of the camera.
Instructions on cleaning the lens, display, and camera body to prevent damage.
Lists recommended battery types (NiMH, Lithium, Alkaline) for optimal camera performance.
Important guidelines for connecting and using the AC adapter safely and correctly.
Identifies external components of the camera, including buttons and controls.
Details various buttons, keys, and connection terminals on the camera.
Explains the different shooting modes selectable via the mode dial.
Describes the icons and information shown on the camera's status display.
Step-by-step guide for inserting AA batteries into the camera correctly.
Instructions for safely removing batteries from the camera.
Explains how to interpret the battery level indicators on the LCD and status displays.
Important warnings and advice for preventing data loss and damage to SmartMedia™ cards.
Procedure for inserting a SmartMedia™ card into the camera.
Procedure for safely removing a SmartMedia™ card from the camera.
How to use the write-protect sticker to prevent accidental erasure of data.
Steps to power on the camera and select a shooting mode.
Procedure for powering down the camera.
Details the information shown on the LCD monitor during photography.
Explains the display elements in Manual Photography mode.
Describes the information displayed on the LCD during image playback.
Instructions for composing shots using the camera's viewfinder.
Instructions for composing shots using the camera's LCD monitor.
Explains how to adjust white balance for different lighting conditions.
Guides on adjusting exposure levels for optimal brightness in various scenes.
Allows selection of shooting modes like 1SHOT, MULTI, and BULB.
Table showing possible combinations of photography modes and functions.
Controls whether a captured image is displayed briefly after shooting.
Adjusts photographic sensitivity (ISO 100, 200, 400) and color mode.
Sets exposure duration for BULB mode (1 or 2 seconds).
Configures the delay time for the self-timer (10 or 2 seconds).
Manages on-screen display status in REC and PLAY modes.
Allows adjustment of the LCD monitor's brightness.
Explains how image folders are created and named on the SmartMedia™ card.
Steps to apply write-protection to individual images to prevent deletion.
Procedure to remove write-protection from selected images.
Sets the display language for menus and on-screen information.
Configures the camera's beep tones for operations and states.
Allows setting the current date and time for accurate image metadata.
Adjusts the duration before the camera automatically powers off.
Selects the video output standard (NTSC or PAL) for TV connection.
Determines whether image numbers are reset after taking photos.
Option to restore camera settings to their factory defaults.
Instructions for transferring images from SmartMedia™ to a computer.
Technical details of the camera body, including image format and frame counts.
Information on SmartMedia™ type, operating conditions, dimensions, and accessories.
Contact information and online resources for users in the US and Canada.
| Image Sensor | 1/2.7-inch CCD |
|---|---|
| Max Resolution | 1600 x 1200 |
| Optical Zoom | 3x |
| Digital Zoom | 2x |
| Focal Length (equiv.) | 38 - 114 mm |
| ISO | 100 |
| Shutter Speed | 1/2 - 1/1000 sec |
| Type | Compact |
| Max Aperture | f/2.8 |
| Storage | SmartMedia card |
| Battery | 2 x AA |
| Effective Pixels | 2.0 million |