Visit WWW.TOTALPOND.COM for information and tips.
EN
EN
8
Please call Customer Care before returning item to store: 1-888-412-6001
9
5
6
7
Step 5. If you would like to run the cord
through the side of the container, select
a spot on the container’s wall that is the
least visible for the cord exit. Drill a hole
that is approximately 1-1/4 in. in diameter.
NOTE: Appropriate safety equipment
should be used while drilling.
8
9
Step 6. Place the unit inside
the container and run the cord
through the hole.
Push the rubber stopper on the
cord into the hole until it seals
well. Continue to step 10.
Step 7. If you would like to run the
cord through the bottom of the
container, widen the existing hole
or create a hole approximately
1-1/4 in. in diameter.
NOTE: Appropriate safety
equipment should be used while
drilling.
Step 8. Glue the container stands
evenly across the bottom surface
near the outside.
Step 9. Place the unit inside the
container and run the cord through
the hole.
Push the rubber stopper on the cord
into the hole until it seals well.
10 11
12
GFCI
outlet
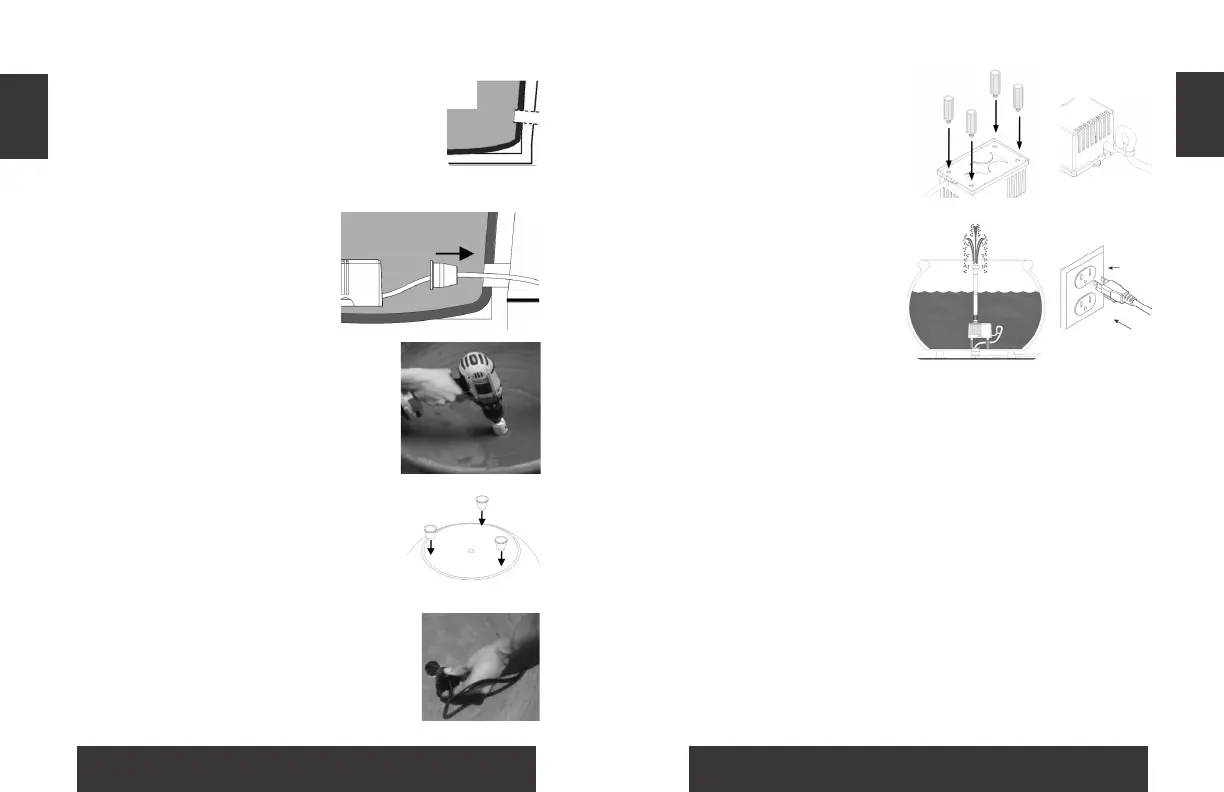
Step 10. If needed, attach
the extensions to the
bottom of the lter box.
Step 11. If needed, use the
cord holder to tie a loop
in the cord. This will help
the pump stay in place.
Step 12. Place the
assembled fountain kit
in the container. Fill the
container up to 2/3 with
water.
Step 13. Connect the unit
to a properly grounded
electrical outlet.
13
SPECIFICATIONS
Product dimensions (LxW)
5 x 3.15
Maximum total height
16.4 in.
Minimum total height
9.8 in. without extensions, 11.2 in. with
extensions
Ideal container width
12-20 in.
Power consumption
8.5 watts / 0.12 amps
Cord length
6 ft.