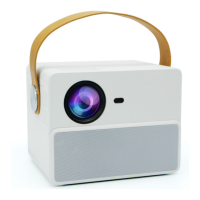
This document outlines the features, usage, and maintenance of a Mini Smart Home Theater projector. It serves as a quick user guide, providing essential information for safe and effective operation.
Safety Precautions
Before operating the projector, it is crucial to read and understand all safety instructions to prevent damage to the device or injury to the user. The manual emphasizes keeping the product in a safe place for future reference. Users are advised to handle the projector with care, avoiding drops or impacts from high altitudes to protect the internal components. A lens protection cap should always be used after operation to prevent scratches on the lens. Only the standard power adapter provided with the projector should be used to avoid damage to the power cord due to excessive bending or incorrect voltage.
High Temperature Attention
Proper ventilation is critical for the projector's longevity and performance. When the projector is in operation, it is strictly forbidden to block the air inlet or outlet. A minimum distance of 30cm must be maintained between the machine's air inlets/outlets and any walls or obstructions. Failure to ensure adequate ventilation can lead to excessively high temperatures, potentially damaging the device.
Electric Shock Prevention
To prevent electric shock and internal damage, users must ensure that foreign objects such as paper dust, wires, or screws do not fall into the machine. If any foreign object does enter the projector, the power must be immediately turned off, and the object should be removed by professional maintenance personnel. Users are explicitly warned against disassembling the machine themselves, as there are no customer-serviceable parts inside. To further prevent fire and electric shock, the projector should not be exposed to rain or moisture.
List of Accessories
The product package includes the following items:
- Projector × 1
- Remote control × 1
- HDMI cable × 1
- AV line × 1
- Power cord × 1
- Instruction manual × 1
Appearance and Function Description
The projector features a user-friendly design with clearly labeled ports and controls.
Top View Controls:
- Focus knob: Used to adjust the clarity of the projected image.
- Trapezoid correction knob: Corrects vertical keystone distortion in the image.
- Indicator light: Provides status feedback for the device.
- On/Off button: Powers the projector on or off.
- Return key: Navigates back in menus or settings.
- Navigation + OK: Used for menu navigation and confirming selections.
- Menu: Accesses the main menu for settings and options.
- Source key: Selects the input source (e.g., HDMI, USB).
- Volume down: Decreases the audio volume.
- Volume up: Increases the audio volume.
- Mute button: Silences the audio output.
Rear View Ports:
- Speaker port: For connecting external audio speakers.
- AV cable port: Connects to devices using an AV cable.
- TF card port: For inserting a TF (microSD) card.
- HDMI port: Connects to devices via an HDMI cable.
- USB port: For connecting USB flash drives or other USB devices.
- VGA port: Connects to computers via a VGA cable.
- IR remote control receiving window: Receives signals from the remote control.
Projection Screen Debugging
The manual provides guidance on how to troubleshoot common projection issues:
- Blurred image: If the image is blurry (Figure 1), adjust the focus knob until the image becomes clear.
- Vertical trapezoid distortion: If the image is distorted vertically (Figure 2), adjust the keystone correction knob to make the screen vertical.
- Rotated screen: If the screen appears rotated (Figure 3), ensure the projector is placed on a horizontal surface.
- Inconsistent screen size on two sides: If the size of the screen differs on the two sides (Figure 4), adjust the projector's position so that the lens directly faces the screen.
Device Connection Instructions
The projector supports various input sources, allowing connection to a wide range of devices. The signal flow direction is indicated by an arrow. For AV cable connections, the yellow end carries the video signal, the white end is for the left audio channel, and the red end is for the right audio channel.
To select an input source, use the remote control or the 'S' button on the projector to choose from the following options:
- Video AV: Connect VCD or DVD players using an AV cable.
- VGA: Connect desktop or laptop computers using a VGA cable.
- USB: Insert a USB flash drive for media playback.
- TF card: Insert a TF card for media playback.
- HDMI: Connect to computers, high-definition DVDs, gaming consoles (PS4, XBOX, SWITCH), and other devices using an HDMI cable.
- Multi-screen interaction and Bluetooth connection: These features enable wireless communication via Wi-Fi and Bluetooth, respectively, allowing direct connection to mobile phones.
- Setup: Access settings to change projection mode, zoom the screen, and adjust text size.
Bluetooth Connection Operation
To connect via Bluetooth, select the Bluetooth connection option on the projector. This will open an interface where you can search for the projector's Bluetooth signal ("projectorBT") on your mobile phone. Once found, match the devices. A voice prompt will confirm a successful connection. After connection, your phone's music can be played synchronously through the projector.
Important Notes on Bluetooth:
- The projector only supports receiving Bluetooth signals from mobile phones or similar devices. It does not transmit Bluetooth signals, meaning it cannot connect to Bluetooth speakers.
- When the energy-saving mode is selected, the projector light will turn off, and the device will enter a low-power state. To wake up the projector, press the up or down key.
Multi-screen Interactive Connection Instructions
The projector offers mobile wireless connection capabilities with two channels: one for Android phones and one for Apple phones.
Wireless Same-Screen Channel Selection:
- Android phone connection: Select "Sansr connection" (interface shown as MIRACAST).
- Apple phone connection: Select "Apple Connection Channel Connection" (interface shown as IOS Display).
Video Push Channel Selection:
- Both Android and Apple phones use the "Apple Connection Channel" (IOS Display) for video push.
Switching Channels:
After powering on the projector and entering the "multi-screen interaction" function, wait approximately 20 seconds. Double-click the "OK" key to switch channels. If switching from another function to Multi-Screen Interaction, wait about 5 seconds and then double-click the OK key. A "Switching" message in the upper left corner indicates the channel is changing.
Apple Wired Connection Operation:
- Switch Channels: Double-click the confirmation key to switch between Android and Apple channels until the "WIFIDISPLAY" interface appears (Versions 5.22.14). This interface will show "LOLLIPOP-819686" and an IP address (e.g., 192.168.49.1).
- Connect Device: Plug in the data cable and connect your Apple phone. If the data cable is working correctly, a "trust device" pop-up window will appear on your phone. Select "trust." After about 1 second, the screen will be mirrored.
Apple Wireless Connection Operation:
- Enable Wi-Fi: Open the Wi-Fi on your Apple mobile phone.
- Open Console: Access the control center (console) on your phone.
- Tap Screen Mirroring: Tap the screen mirroring option.
- Connect to Projector: Select the projector's device name (e.g., "LOLLIPOP-819686-ITV") to establish a successful screen mirroring connection.
Android Wired Same Screen:
- Enter Channel Interface: Ensure the projector is in the channel interface, which displays two icons (Versions 5.22.14, "WIFIDISPLAY," "LOLLIPOP-819686," and "Waiting for connection...").
- Connect Data Cable & Enable USB Debugging: Connect the data cable to your Android phone. Open "Developer options" on your phone and enable "USB debugging." (Note: The method to open Developer Options varies by phone model; users may need to search online for specific instructions.)
- Achieve Same Screen: Wait approximately 1 second for the screen to be mirrored.
Android Wireless Same Screen:
- Switch to Small Board Mode: Double-click the key to switch to small board mode, which displays an interface with two icons (Versions 5.22.14, "WIFIDISPLAY," "LOLLIPOP-819686," and "Waiting for connection...").
- Connect to Wi-Fi & Wireless Display:
- Open your phone's Wi-Fi and connect to any available network.
- Go to your phone's settings.
- Navigate to "More link means" (or similar, such as "More" -> "Wireless display").
- Select "Wireless display" and then choose your projector from the list (e.g., "LOLLIPOP-4447FB").
- Wait 1 second for the screen to be mirrored. (Note: Function names and locations may vary depending on the phone model. Common names include "wireless display," "wireless connection," or "multi-screen interaction.")
Wireless Video Push Operation (Android & Apple):
- Push Function Interfaces: The push function utilizes three target interfaces (Versions 5.22.14, "WIFIDISPLAY," "LOLLIPOP-819686," and an IP address like 192.168.49.1).
- Connect to Projector's Wi-Fi: Turn on your phone's Wi-Fi and connect to the projector's device (e.g., "LOLLIPOP-819686"). The password is "12345678." (Note: The device name will start with "LOLL," but the full name may vary by machine.)
- Open Browser: Open a web browser on your phone and directly enter the IP address "192.168.49.1" in the address bar.
- Configure Wi-Fi AP: Enter the Wi-Fi setting interface on the projector and select "WiFi AP." Click "Scan" to find your home Wi-Fi network. Enter the password and click "Connect."
- Confirm Connection: Once the projection interface displays the successful connection picture (showing "WIFIDISPLAY," "LOLLIPOP-819686," and "TP-LINK_EOSC" with IP addresses), the connection is established. (Note: If using the same Wi-Fi, this connection only needs to be made once.)
- Project Content: Open any projection-supported app on your phone, select the desired video, click the projection button (often represented by a "TV" icon), and enjoy the movie on the projector. This feature is compatible with both Android and iOS devices.
The projector supports a variety of media file formats:
- Audio file: MP3, WMA, ASF, OGG, ACC, WAV
- Picture file: JPEG, BMP, PNG
- Video file: 3GP (H.263, MPEG4), AVI (XVID, DIVX, H.264), MKV (XVID, H.264, DIVX), FLV (FLV1), MOV (H.264), MP4 (MPEG4, AVC), MEP (MEPG1), VOB (MPEG2), MPG (MPG-PS), RMVB (RV40)
- TXT file: TXT
Important Note on Video Playback:
The projector supports movies up to 1080P resolution. However, it does not support Dolby audio and DTS sources. When playing such files directly from a USB disk or TF card, there will be no sound. To play these files with sound, they must first be decoded by a computer or mobile phone and then connected to the projector for playback.
Projection Distance and Size
The projector has a transmission ratio of 1.2:1. The provided picture illustrates the relationship between projection distance and screen size, serving as a reference. The actual product's performance may vary slightly.
Warranty Card
The manual includes a warranty card section for recording customer details, contact information, address, serial number (SN), store name, store address, and date of purchase.
Product Warranty Policy Description
The product comes with a comprehensive warranty policy:
- 7-Day Return Service: Within 7 days of purchase, if failures are determined to be caused by product components (not improper use or man-made causes), customers can enjoy a return service with a valid purchase bill and three-guarantee certificates.
- 1-Year Free Maintenance: Within one year of purchase, if failures are determined to be caused by the main components of the product (not improper use or human causes), customers can receive free maintenance services with a valid purchase ticket and three-guarantee certificates.
- 3-Month Accessory Warranty: Within three months of purchasing accessories for the mini smart home theater projector, if accessory failures are detected by the company's after-sales service center due to component issues, customers can enjoy free warranty service with a valid purchase certificate and three-guarantee certificates.
Warranty Exclusions:
The company reserves the final right to interpret the Three Guarantees service. The following issues are not covered by the warranty:
- Device casing, instruction manual, packaging, promotional items, and random gifts.
- Damage caused by unauthorized disassembly, dismantling, refitting, or upgrading by the user or non-designated service repair points.
- Damage caused by using the machine not in accordance with the product instructions.
- Inability to provide valid purchase notes and valid three-guarantee certificates.