EasyManua.ls Logo

Toyota 2013 Tacoma User Manual

Toyota 2013 Tacoma
10 pages
To Next Page IconTo Next Page
Page #1 background imageLoading...
Page #1 background image
Rostra Precision Controls, Inc. - 2519 Dana Dr. - Laurinburg, NC 28352 - 800-782-3379 - rostra.com
Page 1"
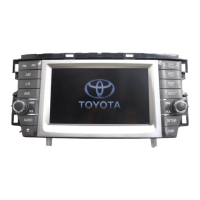
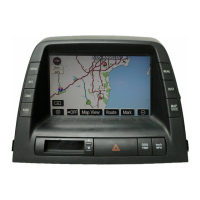
SoftTouch Navigation System
250-7613 2012-2013 Toyota Camry Installation Instructions
General Applicability:
Toyota 2012-2013 Prius/Prius V, 2013 Venza, 2013 Avalon, 2013 Highlander, 2013 Tacoma
For video installation instructions, please visit us online at www.rostra.com.
Parts Identification
Page 1
Vehicle Preparation
Page 3
Programming Switch Settings
Page 3
Installation
Page 4
Parts Identification
Item
Qty.
Description
1
1
Navigation interface module
2
1
LCD IN harness
3
1
TP-IN harness
4
1
Hardware service parts (VHB tape, metal plate)
5
1
Vehicle interface harnesses
6
1
Stylus
7
1
GPS antenna with magnetic base
8
1
GPS speaker
9
1
Navigation interface board
10
1
LCD-IN/TP-IN Extension Harness
Form #5420, 3-20-2013

Other manuals for Toyota 2013 Tacoma

Question and Answer IconNeed help?

Do you have a question about the Toyota 2013 Tacoma and is the answer not in the manual?

Toyota 2013 Tacoma Specifications

General IconGeneral
Screen Size6.1 inches
TouchscreenYes
Voice RecognitionYes
BluetoothYes
HD RadioNo
USB PortYes
Navigation SystemOptional
Auxiliary Input JackYes
Voice ControlYes
Satellite RadioOptional
Smartphone IntegrationNo

Summary

Product Warnings and Warranty

Electrostatic Discharge (ESD) Precautions

Critical handling procedures to prevent damage and voiding the product warranty.

Professional Installation Requirements

Mandates professional installation for vehicle radio head unit and navigation electronics.

Vehicle Preparation and Settings

Vehicle Preparation Safety

Safety advice including emergency brake and battery disconnection before installation.

Programming Switch Settings

Configuration of dip switches for default operation and camera integration.

Installation Procedure

Dashboard Disassembly

Step-by-step guide to removing dashboard trim and the radio/screen unit.

Navigation Module Installation

Instructions for removing the screen housing and mounting the navigation interface board.

Component Connections

Guidance on connecting ribbon cables, ESD tape, speaker, and GPS antenna.

System Testing and Activation

Final Connections and Testing

Reconnecting harnesses, radio, and performing initial navigation system testing.

Navigation Interface Activation

Steps to turn ignition on and activate the navigation interface using steering wheel controls.

Related product manuals