Do you have a question about the Toyota PZQ60-00230 and is the answer not in the manual?
| Brand | Toyota |
|---|---|
| Model | PZQ60-00230 |
| Category | Automobile Accessories |
| Language | English |
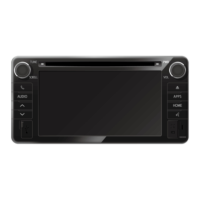
Remove the audio fascia panel and its components as instructed.
Remove the blanking plate and audio side brackets, then discard the blanking plate.
Peel and prepare the earth plate sticker for GPS antenna installation.
Install the GPS antenna onto the prepared earth plate.
Install the GPS antenna and earth plate behind the air vent duct and secure excess wire.
Attach mounting brackets to the head unit using M5x8 bolts, avoiding self-tapping screws.
Identify and locate the necessary vehicle connectors for the head unit installation.
Connect the vehicle harness and patch harnesses to the specified ports on the head unit.
Re-install all removed parts, ensuring correct alignment and no gaps.
Reconnect the battery terminal clamp with the specified torque.
Verify all switches and audio controls function correctly after re-installation.
Place the owner's manual in the glove box.
Verify the rear camera display shows the correct view when the gear is in REVERSE.
Check microphone connectivity by pressing the 'Phone' button and responding to prompts.
Drive vehicle outdoors to check GPS signal via Service Menu.
Access 'System Sensors Check' to verify GPS status and speed pulse count.
After rectifying issues, restart the head unit by holding the POWER button.