EasyManua.ls Logo

TP-Link Archer AX10000 - User Manual

TP-Link Archer AX10000
2 pages
Print Icon
To Next Page IconTo Next Page
Loading...
Internet
Connect the powered-off modem
to the router’s 2.5 Giga WAN port
with an Ethernet cable.
Power on the modem, and then wait about
2 minutes for it to restart.
Connect the power adapter to the
router and turn on the router.
Verify the LED on the top is solid on (red or white) before moving on.
If your internet connection is through an Ethernet cable directly from the wall instead of through a DSL /
Cable / Satellite modem, connect the Ethernet cable to the router’s 2.5 Giga WAN port, and then follow
steps 3 and 4 to complete the hardware connection.
*Image may dier from actual product.
Connect the Hardware
1
1
2
4
3
Refer to Q4 of Need Help? to place the router for optimal Wi-Fi performance.
Unplug the power
to turn o your modem, if any,
and remove the backup battery if it has one.
Modem
Unplug the power
Hold the antennas from the base and
push them fully into the slots.
Congure the Router
2
Method ONE: Via TP-Link Tether App
1. Download the Tether app.
Scan for Tether
Tether
or
Method TWO: Via a Web Browser
1. Connect your device to the router wirelessly
or with an Ethernet cable.
3. Follow the step-by-step instructions to
set up the internet connection and
register for the TP-Link Cloud service.
SSID:TP-Link_XXXX
SSID:TP-Link_XXXX_5G
SSID:TP-Link_XXXX_5G_Gaming
Wireless Password/PIN: XXXXXXXX
The default wireless network names (SSIDs) and password
are printed on the label at the bottom of the router.
Choose your device type
Gaming Router
Range Extender
Router
3. Tap the button in the Tether app and
select Gaming Router > Archer AX10000.
Follow the steps to complete the setup
and connect to the internet.
2. Open the Tether app and log in with your
TP-Link ID.
Note: If you don’t have an account, create one first.
2. Launch a web browser, and enter
http://tplinkwifi.net or http://192.168.0.1 in
the address bar. Create a password to log in.
Note: If the login window does not appear, please refer to
Q1 of Need Help? in this guide.
http://tplinkwi.net
Password:
Conrm Password:
Let’s Get Started
Set up with videos:
Scan QR code or visit
https://www.tp-link.com/support/setup-video/#wi--routers
Question and Answer IconNeed help?

Do you have a question about the TP-Link Archer AX10000 and is the answer not in the manual?

Summary

Setup Guidance

Connect the Hardware

Connect the modem to the router using an Ethernet cable and power on the devices.

Configure the Router

Set up the router using the TP-Link Tether app or a web browser for internet access.

LED and Button Indicators

Understanding LED Status Lights

Explains the meaning of different LED light patterns and colors on the router.

Router Button Functions

Describes the operational functions of the WPS, Wi-Fi, and LED buttons.

Troubleshooting and FAQs

Cannot Access Web Management Page

Steps to resolve issues when the router's web management page is inaccessible.

Cannot Access Internet

Troubleshooting steps for resolving internet connectivity problems.

Optimal Wi-Fi Placement

Guidance on positioning the router for the best wireless performance.

Overview

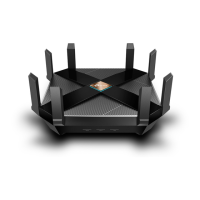
This document serves as a Quick Installation Guide for the TP-Link Archer AX10000 Tri-Band Wi-Fi 6 Gaming Router, providing instructions for hardware connection, router configuration, and troubleshooting.

Function Description

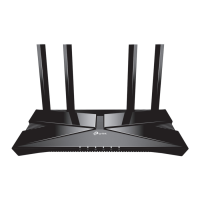
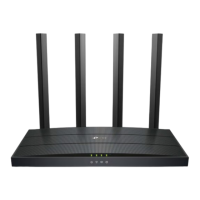
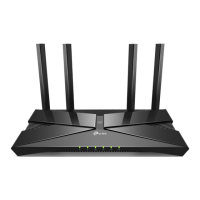
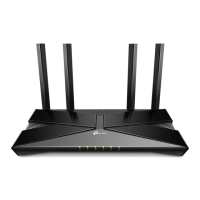
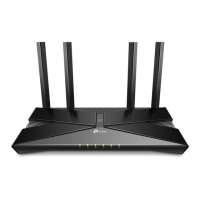
The TP-Link Archer AX10000 is a high-performance Tri-Band Wi-Fi 6 Gaming Router designed to provide robust and fast internet connectivity, particularly optimized for gaming. It functions as a central hub for your home network, distributing internet access to various devices wirelessly or via Ethernet cables. The router supports Wi-Fi 6 technology, offering improved speeds, capacity, and reduced latency compared to previous Wi-Fi standards. Its tri-band capability allows for dedicated bandwidth for different types of traffic, enhancing overall network efficiency. The device can be configured either through a dedicated mobile application (TP-Link Tether App) or via a web browser, offering flexibility in setup. It also includes features like WPS (Wi-Fi Protected Setup) for easy connection of devices and an LED button to control the router's indicator lights.

Usage Features

Hardware Connection:

  • Modem Connection: The router connects to your existing DSL/Cable/Satellite modem via an Ethernet cable. Ensure the modem is powered off and any backup battery is removed before connecting it to the router's 2.5 Giga WAN port.
  • Direct Ethernet Connection: If your internet comes directly from the wall via an Ethernet cable, connect it to the router's 2.5 Giga WAN port.
  • Antenna Installation: The router features external antennas that need to be pushed fully into their slots from the base.
  • Power-Up Sequence: After connecting the modem (if applicable) and the router, power on the modem and wait approximately 2 minutes for it to restart. Then, connect the power adapter to the router and turn it on.
  • LED Verification: Before proceeding with configuration, verify that the router's LED on the top is solid (red or white), indicating it's ready.
  • App Download: Download the TP-Link Tether app from the App Store or Google Play.
  • Login/Account Creation: Open the Tether app and log in with your TP-Link ID. If you don't have an account, you'll need to create one first.
  • Device Selection: Tap the '+' button in the app, select "Gaming Router," and then choose "Archer AX10000."
  • Setup Process: Follow the on-screen steps within the app to complete the setup and connect to the internet.
  • TP-Link ID Binding: For a more complete service experience, bind your TP-Link ID to the router.

Router Configuration (Method TWO: Via a Web Browser):

  • Device Connection: Connect your device (computer, smartphone, etc.) to the router either wirelessly or with an Ethernet cable. The default wireless network names (SSIDs) and password are printed on the label at the bottom of the router.
  • Access Web Management Page: Launch a web browser and enter http://tplinkwifi.net or http://192.168.0.1 in the address bar.
  • Login: Create a password to log in. If the login window doesn't appear, refer to Q1 in the "Need Help?" section.
  • Setup Process: Follow the step-by-step instructions to set up the internet connection and register for the TP-Link Cloud service.

LED Indicators:

  • Pulsing Orange: System is starting up.
  • Solid White: Router is working normally.
  • Solid Red: No internet connection.
  • Solid Orange: Router is connected to the internet, but Wi-Fi is off.
  • Pulsing White: Firmware upgrade, WPS connection, or router reset is in progress.

Buttons:

  • WPS Button: Press to initiate a WPS connection with a client device.
  • Wi-Fi Button: Press to turn the wireless function of the router on or off.
  • LED Button: Press to turn the router's LED lights on or off.

Maintenance Features

Troubleshooting Internet Access (Q2):

  • Modem Power Cycle: If you can't access the internet, power off your modem for about 5 minutes, then power it back on. Ensure only one Ethernet port on the modem is connected if it has multiple.
  • Direct Modem Connection Check: Connect a computer directly to the modem via an Ethernet cable to verify if the internet is working normally. If not, contact your internet service provider.
  • WAN IP Address Check: Log in to the router's web management page, go to "Network Map," and check the WAN IP address.
    • If valid, go to "Advanced > Network > Internet," and set Primary DNS to 8.8.8.8 and Secondary DNS to 8.8.4.4.
    • If not valid, check hardware connections or contact your internet service provider.
  • MAC Clone (for cable modem users): Log in to the router's web management page, go to "Advanced > Network > Internet > MAC Clone," select "Clone Current Device MAC," click "SAVE," and then reboot both the modem and the router.

Troubleshooting Web Management Page Access (Q1):

  • Router Reboot: Reboot the router and try again.
  • IP Address Settings: If your computer uses a static IP, change its settings to obtain an IP address automatically.
  • Address Verification: Ensure http://tplinkwifi.net or http://192.168.0.1 (or http://192.168.1.1) is correctly entered in the web browser.
  • Browser/Adapter Check: Try a different web browser or disable and re-enable the network adapter in use.

Resetting the Router (Q3):

  • Bluetooth Discovery: The router's Bluetooth is enabled for 30 minutes after a factory reset, which is useful if the router can't be found via Bluetooth in Tether.
  • Hardware Reset: With the router powered on, use a pin to press and hold the Reset button on the back of the router until the LED blinks.
  • Software Reset: Log in to the router's web management page, go to "Advanced > System > Backup & Restore," and click "FACTORY RESTORE." The router will reset and restart automatically.

Optimal Wi-Fi Performance (Q4):

  • Placement: Avoid placing the router in corners or closets.
  • Obstacles: Keep the router away from obstacles and high-powered appliances.
  • Central Location: Place the router in a central location at a certain height.
  • Antenna Orientation: Keep the antennas vertical when the router is placed on a desktop.

General Safety and Care:

  • Environment: Keep the device away from water, fire, humidity, or hot environments.
  • Disassembly: Do not attempt to disassemble, repair, or modify the device. Contact support if service is needed.
  • Chargers: Use only recommended chargers and avoid damaged chargers or USB cables.
  • Wireless Restrictions: Do not use the device where wireless devices are prohibited.
  • Adapter Accessibility: Ensure the power adapter is installed near the equipment and is easily accessible.

Support and Community:

  • Community: Visit https://community.tp-link.com to interact with TP-Link users and engineers.
  • Technical Support: Visit https://www.tp-link.com/support for technical support, replacement services, user guides, and more information.
  • Feedback: For suggestions or needs regarding product guides, email techwriter@tp-link.com.cn.

TP-Link Archer AX10000 Specifications

General IconGeneral
DSL WANNo
Ethernet WANYes
WAN connection typeRJ-45
ModulationOFDM
Wi-Fi bandTri-band (2.4 GHz / 5 GHz / 6 GHz)
Wi-Fi standards802.11a, 802.11b, 802.11g, Wi-Fi 4 (802.11n), Wi-Fi 5 (802.11ac), Wi-Fi 6 (802.11ax)
Top Wi-Fi standardWi-Fi 6 (802.11ax)
WLAN data transfer rate (max)4804 Mbit/s
WLAN data transfer rate (first band)918 Mbit/s
VPN serverOpenVPN, PPTP
Cabling technology10/100/1000Base-T(X)
Networking standardsIEEE 802.11a, IEEE 802.11ac, IEEE 802.11ax, IEEE 802.11b, IEEE 802.11g, IEEE 802.11n
Ethernet LAN data rates10, 100, 1000, 2500 Mbit/s
Ethernet LAN interface typeGigabit Ethernet
Number of guest networks (2.4 GHz)1
Mobile network generation-
Ethernet LAN (RJ-45) ports8
Security algorithmsWPA, WPA2, WPA2-Enterprise, WPA3
Product typeTabletop router
Product colorBlack, Red
LED indicatorsPower, Status
Transmit power\u003C30dBm(2.4GHz & 5.15GHz~5.25GHz & 5.725GHz~5.825GHz), \u003C24dBm(5.25GHz-5.35GHz & 5.47GHz-5.725 GHz) dBmW
Processor cores4
Processor frequency1800 MHz
Output current5 A
Output voltage12 V
Power source typeDC
Storage temperature (T-T)-40 - 70 °C
Operating temperature (T-T)0 - 40 °C
Storage relative humidity (H-H)5 - 90 %
Operating relative humidity (H-H)10 - 90 %
Browser supportedInternet Explorer 11+, Firefox 12.0+, Chrome 20.0+, Safari 4.0+, or other JavaScript-enabled
Cables includedLAN (RJ-45)
Sustainability certificatesRoHS
Weight and Dimensions IconWeight and Dimensions
Width288 mm
Height184 mm

Related product manuals