EasyManua.ls Logo

TP-Link Archer AX58 - User Manual

TP-Link Archer AX58
2 pages
Print Icon
To Next Page IconTo Next Page
Loading...
Refer to Q5 of Need Help? to place the router for optimal
Wi-Fi performance.
New Password:
Let’s Get Started
Conrm Password:
http://tplinkwi.net
Connect the Hardware
Note: If the 2.4GHz LED and 5GHz LED are off, press and hold the WPS/Wi-Fi button on the back for
more than 2 seconds, then release the button. Both the LEDs should turn solid on.
Power
On
Internet
On
2.4GHz
On
5GHz
On
If your internet comes from an Ethernet outlet instead of a DSL / Cable / Satellite modem, connect the
router’s WAN port to it, and then follow steps 3 and 4 to complete the hardware connection.
*Image may dier from actual product.
Unplug the power to turn o your modem, if any, and remove
the backup battery if it has one.
Modem
Unplug the power
Power on the modem, and then wait
about 2 minutes for it to restart.
2
Connect the power adapter to
the router and turn on the router.
3
Verify that the hardware connection is correct by checking the following LEDs.
4
Set up with videos:
Scan QR code or visit
https://www.tp-link.com/support/setup-video/#wi--routers
1
Internet
Connect the powered-off
modem to the router’s WAN
port with an Ethernet cable.
1
Set Up the Network
Method ONE: Via TP-Link Tether App
1. Download the Tether app.
Scan for Tether
Tether
or
Method TWO: Via a Web Browser
The default wireless network names (SSIDs) and password
are printed on the label at the bottom of the router.
1. Connect your device to the router wirelessly
or with an Ethernet cable.
2. Open the Tether app and log in with your
TP-Link ID.
3. Tap the button in the Tether app and
select Wireless Router > Standard
Routers. Follow the steps to complete the
setup and connect to the internet.
Note: If you don’t have an account, create one first.
2
Model: Archer AX3000
AX3000 Gigabit Wi-Fi Router
Wireless Password/PIN:XXXXXXXX
SSID:TP-Link_XXXX
SSID:TP-Link_XXXX_5G
2. Launch a web browser, and enter
http://tplinkwifi.net or http://192.168.0.1 in
the address bar. Create a password to log in.
Note: If the login window does not appear, please refer to
Q1 of Need Help? in this guide.
3. Follow the step-by-step instructions to
set up the internet connection and
register for the TP-Link Cloud service.
To enjoy a more complete service from
TP-Link, bind your TP-Link ID to the router.
Choose Your Device Type
Gaming Router
Range Extender
Wireless Router
Note: Due to Tether app
updates, your actual
user interface and
pathway may dier from
those depicted here.
Question and Answer IconNeed help?

Do you have a question about the TP-Link Archer AX58 and is the answer not in the manual?

Summary

Connect the Hardware

Connect Modem to Router

Connect the modem's WAN port to the router using an Ethernet cable for initial setup.

Power On and Restart Modem

Turn on the modem and allow it to restart completely before proceeding with router setup.

Power On and Configure Router

Connect the power adapter to the router and turn it on to begin configuration.

Verify Hardware Connections

Check the status of Power, 2.4GHz, 5GHz, and Internet LEDs for correct hardware setup.

Set Up the Network

Setup via TP-Link Tether App

Use the TP-Link Tether mobile app for guided router setup and management.

Setup via Web Browser

Access the router's web interface via a browser for manual network configuration.

Router Button Functions

WPS;Wi-Fi Button Operation

Learn how to use the WPS/Wi-Fi button for quick pairing and wireless network control.

Reset Button Operation

Understand how to use the reset button to restore the router to its factory default settings.

EasyMesh Network Features

Seamless Roaming

Enjoy uninterrupted Wi-Fi coverage throughout your home with EasyMesh devices.

One-Click EasyMesh Setup

Easily create an EasyMesh network by pressing the WPS button on compatible devices.

Flexible Scalability

Allows scaling home networking with various vendors, topologies, and protocols.

Troubleshooting and Support

Cannot Access Web Management Page

Steps to resolve issues accessing the router's web interface.

Cannot Access Internet

Troubleshooting steps for internet connectivity problems.

Forgot Wireless Password

How to retrieve or reset a forgotten Wi-Fi password.

Forgot Web Management Password

Instructions to reset the router's web interface login password.

Router Placement for Wi-Fi Performance

Guidance on optimal router positioning for better Wi-Fi coverage.

Overview

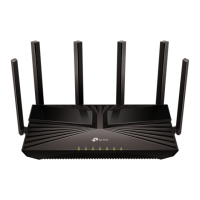
This document serves as a Quick Installation Guide for a TP-Link Dual-Band Wi-Fi 6 Router, providing instructions for hardware connection, network setup, and troubleshooting.

Function Description:

The TP-Link Dual-Band Wi-Fi 6 Router is designed to provide strong, stable, and seamless wireless connections throughout a home or office environment. It supports the Wi-Fi 6 standard, enabling faster speeds and improved efficiency for multiple devices. The router can be set up and managed via the TP-Link Tether app or a web browser. It is also EasyMesh-compatible, allowing for the creation of a unified mesh Wi-Fi network with other compatible devices (routers or extenders) to ensure seamless roaming and extended coverage. The router acts as a central hub for internet connectivity, distributing network access wirelessly and via Ethernet ports.

Important Technical Specifications:

  • Wi-Fi Standard: Dual-Band Wi-Fi 6.
  • Connectivity: Features a WAN port for connecting to a modem (DSL, Cable, Satellite, or Ethernet outlet) and multiple LAN ports for wired connections.
  • LED Indicators: Includes LEDs for Power, 2.4GHz Wi-Fi, 5GHz Wi-Fi, and Internet status. These indicators help verify correct hardware connection and operational status.
  • Buttons:
    • WPS/Wi-Fi Button: Used for initiating the WPS (Wi-Fi Protected Setup) process with client devices (1-second press) or for turning the wireless function of the router on/off (2-second press and hold).
    • Reset Button: Used to restore the router to its factory default settings (6-second press and hold until the Power LED blinks).
  • Management: Supports management via the TP-Link Tether app (available on App Store and Google Play) and a web browser (http://tplinkwifi.net or http://192.168.0.1).
  • Default Credentials: Default wireless network names (SSIDs) and password/PIN are printed on the label at the bottom of the router.
  • DNS Support: Allows for manual configuration of primary and secondary DNS addresses (e.g., 8.8.8.8 and 8.8.4.4).
  • MAC Clone: Feature for cable modem users to clone the current device's MAC address.
  • Cloud Service: Supports registration for TP-Link Cloud service for enhanced management.

Usage Features:

  • Hardware Connection:
    1. Unplug power from the modem and remove any backup battery.
    2. Connect the powered-off modem to the router's WAN port using an Ethernet cable. If the internet comes from an Ethernet outlet, connect the router's WAN port directly to it.
    3. Power on the modem and wait approximately 2 minutes for it to restart.
    4. Connect the power adapter to the router and power it on.
    5. Verify hardware connection by checking the LEDs: Power, 2.4GHz, 5GHz, and Internet LEDs should be solid on. If 2.4GHz and 5GHz LEDs are off, press and hold the WPS/Wi-Fi button for more than 2 seconds.
  • Network Setup (Method ONE: Via TP-Link Tether App):
    1. Download the TP-Link Tether app.
    2. Open the app and log in with a TP-Link ID (create one if necessary).
    3. Tap the "+" button, select "Wireless Router" > "Standard Routers," and follow in-app instructions to complete the setup.
  • Network Setup (Method TWO: Via a Web Browser):
    1. Connect a device (computer, smartphone) to the router wirelessly (using default SSIDs and password from the label) or via an Ethernet cable.
    2. Launch a web browser and enter http://tplinkwifi.net or http://192.168.0.1 in the address bar.
    3. Create a password to log in.
    4. Follow the step-by-step instructions to set up the internet connection and register for the TP-Link Cloud service.
  • EasyMesh Compatibility:
    • Enables seamless roaming, allowing mobile devices to automatically connect to the router or extender with the best signal.
    • Supports one-click settings: Press the WPS button on the main router and then on the satellite device within 2 minutes to set up the EasyMesh network.
    • Offers flexible scalability with different vendors (though TP-Link recommends all APs from TP-Link for best performance), topologies, protocols, and product categories.
  • Optimal Wi-Fi Performance:
    • Avoid placing the router in corners or closets.
    • Keep it away from obstacles and high-powered appliances.
    • Position the router in a central location at a suitable height.
    • Keep antennas vertical when the router is on a desktop, or upright when mounted on a wall.

Maintenance Features:

  • Troubleshooting (Web Management Page Access):
    • Reboot the router.
    • Ensure the computer's IP settings are set to obtain an IP address automatically.
    • Verify correct address entry (http://tplinkwifi.net, http://192.168.0.1, or http://192.168.1.1).
    • Try a different web browser.
    • Disable and re-enable the network adapter.
  • Troubleshooting (Internet Access):
    • Power off the modem for 5 minutes, then power it on.
    • Ensure only one Ethernet port on the modem is connected to the router.
    • Verify internet functionality by connecting a computer directly to the modem.
    • Check the internet IP address on the router's Network Map page. If valid, configure DNS settings (Advanced > Network > Internet > Advanced Settings > Use the Following DNS Addresses, Primary DNS 8.8.8.8, Secondary DNS 8.8.4.4).
    • For cable modem users, use MAC Clone (Advanced > Network > Internet > MAC Clone > Clone Current Device MAC).
    • Reboot both the modem and the router after changes.
  • Troubleshooting (Forgot Wireless Password):
    • The default password is on the router's label.
    • Connect a computer via Ethernet, log into http://tplinkwifi.net, and go to the Wireless page to retrieve or reset the password.
  • Troubleshooting (Forgot Web Management Page Password):
    • If using a TP-Link ID, click "Forgot Password?" on the login page.
    • Alternatively, press and hold the Reset button for about 6 seconds until the Power LED blinks, then visit http://tplinkwifi.net to create a new login password.
  • General Safety and Maintenance:
    • Keep the device away from water, fire, humidity, or hot environments.
    • Do not disassemble, repair, or modify the device. Contact support for service.
    • Use only recommended chargers and cables.
    • Do not use the device where wireless devices are not allowed.
    • The adapter should be easily accessible.
  • Support Resources:
    • Scan QR code or visit https://www.tp-link.com/support/setup-video/#wi-fi-routers for setup videos.
    • Visit https://www.tp-link.com/easymesh/ for EasyMesh information.
    • Visit https://www.tp-link.com/support for technical support, replacement services, user guides, and more.
    • EU Declaration of Conformity: https://www.tp-link.com/en/support/ce
    • UK Declaration of Conformity: https://www.tp-link.com/support/ukca

TP-Link Archer AX58 Specifications

General IconGeneral
BrandTP-Link
ModelArcher AX58
CategoryNetwork Router
LanguageEnglish

Related product manuals