40°
Back Side
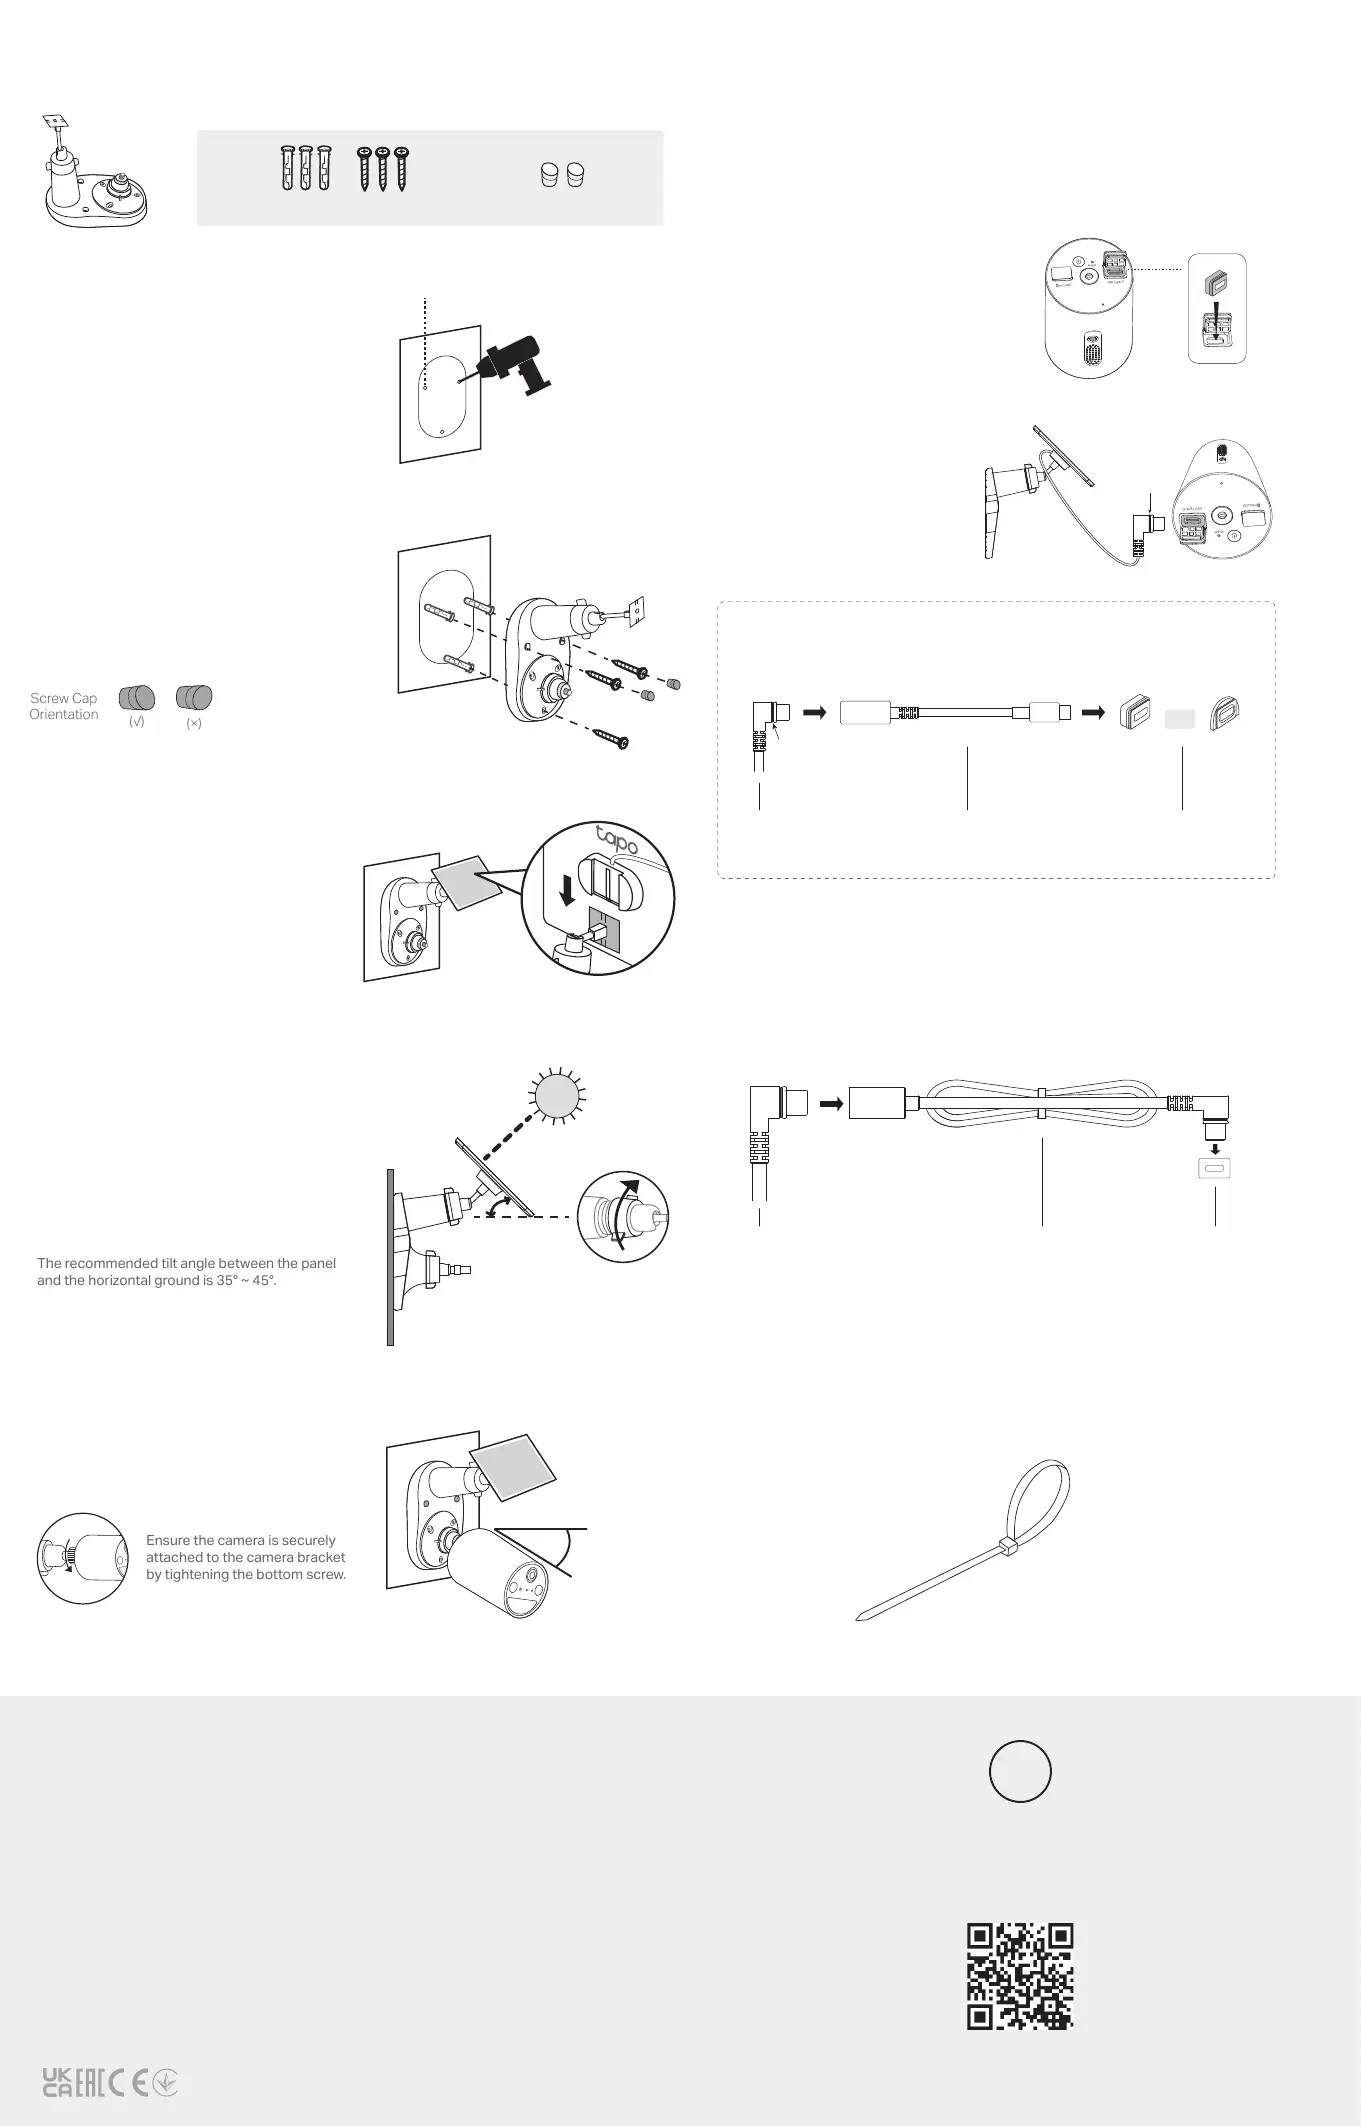
1. Drill Holes
Stick the mounting template to a solid and
level wall surface. Drill three screw holes
according to the template.
套装出货
1. 定位标贴三个洞打孔
2. 3个螺丝固定底座
3. 装面板、调角度
4. 装Cam、调角度
Scenario 3. Mount Solar Panel and Camera KIT
Use the appropriate waterproof gasket when connecting the solar panel to
your camera. The gasket protects your camera from exposed moisture and
dust that may damage the camera.
If the power cable is too short...
Extend the power cable using the provided extension cable. Insert the
connector with the black ring into the extension until snug and use the
appropriate gasket when connecting the solar panel to your camera.
Φ=6 mm (15/64 in.)
2. Mount Bracket
Insert three wall anchors into the
holes and use the mounting screws to
ax the solar panel bracket over the
anchors. Then, insert two screw caps
into the upper screw holes.
3. Install the Solar Panel
Slide the solar panel onto the mounting
bracket until it clicks into place.
4. Adjust Solar Panel Angle
Loosen the adjustable screw, tilt the solar
panel to adjust the angle, and then tighten
the adjustable screw.
The recommended tilt angle between the panel
and the horizontal ground is 35° ~ 45°.
5. Install Camera & Adjust Angle
Install the camera onto the bracket and adjust
the camera angle as per the camera's guide.
Camera-suggested
Angle
03 /
Connect to the Camera
Use the cable zip tie provided to bundle up the excess cable. Once
tightened, the zip tie cannot be easily adjusted. To release the tie, you
will need to cut the zip tie.
If the power cable is too long...
Extension CableSolar Panel Connector Waterproof Gasket
Ensure the camera is securely
attached to the camera bracket
by tightening the bottom screw.
A USB adapter is required for a camera with a Micro USB charging port.
Choose the appropriate Micro USB waterproof gasket for connection.
Visit www.tapo.com/support
for technical support, user guides,
and more information
?
Safety Information
• Keep the device away from re or hot environments. DO NOT immerse in water or any
other liquid.
• Do not attempt to disassemble, repair, or modify the device. If you need service,
please contact us.
TP-Link hereby declares that the device is in compliance with the essential requirements
and other relevant provisions of directives 2014/30/EU, 2014/35/EU, 2011/65/EU and
(EU)2015/863.
The original EU declaration of conformity may be found at
https://www.tapo.com/en/support/ce/
TP-Link hereby declares that the device is in compliance with the essential requirements
and other relevant provisions of the Electromagnetic Compatibility Regulations 2016 and
Electrical Equipment (Safety) Regulations 2016.
The original UK declaration of conformity may be found at
https://www.tapo.com/support/ukca/
Solar Panel Connector
OR
Micro USB GasketUSB Adapter
Wall Anchors ×3 + Self-tapping Screws ×3 Screw Caps ×2
1. Install Waterproof Gasket
Insert the waterproof gasket into
the camera’s charging port. Ensure
that the gasket is tightly sealed.
2. Power On Camera
Connect the solar panel by
inserting the connector
with the black ring into the
charging port until snug.
Black Ring
Black Ring
Screw Cap
Orientation
 Loading...