800-448-8979
TRAC-RITE
8
9. OPERATORS:
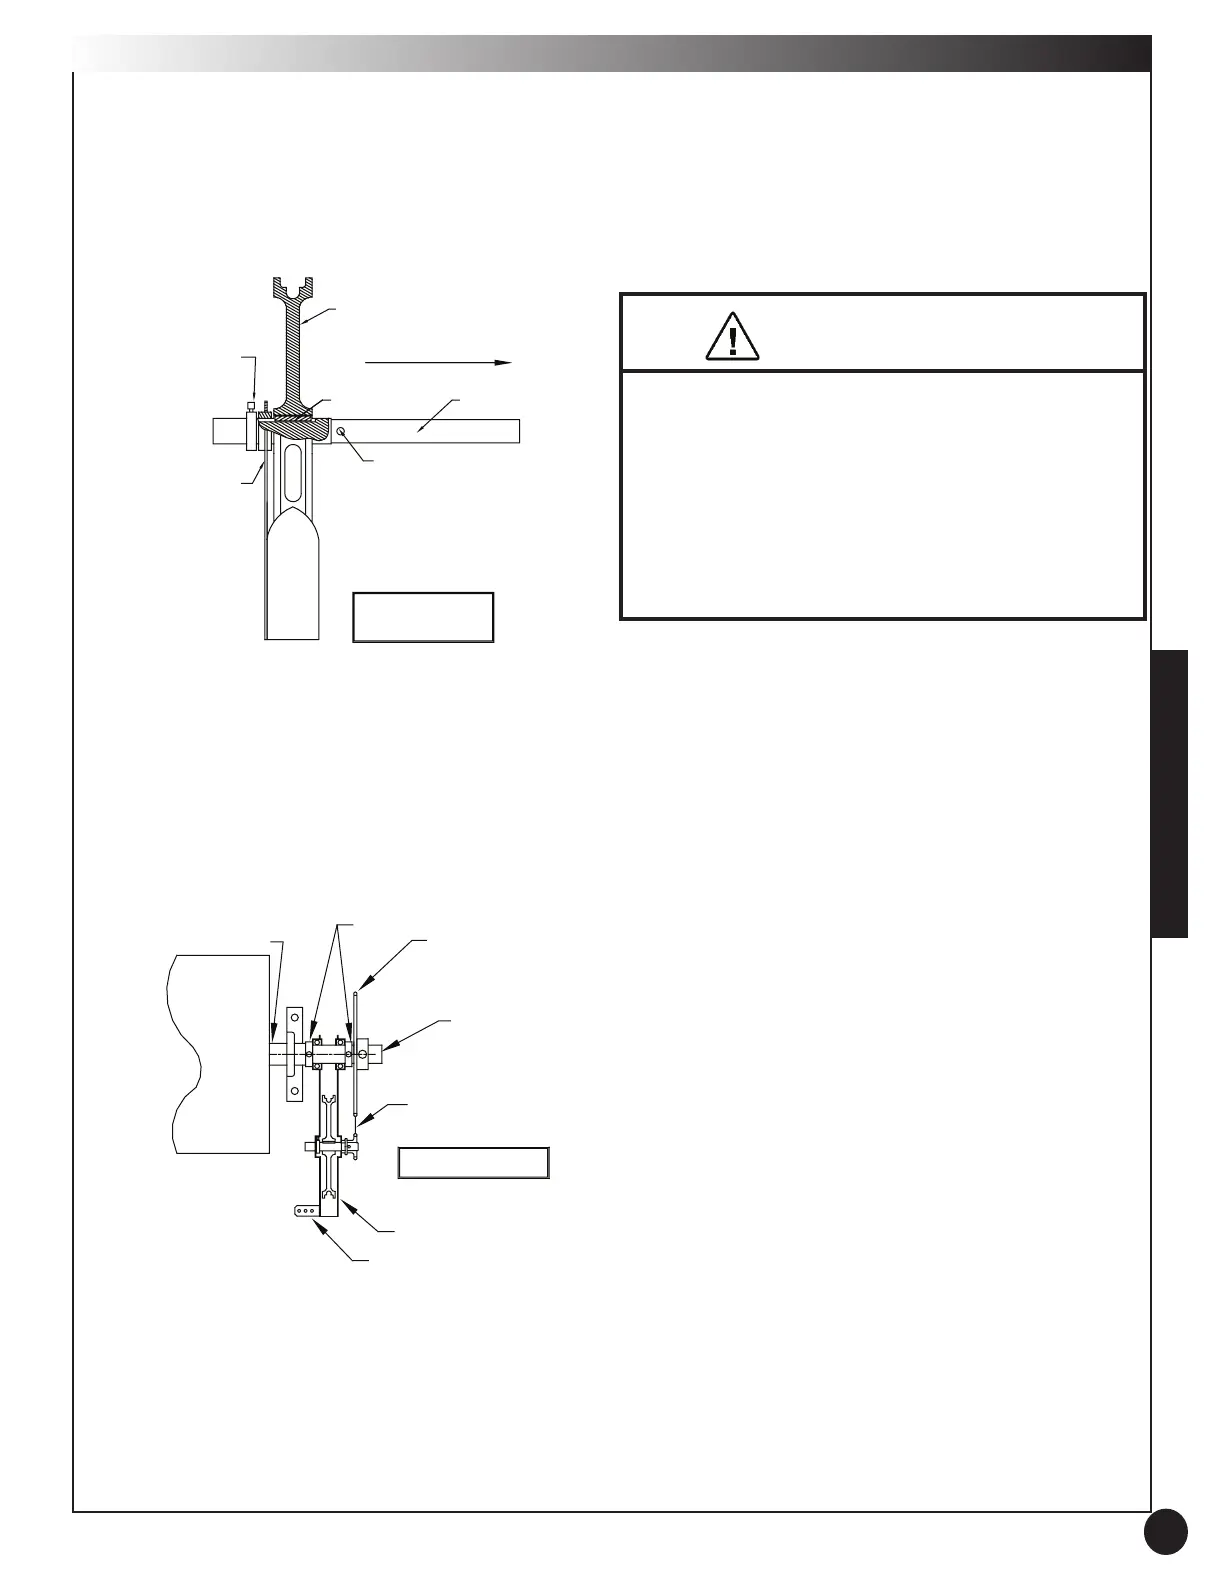
9.1 Direct-drive operator -- Direct drive chain hoists
can be installed on either side of the door, prior to or
after the door is hung (although there may be clearance
limitations). Please reference Figure 12 for specifics.
9.2 Reduced-drive operator — 4:1 chain hoist
installation as shown in Figure 13.
9.2.1 Align hole in shaft extension with axle hole and
fasten with 1/4" shoulder screw and nylon insert stop
nut.
9.2.2 Assemble onto shaft extension as shown, making
certain 41B36 sprocket is aligned with the sprocket
on the hoist body and the 1/4" x 1/4" key is in place.
Tighten all set screws.
SLIDE INTO DOOR AXLE
HOIST RETAINING
COLLAR WITH
SQUARE HEAD SET
SCREW (SCREW
INTO KEYWAY)
ALIGN WITH AXLE
HOLE AND FASTEN
WITH 1/4"
SHOULDER SCREW
AND NYLON INSERT
STOP NUT
POCKET WHEEL
1/4" SQUARE KEY SHAFT EXTENSION
CHAIN RETAINER
HAND CHAIN NOT
SHOWN FOR
DRAWING CLARITY
FOR DRAWING CLARITY
HAND CHAIN NOT SHOWN
41B36 SPROCKET
ROLLER CHAIN
MAIN HOIST BODY
WALL "L" BRACKET
SHAFT COLLAR
SHAFT EXTENSION
AXLE
9.2.3 Attach wall “L” bracket to main hoist body using
either supplied self tapping screw or bolt and nut
supplied using an existing hole in the case. This will
hold the hoist level and keep it from swinging during
operation. Secure “L” bracket to wall.
Components under extreme spring tension
can cause SERIOUS INJURY or DEATH.
Adjustments and repairs must be made by a
qualied door mechanic using proper tools and
instructions. Do NOT attempt to adjust door
tension unless the door is in the “UP” position
and “LOCKED” in place. Winding bar should be
solid steel 1/2” dia. rod or
3/8” X 1/2” at
WARNING
9.2.4 Feed hand chain through and around pocket
wheel. Shorten chain so it does not lay on the floor,
(1' to 3' off floor is ideal). Close chain, making certain
there are no twists in the chain.
9.2.5 Install roller chain around sprockets with
connecting link provided.
9.2.6 Attach chain keeper clip to wall (4' to 5' above
floor).
Figure 12
Figure 13
944_Manual_522000revH_818 color.indd 9 9/10/2018 1:36:47 PM
 Loading...