Installation Instructions – Lexus IS, July 2013 > Issue: 1.0
TRACKER Network (UK) Ltd Date: 01/07/2013
route
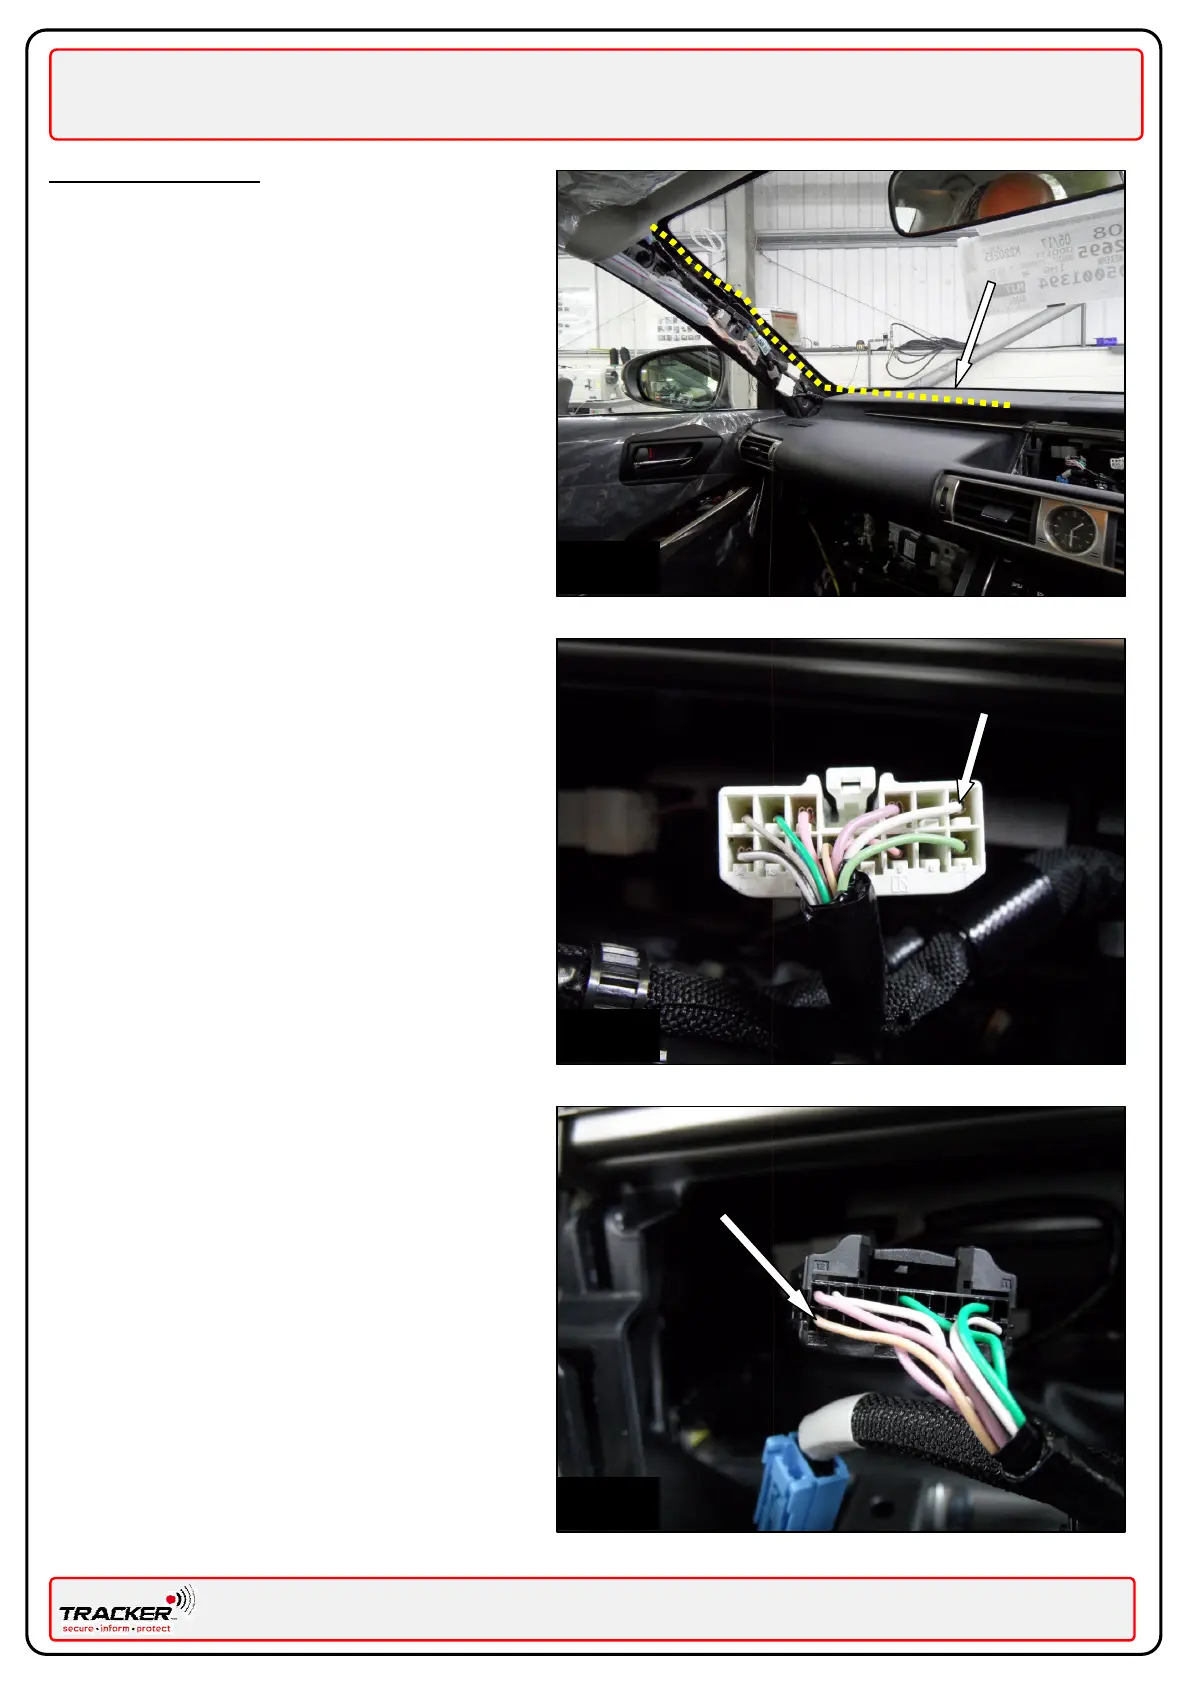
Routing the VHF antenna
Fig. 4 – Route the VHF antenna (BLACK/WHITE
wire) as shown by yellow line, along the air vent
below the dash as indicated. Route the remainder
of the antenna wire along the Near Side “A” pillar
as indicated. Cover the wire with looming tape, to
match the vehicle’s existing wiring harness, in
order to disguise the antenna.
Ensure the VHF antenna is not secured directly to
the metal work by using a felt strip to separate
the antenna from the metalwork.
Power Connections
Fig. 5 - Connect the RED wire (+12v) of the VLU,
via the supplied RED 5A fuse assembly, to the
White wire Pin 1 of the Double Lock Door Control
K42 connector plug. (Module attached to back of
Multi Display Screen)
Connect the BLACK wire (Earth) of the VLU, to a
local O.E. earth point using the ring terminal
supplied. Do not route the VLU Earth wire
(Black) with the VHF antenna wire (Black/White)
Fig. 6 - Connect the ORANGE wire (Ign) of the
VLU, via the supplied BLUE 1A fuse assembly, to
the Beige wire PIN 24 of the Multi Display K61
connector plug.
System testing
Complete the installation by following the
information given for ‘Post Installation’ in the
‘General Information’ on page 3 of this manual.
Pin 24 Beige wire
 Loading...